AWS SSO
To enable SSO to GSuite using SAML, you will need to configure both AWS and OpenIAM. The following section describes how to configure both.
AWS is SP and OpenIAM is IDP
Configure OpenIAM Authentication provider
The OpenIAM IdP must be configured to support the service provider. The step below describe this process.
- Login to the OpenIAM Webconsole
- Navigate to Access Control -> Authentication Provider -> Create new Provider -> Add service to OpenIAM (IDP)
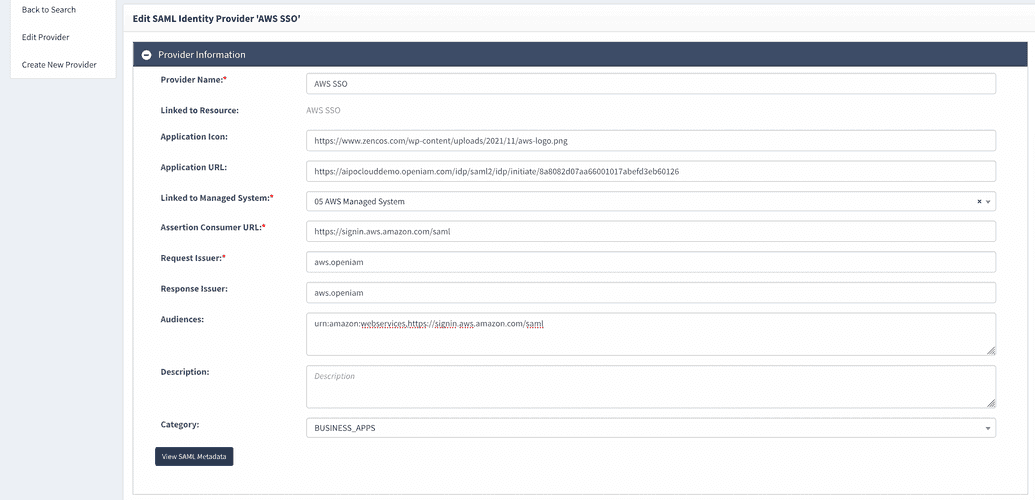
- Complete the form as described in the table below
| Field Name | Description |
|---|---|
| Provider Name | Descriptive name that will help you identify this integration, note: this name will be shown to end users on the application panel in selfservice portal. ie: AWS SSO |
| Application Icon | Absolute path to png file on internet to use it as an icon in selfservice portal |
| Application URL | Fill this value after you save authentication provider and ID will be assigned to it. URL with ID: https://{OpenIAMAddress}/idp/saml2/idp/initiate/{authentication provider ID} |
| Linked to Managed System | OpenIAM allows you to have a different identity for each application. This configuration indicates which identity should be used for this integration with AWS. If you are using OpenIAM to also manage the user life cycle in AWS, then you should select the 'AWS Managed System'. |
| Assertion Consumer URL | https://signin.aws.amazon.com/saml |
| Request Issuer | Unique identifier. ie: aws.openiam |
| Response Issuer | Same as request issuer. ie: aws.openiam |
| Audiences | urn:amazon:webservices,https://signin.aws.amazon.com/saml |
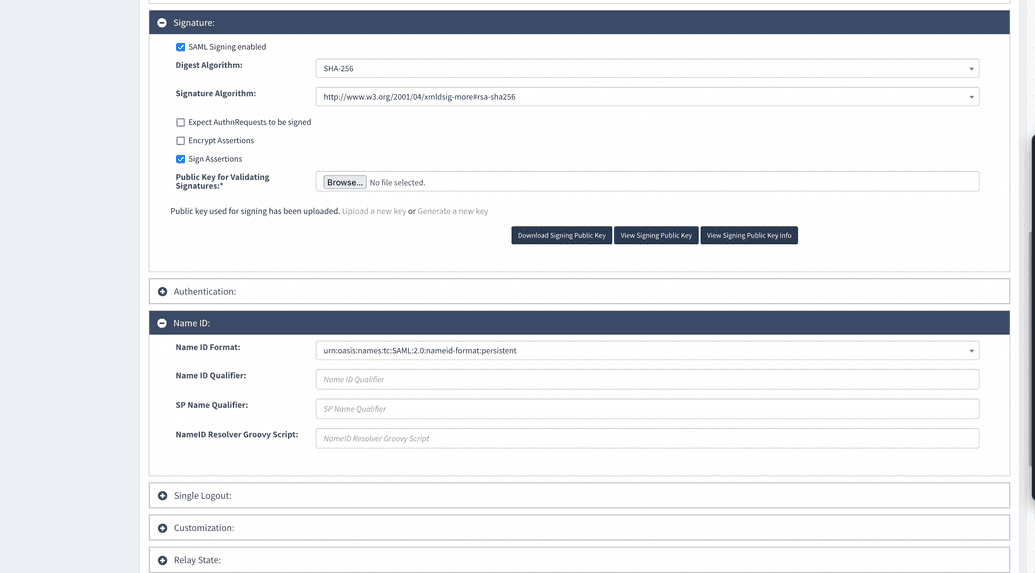
| SAML Signing enabled | Enable this checkbox as its signs your requests. |
| Digest Algorithm | The SAML digest algorithm is part of the validation process to ensure the integrity of the request. Select SHA-256 from the dropdown |
| Signature Algorithm | Select http://www.w3.org/2001/04/xmldsig-more#rsa-sha256 from the dropdown. |
| Sign Assertions | Enable this checkbox |
| Name ID Format | Select urn:oasis:names:tc:SAML:2.0:nameid-format:persistent |
| Attribute #1 | After saving authentication provider add attribute with name "https://aws.amazon.com/SAML/Attributes/RoleSessionName", type: String, Property Type: Property from User, Value: Principal |
| Attribute #2 | After saving authentication provider add attribute with name "https://aws.amazon.com/SAML/Attributes/Role", type: String, Property Type: Static Value, Value: string that you have built based on AWS ARNs. For example, arn:aws:iam::00000000:saml-provider/OpenIAM,arn:aws:iam::00000000:role/OpenIAM |
Configure AWS entities
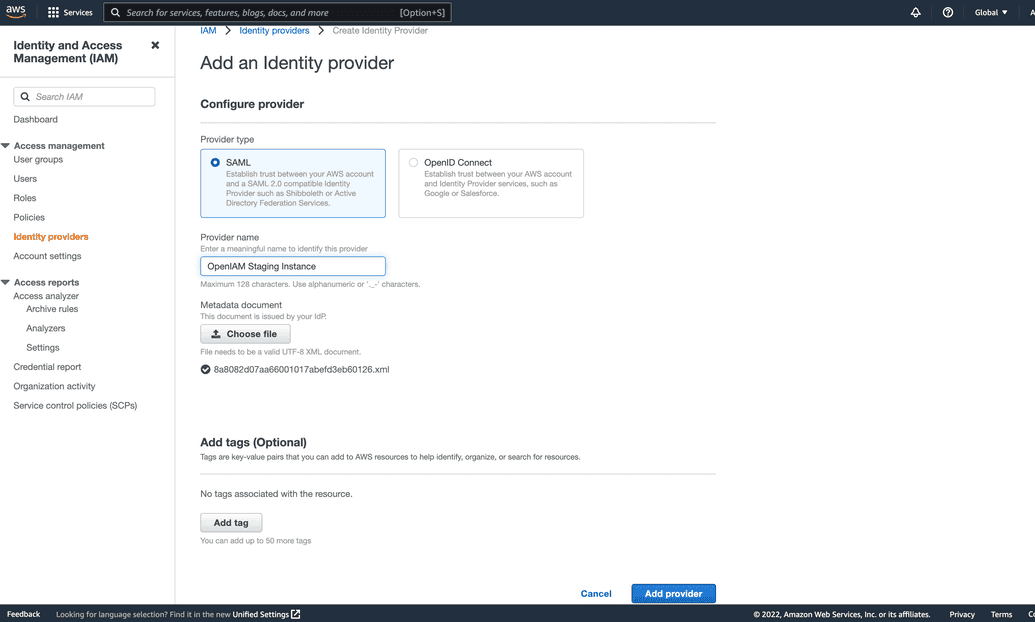
To configure the AWS side, login to the AWS console at https://console.aws.amazon.com/iam/. In the navigation panel,
click 'Identity Providers' and then click 'Add provider'. Provider type should be SAML, put provider name that can help
you identify it is OpenIAM SAML provider, then perform import metadata from XML file that you downloaded from OpenIAM
authentication provider page.Complete creation by clicking 'Add provider'.
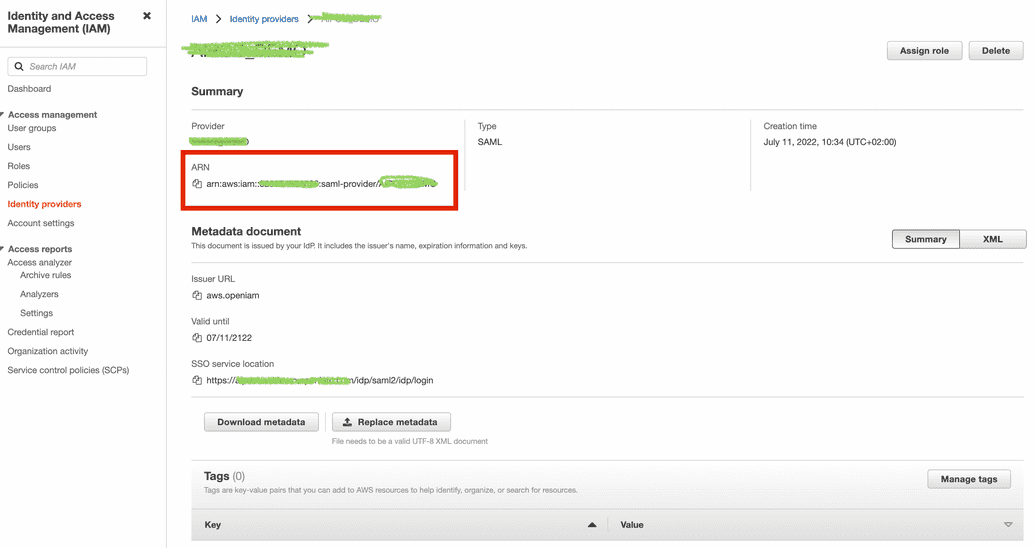
After provider will be created, please copy its ARN from Summary section and save it somewhere.
In the navigation panel, click 'Roles' and then click 'Create role'. Select type as 'SAML 2.0 federation' then below in
dropdown line select identity provider and click next. Then add permission 'IAMFullAccess' by setting checking box in
list. Then put role name and its description, and click 'Create role'.
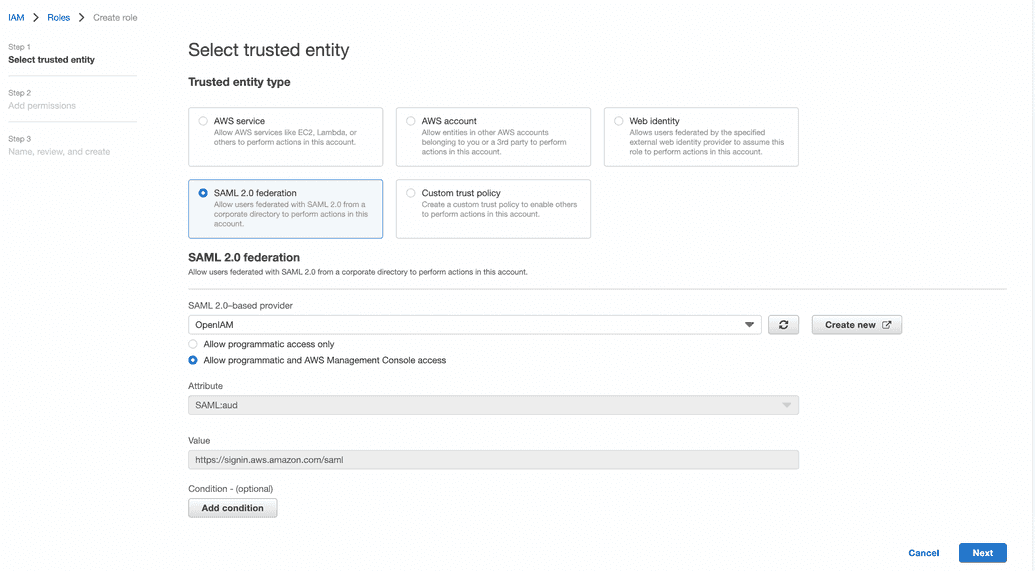
Find created role in list and copy its ARM and save it somewhere.
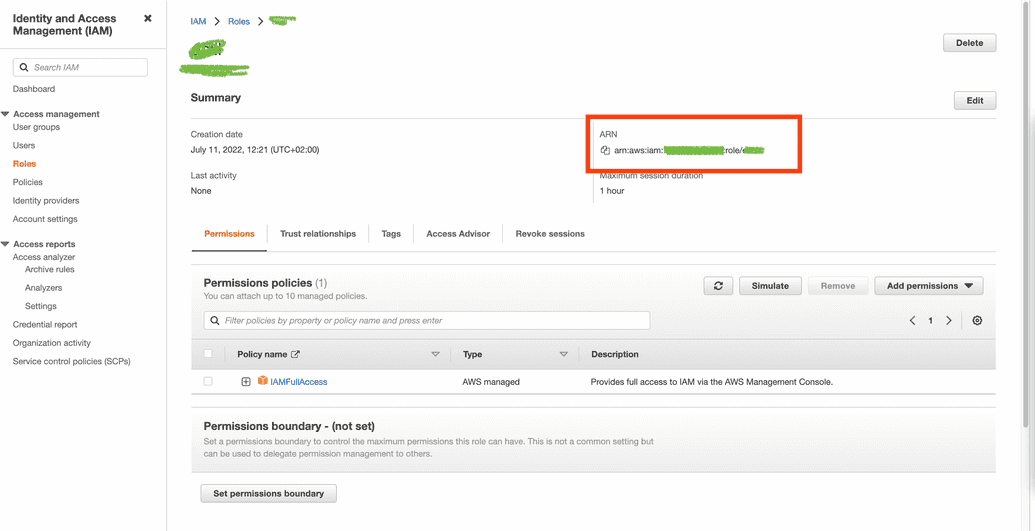
Form a string of identity provider ARN and role ARN, these values should be coma separated. You should have string similar to arn:aws:iam::00000000: saml-provider/OpenIAM,arn:aws:iam::00000000:role/OpenIAM
Configure user access to SSO in OpenIAM
With the configurations are completed, return the SAML configuration page and follow the steps to "Grant access to your application". Go in Seflservice->My Applications find AWS icon and click on it, you should be redirected to an AWS home page.
AWS is IDP and OpenIAM is SP
Configure AWS IDP
Follow link https://docs.aws.amazon.com/singlesignon/latest/userguide/getting-started.html to set up AWS IDP from scratch at your AWS instance
example of configuration at AWS

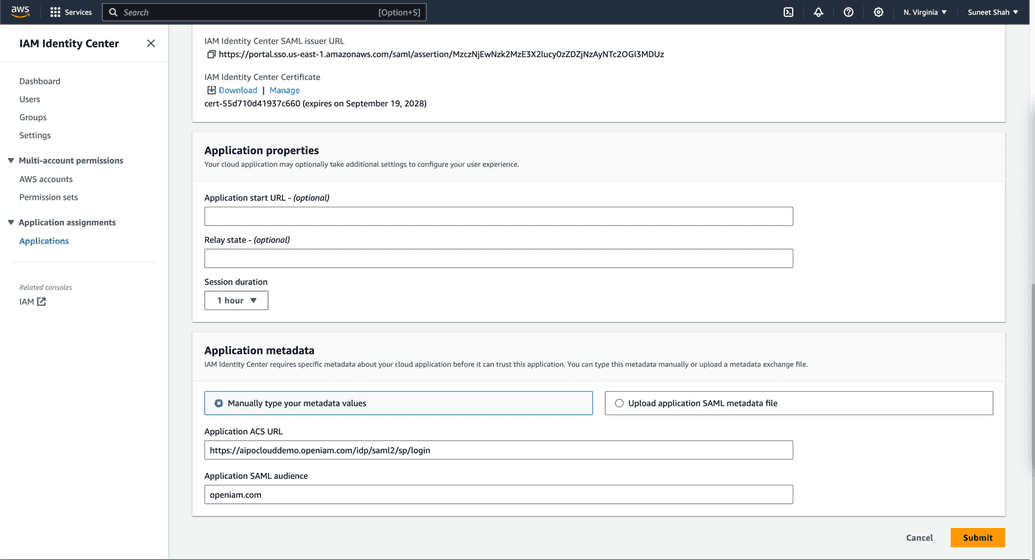 Pay attention to attribute mapping:
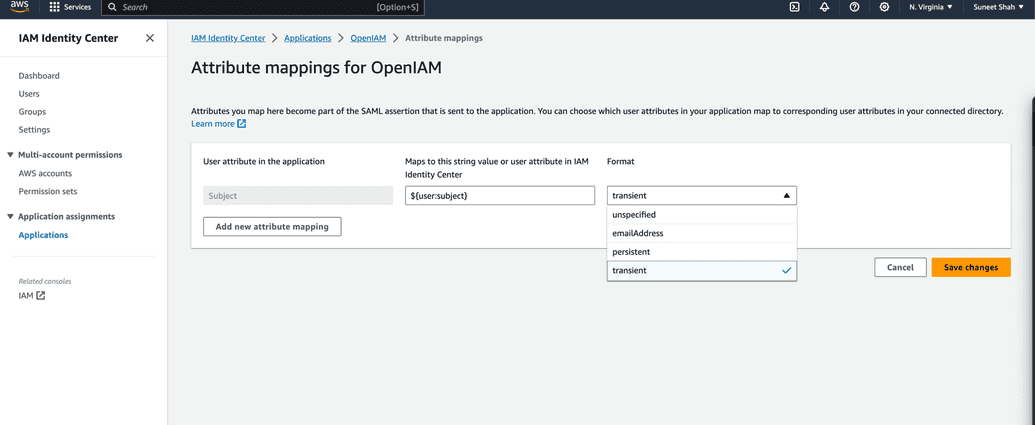 Download metadata, it will be used for OpenIAM service provider set up.
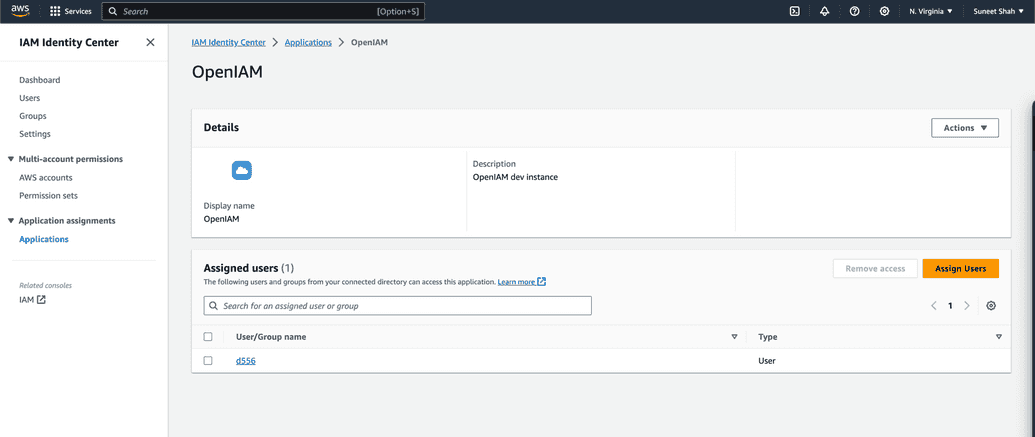
Add users to AWS application
Configure OpenIAM SP
Follow: Webconsole->Access control->Authentication providers->Add OpenIAM as Service Provider to your IDP
Import from IDP metadata grabbed from AWS, choose managed system (make sure that it is active, otherwise OpenIAM will use default managed system), select password and authentication policies. In SAML issuer must be equals to audience in AWS configuration. Make sure signed turned off. Name ID format select accordingly to your attribute mapping settings in AWS. Save the configuration.
Configure user access to SSO in OpenIAM
With the configurations are completed, return the SAML configuration page and follow the steps to "Grant access to your application".
