Customize Branding
The look and feel of OpenIAM can be changed. For this, one can use CSS.
Cascading Style Sheets (CSS) are an industry-standard way of styling a web page. While the content of a page is rendered with HTML, its look and feel is determined by CSS files. Creating CSS styles that work seamlessly across different browsers is a delicate task for basic web sites, and reasonably challenging when customizing web applications like OpenIAM. It is important to test each change that you make and ensure it works as expected in all areas of OpenIAM.
If you are not familiar with CSS, see this link: http://www.w3schools.com/css/css_intro.asp. You should spend some time to become confident with Cascading Style Sheets before you start editing your Confluence style sheets.
What can be customized using CSS?
Every page's style can be overridden using CSS.
Note: Any page that is defined by page template (Role, Groups, User Self-registering forms, etc.) can be customized to have custom HTML.
What cannot be changed using CSS?
The HTML structure of the page
Any <img> tags are not configurable via the UI.
You can override CSS for a particular Content Provider and/or a Pattern. To do this, follow the instructions below.
Customizing branding in Docker environment
Step 1. Configure the UI Theme
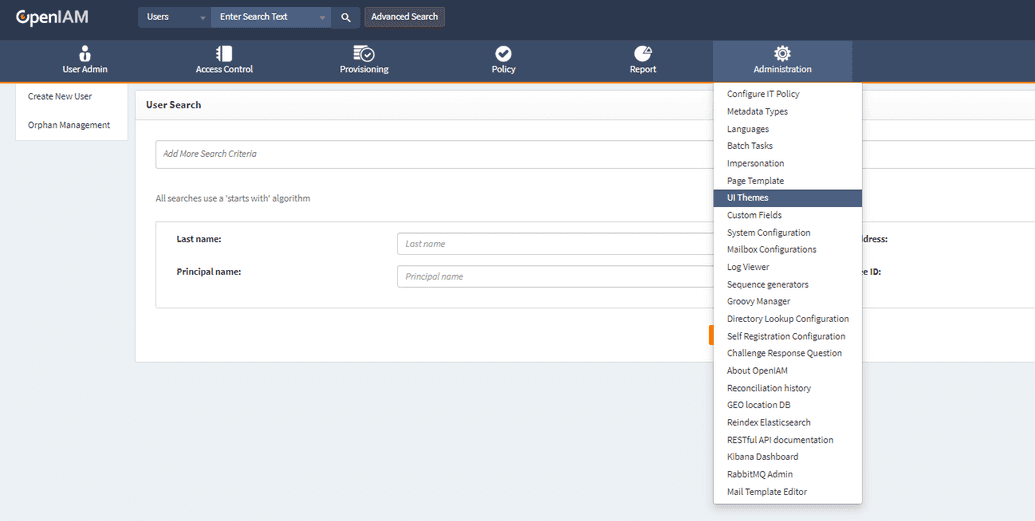
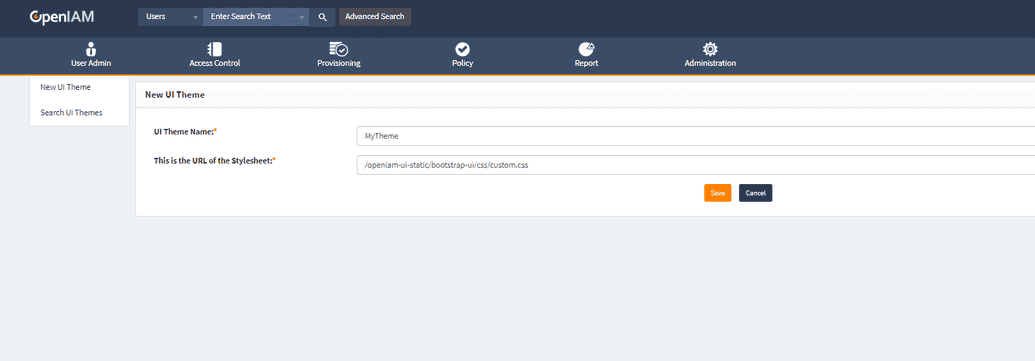
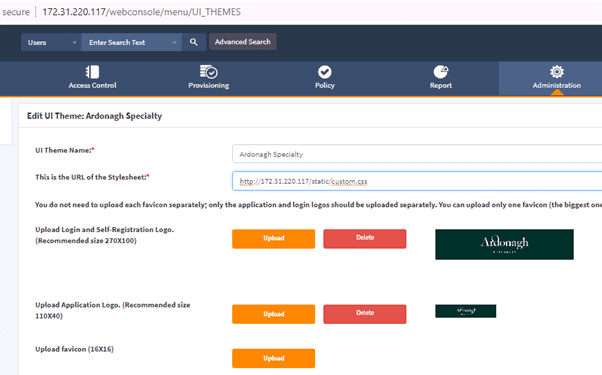
The first step (before creating the CSS file), is to set up the UI Theme. Go to Administration > UI Themes. Then, to edit the existing theme click the Edit icon in front of it; to create a new theme, select New UI Theme.
Enter the correct name and URL. Click Save.
Step 2. Assign the Theme to the Content Provider
After creating a theme, you can then assign it to a Content Provider.
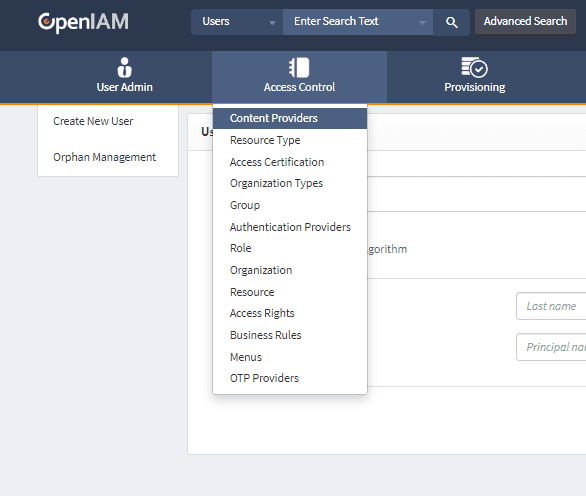
Go to Access Control > Content Providers.
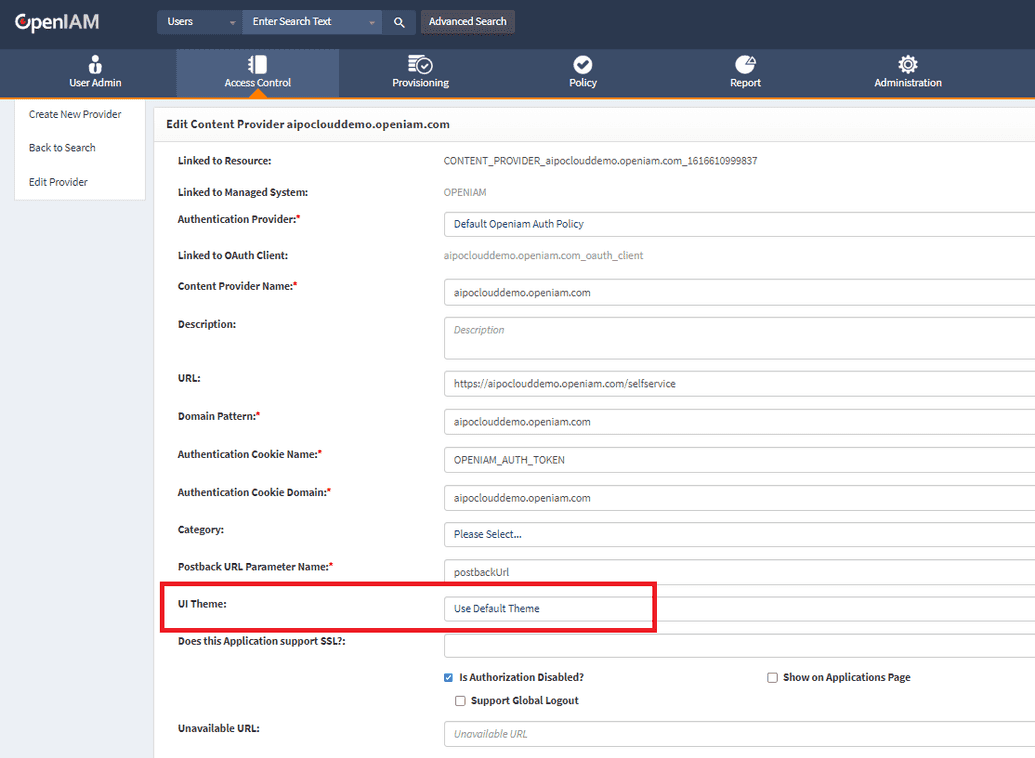
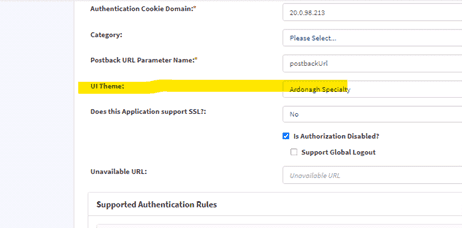
There is a default theme used for all the Content Provider's URI patterns, if the pattern doesn't specify its own UI Theme. To change the theme, find your content provider, click the edit icon and choose your theme in the UI Theme drop-down.
Step 3. Selecting an UI theme for the URI pattern
This step is optional. You can specify a UI Theme for a URI Pattern. The selected pattern will override the one in the parent Content Provider.
By default, all Patterns inherit UI Themes from the Content Provider settings.
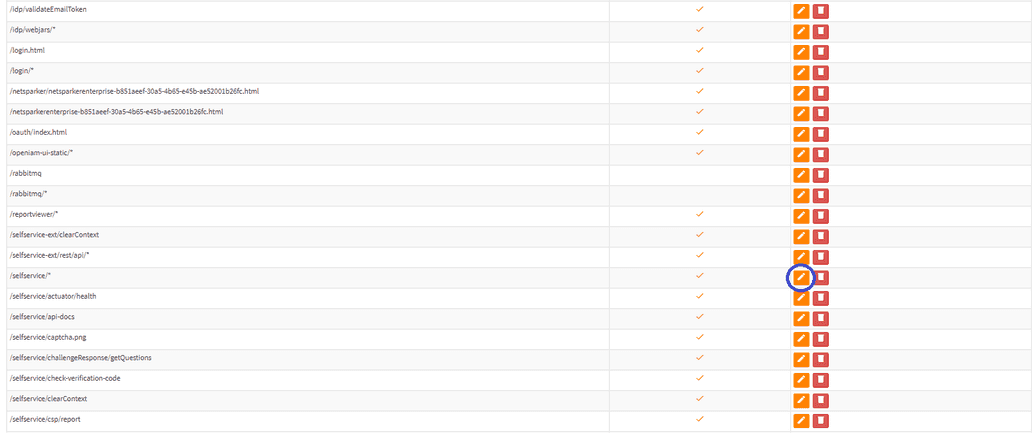
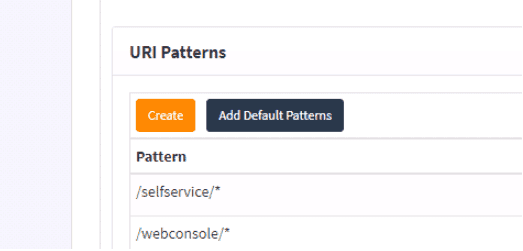
Access the Edit Content Provider window and scroll to the URL Patterns form located at the bottom of the window. Click the Edit icon in front of the Pattern to update. On the following example we will edit the /selfservice/* pattern.
Choose the theme required in UI Theme field:
Step 4. Updating CSS
Once the previous steps are finished, update the CSS files. The last CSS file to load on each page will be the Stylesheet URL of the UI Theme. This way, you can override any and all of our default CSS.
Customizing branding in Kubernetes environment
Infrastructure preparation
If your OpenIAM version is lower than v.4.2.1.11, you need to install the add-on to persist the static folder, as shown below. Starting with OpenIAM version 4.2.1.11 the add-on is in place.
cd kubernetes-docker-configurationcurl "https://download.openiam.com/release/enterprise/infra/custom-static-addon.tar.gz" --output "./custom-static-addon.tar.gz"tar -xvf custom-static-addon.tar.gzcd custom-static-addon./setup-addon.shcd .../setup.shterraform apply
Using your own static content
To use your own static content and use it in the theme, perform the following steps.
- Create a folder on the deployment server and add all permissions to it.
- Add a .css to the created folder.
- Upload the custom.css to the UI pod.
To obtain the UI pod id run the following command.
kubectl get pods
Grab the UI pod name from the list and upload custom.css to the UI pod.
kubectl cp /path/to/static_data/custom.css <pod-id>
Notes:
- The UI pod must be up to upload. If there are multiple UI pods in your environment, you must upload to any of them, because all of them are using the same persistent volume attached.
/usr/local/tomcat/webapps/static/in the pod is already mounted to some volume on the box. So, after a pod is recreated it will mount the same volume with data.
Getting started with CSS
Tip: One of the ways to work with CSS is using Firebug.
Most of the styles are described in the following file.
/openiam-ui-static/css/common/style.css
Users can also create custom CSS and apply it to an OpenIAM instance.
Updating a logo
To override the logo on the login page, override the .llogo class:
.llogo {background-image: url(/openiam-ui-static/images/common/llogo.png);width: 273px;height: 114px;}
Note: In OpenIAM v4.x you can also upload different logos right from UI theme edit.
The HTML code looks like this on the login page:
<div id="llogo"><a class="logo llogo" href="javascript:void(0);">Openiam</a></div>
To define a new logo on all other pages, override the .slogo class:
.slogo {background-image: url(/openiam-ui-static/images/common/logo.png);width: 110px;height: 41px;}
Here is the equivalent HTML:
<div id="logo"><a class="logo slogo" href="">Openiam</a></div>
Changing a background
Background for the Login/Logout pages - The style rule below will be applied to the HTML element with id="pagebg":
#pagebg{background:#333;width:100%;padding-top:60px;}
Background for Top, Middle, and Bottom sections of the page when you're logged in - are controlled by the style rule below. It is applied to the HTML elements with id="top," "middle," "bottom":
#top{background:url(../../images/common/topbg.jpg) repeat-x;width:100%;min-height:243px;margin-bottom: 10px;}
#middle{background:url(../../images/common/middlebg.jpg) repeat;width:100%;min-height:400px;float:left;position: relative;}
#bottom{background:url(../../images/common/footbg.jpg) repeat-x;width:100%;min-height:172px;float:left;}
Background inside the Content frame - The .openiam-client-frame class is added to the <body> of the document in the iframe.
It's a placeholder in case you want to style the iframe specifically.
<body class="openiam-client-frame">
Changing footer and copyrights
There is no need to configure a CSS file to change Footer and Copyright.
You can do it via the system configuration page.
Go to webconsole > Administration > System Configuration > UI tab and scroll to Footer.
Here, you can change the attributes to the extent you need.
Uploading static content
To use your own static content and use it in the theme, perform the following steps.
- In Docker environment, create a folder on server and add all permissions to it:
root@AZ07-SECIAM-01P:/usr/local/openiam-docker-compose# cd ..root@AZ07-SECIAM-01P:/usr/local/openiam# -R 777 static_data/
Then, add a .css to this folder.
root@AZ07-SECIAM-01P:/usr/local/openiam/static_data@ 1s custom.cssroot@AZ07-SECIAM-01P:/usr/local/openiam/static_data#
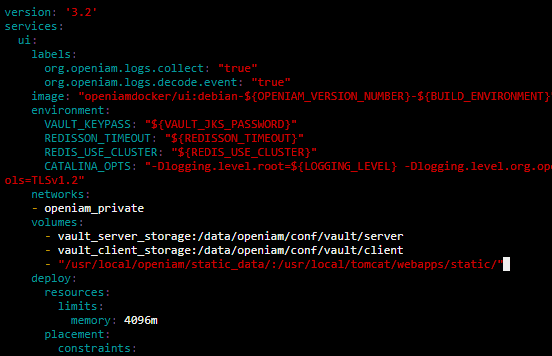
- Navigate to docket-compose.yaml
Add the below line
After the .yaml file is changed, you will have to redeploy.
In RPM environment, create folder in
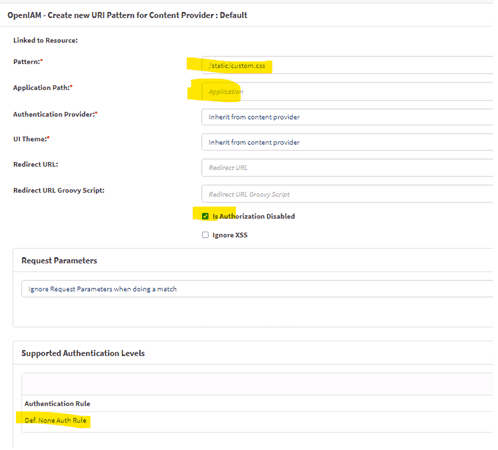
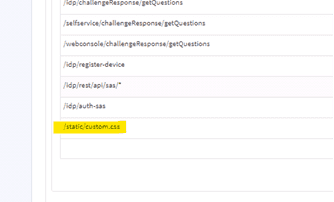
ui/webapps/static/with ownership of OpenIAM.Go to Access Control > Content Providers in webconsole. Select the content provider in use and add the URI pattern, as shown below.
Be sure to leave Application path field blank.
Save the pattern and check - your pattern should be added to the list as follows.
- Go to Administration > UI Themes.
Under Content provider > select UI Theme.
Afterwards, press Ctrl + F5 to reload the cache.
