Workday
General information
Workday connector provides an ability to get user data from Workday HR system. The operation that could be performed using OpenIAM is search and setting user's email in Workday.
Installing the connector
Based on the nature of your deployment, follow the procedures below to deploy the connector.
Docker swarm
To start this connector in a Docker Swarm deployment, follow the steps described below:
- Uncomment the following line in
setup.shfile
setup.sh - #docker pull "openiamdocker/workday-rest-connector-rabbitmq:debian-${OPENIAM_VERSION_NUMBER}-${BUILD_ENVIRONMENT}"
- Uncomment the following line in
startup.shfile
#docker stack deploy --compose-file connectors/workday-rest/docker-compose.yaml --with-registry-auth workday-rest-connector
For the changes to take effect one will need to stop OpenIAM containers and then run:
./setup.sh./startup.sh
Connector Configuration
First, login to OpenIAM webconsole.
Step 1. Create new Page Template.
Go to the Administration -> Page Template -> Create New Template
| Field | Value |
|---|---|
| Template Name: | Workday Connector |
| Template Type: | Managed System Template |
| Metadata Grouping: | Connector Type |
| Metadata Type Name: | Workday Connector |
Click Save button.
Step 2.
Once the Page template is saved, go to Template fields section and add below fields.
| Field Name | Is Required | Is Editable | Actions |
|---|---|---|---|
| Fetch Type | check | check | mode_edit_delete |
| REST_PASSWORD | check | mode_edit_delete | |
| REST_LOGIN | check | mode_edit_delete | |
| REST_TENANT | check | mode_edit_delete | |
| SOAP_PASSWORD | check | mode_edit_delete | |
| SOAP_LOGIN | check | mode_edit_delete | |
| SOAP_TENANT | check |
Save the template upon all field are added.
Step 3.
Go to Provisioning -> Managed System. Find "Workday connector" and click Action. Fill all the details as follows:
| Field | Value |
|---|---|
| Connector: | Workday Connector |
| Managed System Name: | Workday Manage System |
| Description: | Workday Manage System |
| Active | checked |
| Show on user change password Screen | checked |
| Host URL: | your-tenant-url |
| Port: | 9999 |
| Password Policy: | Default password policy |
| Login Id: | Login |
| Password: | Enter client password |
| Fetch Type: | REST |
| REST Password: | Enter client password |
| REST Login: | Login |
| REST Tenant: | https://wd2-impl-services1.workday.com/ |
| SOAP Password: | Enter client password |
| SOAP Login: | login |
| SOAP Tenant: | tenant-name |
Step 4. Add new attributes.
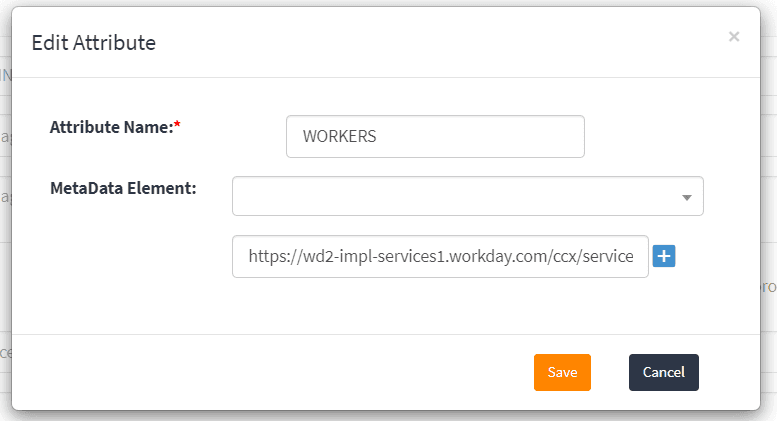
Scroll down to Attributes section -> Click Create New Attribute and add a new attribute.
Set Attribute Name as "Workers".
And attribute value at in the following format (it will be different in your environment) https://wd2-impl-services1.workday.com/ccx/service/customreport2/[your tenant name]/[account qualifier]/OPEN_IAM_OUTBOUND_RAAS?format=json
Click Save.
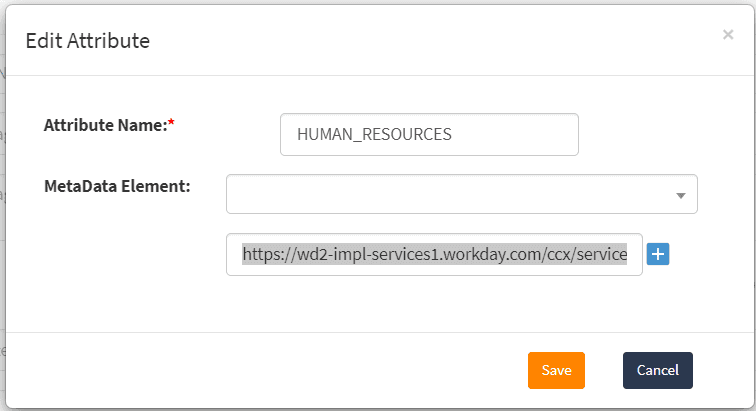
Add another Attribute -> Click Attribute button and add a new attribute.
Set Attribute Name as Human_Resources.
And attribute value at https://wd2-impl-services1.workday.com/ccx/service/[your tenant name]/Human_Resources/v38.0?wsdl
Save it.
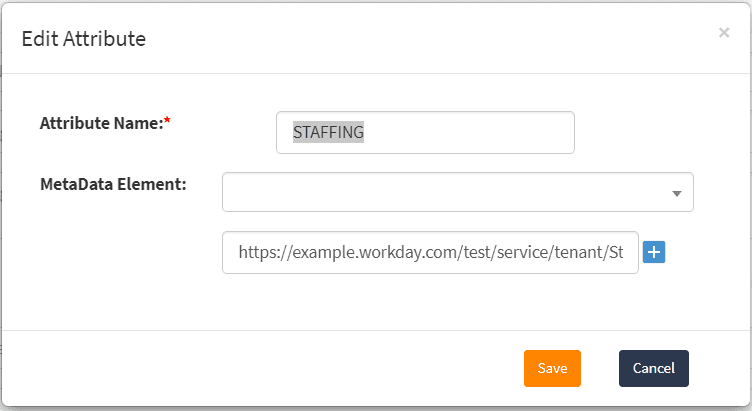
Add another Attribute -> Click Attribute button and add a new attribute.
Set Attribute Name as STAFFING.
And attribute value at https://example.workday.com/test/service/tenant/Staffing?wsdl
Click Save.
Now go to Provisioning -> Managed System and find "Workday connector". Connector should be up, as shown below.
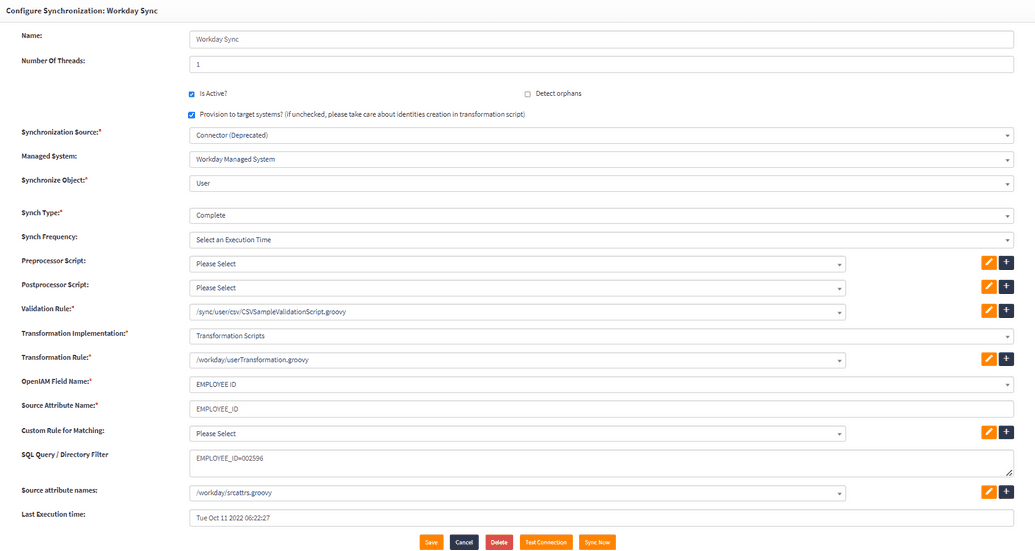
Step 5. Configuring synchronization.
Go to Provisioning -> Synchronisation -> Create New Synchronization.
| Field | Value |
|---|---|
| Name: | Workday Sync |
| Number Of Threads: | 1 |
| Is Active? | checked |
| Provision to target systems? | checked (if unchecked, please take care about identities creation in transformation script) |
| Synchronization Source: | Connector |
| Managed System: | Workday Manage System |
| Synchronize Object: | User |
| Synch Type: | Complete |
| Synch Frequency: | Select on Execution Time |
| Validation Rule: | /sync/user/csv/CSVSampleValidationScript.groovy |
| Transformation Implementation: | Transformation Scripts |
| Transformation Rule: | /workday/userTransformation.groovy |
| OpenIAM Field Name: | EMPLOYEE ID |
| Source Attribute Name: | EMPLOYEE_ID |
| SQL Query / Directory Filter: | EMPLOYEE_ID=006971 |
| Source attribute names: | /workday/srcattrs.groovy |
The field values are indicated in the image below.
Click Save and then and then click Sync Now and check - New user with with Employee ID (employee id / Employee Id / ?) = {from_your_example} should should be created in OpenIAM.
Note: To start a connector in the RPM environment download a jar file of connecotr from customer's portal and make sure to download a correct version. Afterards, use the following command.
systemctl start openiam-connector@workday-connector-rabbitmq


