Custom fields
When creating templates to capture information about users, roles, groups (all these pages are template based, it means you can add your own fields to display custom attributes). You may find that you need a way to gather details additional to those collected by OpenIAM's out-of-the-box fields. The webconsole allows you to create custom fields to facilitate these requirements.
Adding a static field
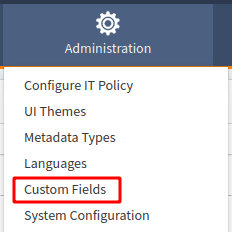
- From the top menu in webconsole go to Administration > Custom Fields.
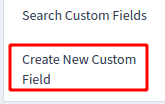
- Next, choose Create New Custom Field on the left-hand side of the screen.
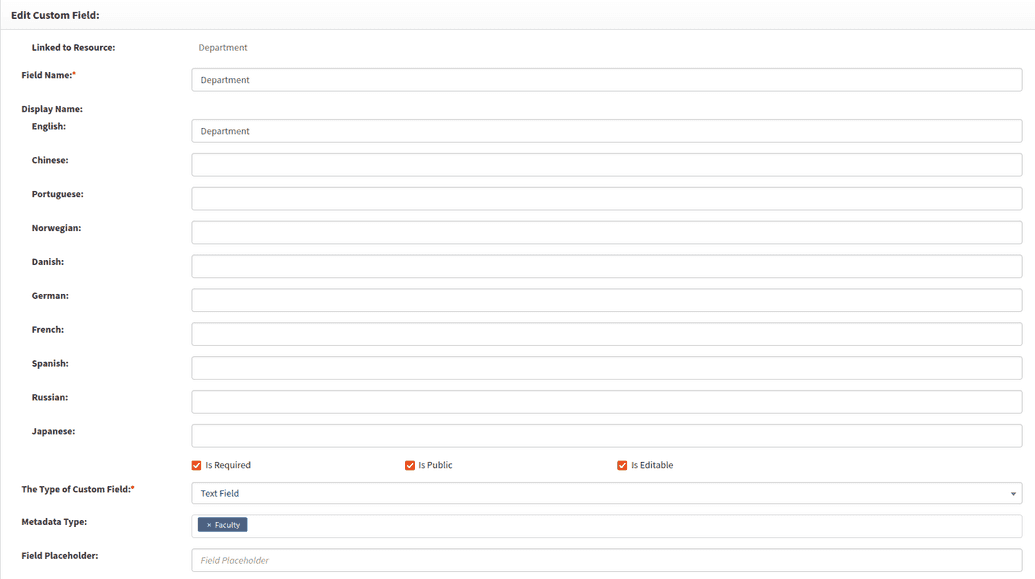
- Let's assume we have a metadata type called Faculty designed to collect information about university staff. We would want to create a field to specify which department the Faculty member belongs to.
Take note of the following fields.
| Field | Description |
|---|---|
| Field Name | Is the name of the field within the Custom Fields listing. |
| Display Name | Is how the field name will appear from within the template. |
| Is Required | If checked, it will mean that the field should not be left blank. |
| Is Public | Determines if the field will be available to be embedded in templates. |
| Is Editable | If the field can be edited after being set initially. |
Next, there is the drop-down specifying The Type of Custom Field. In this case we are using a text-field, but we also have the following options available:
- Single select checkbox.
- Date field.
- Label.
- MultiSelect Checkbox.
- MultiSelect List.
- Password Field.
- Radio button.
- Section.
- Combo box.
- Text Field.
- Multiline text field.
The last field, Metadata Type, associates the field with the chosen metadata type. This dropdown provides all available metadata lists for user, role and groups objects.
Next, click Save. Field is created.
Adding a dynamic field
Adding a dynamic field is similar to the static one, except for being possible only for the number of types and using the specific groovy script. Follow the steps below to add a dynamic field.
- As shown for the static field, go to webconsole > Administration > Custom Fields and fill the same field as shown in step 1 of the instruction above. Please note that the field needs to be editable, hence don't forget to check Is editable checkbox.
- Choose the field type in The Type of Custom Field field. The type that can be used as dynamic fields are:
- Combo box.
- Single select checkbox.
- MultiSelect Checkbox.
- Radio button.
When choosing one of these types of fields, the Valid Values table becomes available.
- In Data model source type field, choose Dynamic data model.
- Below, in another Data Model Source Type: field, choose Data model Script.
- In the Data Model script path: field provides the path to the Groovy script to be used. The groovy script to be used here is
/ui-template/fieldDataModel.groovy. The Valid Values table now looks as in the example below.
The content of the groovy script required populates the needed field for the dynamic data model. The example of the script is given below.
import org.apache.commons.csv.CSVStrategyimport org.apache.commons.lang3.RandomStringUtilsimport org.openiam.common.beans.mq.FileRabbitMQServiceimport org.openiam.esb.core.template.model.AbstractFieldDataModelimport org.openiam.idm.srvc.meta.dto.PageElementValidValueimport org.openiam.util.CSVHelperimport java.nio.charset.StandardCharsetsclass CustomFieldDataModel extends AbstractFieldDataModel {@OverrideString getDefaultValue(String requesterId, Map<String, Object> bindingMap) {return null}@OverrideList<PageElementValidValue> getDataModel(String requesterId, Map<String, Object> bindingMap) {FileRabbitMQService fileRabbitMQService = context.getBean(FileRabbitMQService.class)String countriesAsString = fileRabbitMQService.getFile("service_files/countries.csv")CSVHelper parser = new CSVHelper(new ByteArrayInputStream(countriesAsString.getBytes()), "UTF-8", null);String[] countries = parser.getAllValues();List<PageElementValidValue> pageElementValidValueList = new ArrayList<>()int option_number = 0for (String countryArr : countries) {String[] array = countryArr.split(",")PageElementValidValue value = new PageElementValidValue()value.setDisplayOrder(option_number)value.setId(RandomStringUtils.randomAlphanumeric(32))value.setValue(array[1].substring(1, array[1].length()-1))value.setDisplayName(array[0].substring(1))pageElementValidValueList.add(value)option_number++}return pageElementValidValueList;}}
- Next, click Save. Field is created.
To learn how to embed the newly created custom field into your template, please refer to the Customizing user form templates document.


