Create OpenIAM Provider
The OpenIAM API is secured using oAuth and in order to be able to interact with the API, you will need to set it up. However, the first step to do it is creating a new Authentication provider in OpenIAM.
Creating authentication provider
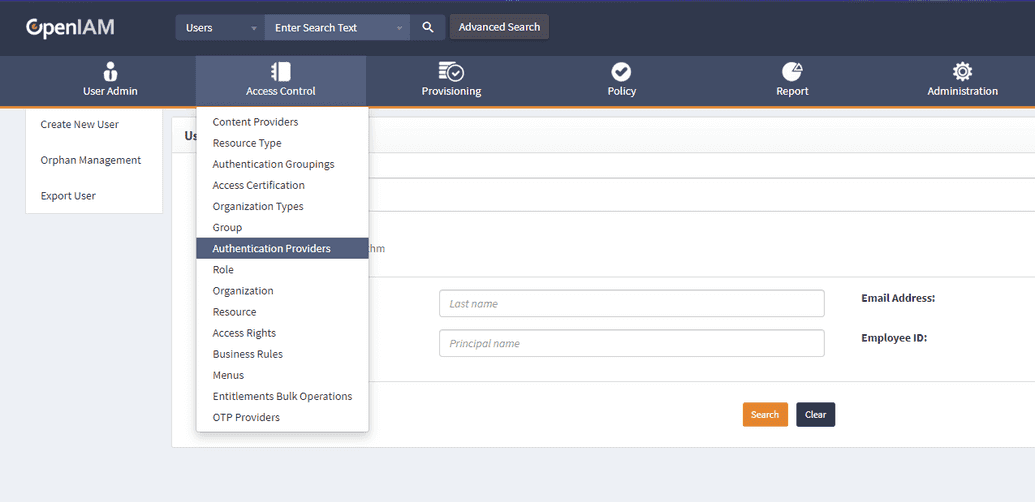
Start by logging into the webconsole and heading over to the Authentication Providers window.
- Got to webconsole > Access Control > Authentication Providers.
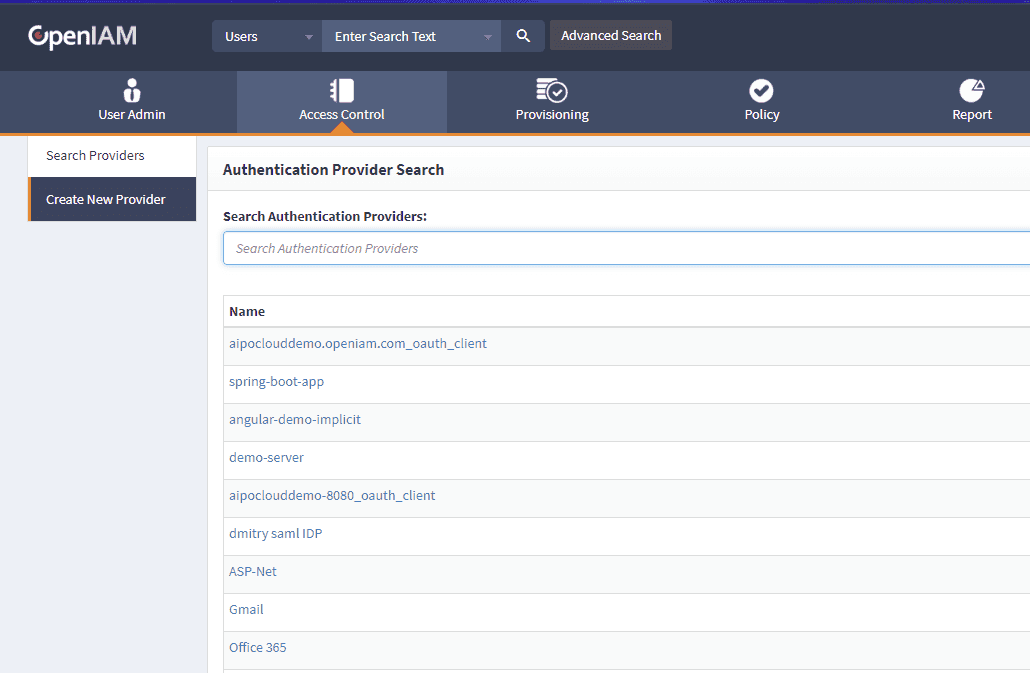
- Select Create New Provider in the top left.
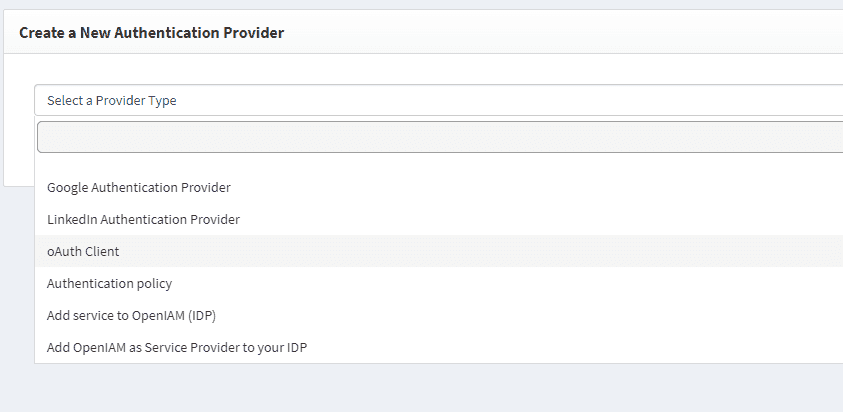
- Under Select a Provider Type, scroll down and select oAuth Client.
Configuring oAuth client provider
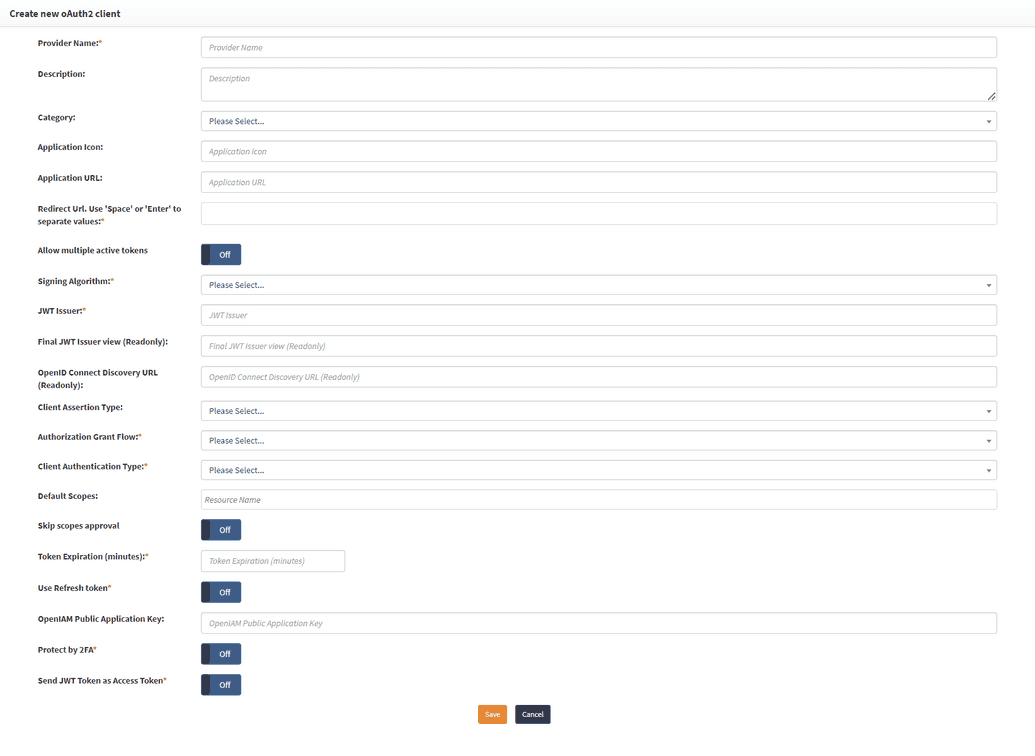
Fill out the mandatory fields, as shown in the table below.
| Field | Description |
|---|---|
| Provider Name | Choose a name to identify this configuration (e.g. Java Client). |
| Redirect URL | Set this to http://localhost:5000/callback (make sure to press enter to confirm the value). |
| Signing Algorithm | Set this to RS-256. |
| JWT Issuer | Choose any name (e.g. JavaClient). This will automatically fill out the Final JWT Issuer View and OpenID Connect Discovery URL fields. |
| Authorization Grant Flow | Select Client Credentials. |
| Client Authentication Type | Select Basic Authentication. |
| Default Scopes | Scroll down and select [your-content-provider-name] > /webconsole/rest/api (Note: it may take a minute to find it). After confirming this value, select user_name. |
| Token Expiration | Set this value to 30. |
| Use Refresh Token | Set this to off value. |
| Protect by 2FA | Set this to off value. |
| Send JWT Token as Access Token | Set this to off value. |
Once you click Save, the page will automatically refresh and generate the Client ID and Client Secret fields.


