Installation without Internet Access
Installation without Internet access.
This installation type is suitable for the servers without Internet access (server from which you can't reach OpenIAM website).
This type of installation is suitable for both el8 RHEL / CentOS version.
Also, during the installation you will be prompted to install MariaDB RDBMS. This is suitable for Demo and POC installations. If you have already had the database server, you should answer N for the prompt.
Download the following files to a server that has internet access.
curl https://download.openiam.com/release/enterprise/4.2.1.10/rpm/openiam-4.2.1.10.noarch.x86_64.rpm --output openiam-4.2.X.noarch.x86_64.rpmcurl https://download.openiam.com/release/enterprise/4.2.1.10/dependencies/el8/openiamrepo.tar.gz --output openiamrepo.tar.gzcurl https://download.openiam.com/release/enterprise/4.2.1.10/binaries/backend.tar.gz --output backend.tar.gzcurl https://download.openiam.com/release/enterprise/4.2.1.10/binaries/frontend.tar.gz --output frontend.tar.gzcurl https://download.openiam.com/release/enterprise/infra/httpd-libs.tar.gz --output httpd-libs.tar.gzCreate folder
/usr/local/openiamon the server.Copy the following files that were downloaded earlier to
/usr/local/openiam- backend.tar.gz;
- frontend.tar.gz;
- openiamrepo.tar.gz;
- httpd-libs.tar.gz.
Install from the RPM using the following command.
sudo rpm -i openiam-4.2.X.noarch.x86_64.rpmYou will see output like the following.
openiam/openiam/OpenIAM-Base-Local.repoopeniam/connectors/openiam/connectors/shutdown.shopeniam/connectors/start.shopeniam/env.confopeniam/services/openiam/services/shutdown.shopeniam/services/start.shopeniam/source-adapters/openiam/source-adapters/shutdown.shopeniam/source-adapters/start.shopeniam/utils/openiam/utils/autodb.shopeniam/utils/autoinit.shopeniam/utils/cluster_healthcheck.shopeniam/utils/curator/openiam/utils/curator/init.shopeniam/utils/elasticsearch/openiam/utils/elasticsearch/default.policy.diffopeniam/utils/elasticsearch/elasticsearchopeniam/utils/elasticsearch/elasticsearch.serviceopeniam/utils/elasticsearch/init.shopeniam/utils/elasticsearch/jvm.optionsopeniam/utils/flyway/openiam/utils/flyway/V0.0.0.0.000__initialization.sql.mssql.m4openiam/utils/flyway/V0.0.0.0.000__initialization.sql.mysq.m4openiam/utils/flyway/V0.0.0.0.000__initialization.sql.mysql.m4openiam/utils/flyway/V0.0.0.0.000__initialization.sql.mysql.rds.m4...openiam/janusgraph/javadocs/package-listopeniam/janusgraph/javadocs/index.htmlopeniam/janusgraph/javadocs/constant-values.htmlopeniam/janusgraph/javadocs/help-doc.htmlopeniam/janusgraph/javadocs/allclasses-frame.htmlopeniam/janusgraph/javadocs/allclasses-noframe.htmlopeniam/janusgraph/javadocs/stylesheet.cssopeniam/janusgraph/javadocs/overview-summary.html/var/tmp/rpm-tmp.ElioLH: line 9: openiam: Is a directoryNo, user openiam does not exist. creatinguseradd: warning: the home directory already exists.Not copying any file from skel directory into it.shell-init: error retrieving current directory: getcwd: cannot access parent directories: No such file or directoryshell-init: error retrieving current directory: getcwd: cannot access parent directories: No such file or directoryshell-init: error retrieving current directory: getcwd: cannot access parent directories: No such file or directoryThe server will be restarted in 1 min to apply ulimit settings ...Shutdown scheduled for Wed 2023-11-22 21:20:46 UTC, use 'shutdown -c' to cancel.At this point the VM will reboot to initialize variables that are needed for stack components such as Elasticsearch.
Execute the initialization step the openiam-cli. During this step the system will be installing and configuring the various components that make up OpenIAM. Please follow the instructions on the screen.
sudo openiam-cli initThe first question:
Does this box have Internet access? [y/n]. Please enterNYou will be asked about installing MariaDB as a default database.
Would you like to install MariaDB RDBMS locally?Please answerYif you would like to use local MariaDB RDBMS as a database server (good choice for quick and simple installation, like demo or POC or small size production platform (up to 500 active users)). Otherwise, please, answerN.
7.1. If you answer 'Y' for MariaDB installation, installer will prepare all files and after will ask you about some details:
Enter current password for root (enter for none):-> Press: 'Enter' buttonSet root password? [Y/n]-> Press 'y' button and after 'Enter'New password:-> Type password for the root user. You will need it later during the installation.Re-enter new password:-> Type the password for the root user as on the previousRemove anonymous users? [Y/n]-> Press 'y' button and after press 'Enter'.Disallow root login remotely? [Y/n]-> Press 'y' button and after press 'Enter'.Remove test database and access to it? [Y/n]-> Press 'y' button and after press 'Enter'.Reload privilege tables now? [Y/n]-> Press 'y' button and after press 'Enter'.
Otherwise, please continue from step 5.
- The installation process will continue. The Cassandra backend as a Graph storage will be installed. Please, be patient as this process can take 4-5 minutes. If you see the ugly exception below, ignore it. This is a byproduct of Cassandra taking some time to start (this will be addressed in an upcoming release).
error: No nodes present in the cluster. Has this node finished starting up?-- StackTrace --java.lang.RuntimeException: No nodes present in the cluster. Has this node finished starting up?at org.apache.cassandra.dht.Murmur3Partitioner.describeOwnership(Murmur3Partitioner.java:284)at org.apache.cassandra.service.StorageService.getOwnershipWithPort(StorageService.java:5166)at sun.reflect.NativeMethodAccessorImpl.invoke0(Native Method)at sun.reflect.NativeMethodAccessorImpl.invoke(NativeMethodAccessorImpl.java:62)at sun.reflect.DelegatingMethodAccessorImpl.invoke(DelegatingMethodAccessorImpl.java:43)at java.lang.reflect.Method.invoke(Method.java:498)at sun.reflect.misc.Trampoline.invoke(MethodUtil.java:72)at sun.reflect.GeneratedMethodAccessor2.invoke(Unknown Source)at sun.reflect.DelegatingMethodAccessorImpl.invoke(DelegatingMethodAccessorImpl.java:43)at java.lang.reflect.Method.invoke(Method.java:498)at sun.reflect.misc.MethodUtil.invoke(MethodUtil.java:276)at com.sun.jmx.mbeanserver.StandardMBeanIntrospector.invokeM2(StandardMBeanIntrospector.java:112)at com.sun.jmx.mbeanserver.StandardMBeanIntrospector.invokeM2(StandardMBeanIntrospector.java:46)at com.sun.jmx.mbeanserver.MBeanIntrospector.invokeM(MBeanIntrospector.java:237)at com.sun.jmx.mbeanserver.PerInterface.getAttribute(PerInterface.java:83)at com.sun.jmx.mbeanserver.MBeanSupport.getAttribute(MBeanSupport.java:206)at com.sun.jmx.interceptor.DefaultMBeanServerInterceptor.getAttribute(DefaultMBeanServerInterceptor.java:647)at com.sun.jmx.mbeanserver.JmxMBeanServer.getAttribute(JmxMBeanServer.java:678)at javax.management.remote.rmi.RMIConnectionImpl.doOperation(RMIConnectionImpl.java:1445)at javax.management.remote.rmi.RMIConnectionImpl.access$300(RMIConnectionImpl.java:76)at javax.management.remote.rmi.RMIConnectionImpl$PrivilegedOperation.run(RMIConnectionImpl.java:1309)at javax.management.remote.rmi.RMIConnectionImpl.doPrivilegedOperation(RMIConnectionImpl.java:1401)at javax.management.remote.rmi.RMIConnectionImpl.getAttribute(RMIConnectionImpl.java:639)at sun.reflect.GeneratedMethodAccessor5.invoke(Unknown Source)at sun.reflect.DelegatingMethodAccessorImpl.invoke(DelegatingMethodAccessorImpl.java:43)at java.lang.reflect.Method.invoke(Method.java:498)at sun.rmi.server.UnicastServerRef.dispatch(UnicastServerRef.java:357)at sun.rmi.transport.Transport$1.run(Transport.java:200)at sun.rmi.transport.Transport$1.run(Transport.java:197)at java.security.AccessController.doPrivileged(Native Method)at sun.rmi.transport.Transport.serviceCall(Transport.java:196)at sun.rmi.transport.tcp.TCPTransport.handleMessages(TCPTransport.java:573)at sun.rmi.transport.tcp.TCPTransport$ConnectionHandler.run0(TCPTransport.java:834)at sun.rmi.transport.tcp.TCPTransport$ConnectionHandler.lambda$run$0(TCPTransport.java:688)at java.security.AccessController.doPrivileged(Native Method)at sun.rmi.transport.tcp.TCPTransport$ConnectionHandler.run(TCPTransport.java:687)at java.util.concurrent.ThreadPoolExecutor.runWorker(ThreadPoolExecutor.java:1149)at java.util.concurrent.ThreadPoolExecutor$Worker.run(ThreadPoolExecutor.java:624)at java.lang.Thread.run(Thread.java:750)Waiting for cassandra
- The installer will ask a number to questions during the initialization process. For most questions, a default value has been provided to simplify the effort for users new to OpenIAM. The section which requires input from the installer is market with the following message in the console: =============== CRITICAL SECTION ===============
Create the database schema accounts
OpenIAM has two schemas which are created by default: openiam and activiti. The openiam schema is the primary schema used by the platform and it stores a variety of information ranging from policies to user profile information and more. activiti is used to store information about workflows and their execution. The first set of questions raised by the installler are related to the creation of database user for every schema. Each question and its intent are listed below.
| Question raised by the installer | Explanation |
|---|---|
| Set OpenIAM username for 'openiam' schema, default: idmuser | This is DB username that will be used to manage the openiam OpenIAM schema. This is the primary schema in the solution data related to OpenIAM are stored. Username will be used by the OpenIAM application to communicate with database. The default value is idmuser. |
| Set OpenIAM password for 'openiam' schema, default: idmuser | This is the password that will be used for username which was provided in the previous step. The default value is: idmuser |
| Set OpenIAM username for 'activiti' schema. For MySQL it will be the same as for 'openiam', default: idmuser | This is DB user name that will be used to manage the activiti schema. User will be used by OpenIAM application to communicate with the database. Default value is idmuser. |
| Set OpenIAM password for 'activiti' schema. For MySQL it will be the same as for 'openiam', default: idmuser | This is the password that for the user associatd with the activiti schema. The default value is idmuser |
Message broker password
OpenIAM uses RabbitMQ as the message broker and is the primary transport service used by OpenIAM application. Services are loosely coupled, and they communicate with each other through the message broker. Cross service communicaiton is encrypted.
The next question raised by the installer is to define a password for RabbitMQ. As seen in the above questions, a default password value is provided for simplicity. For production use, please use a strong password.
Set OpenIAM password for RabbitMQ message broker, default: passwd00
Memory cache
Redis is an in-memory distributed cache which is used by OpenIAM to improve system performance. A variety of objects are temporarily stored in Redis including:
- End user web session.
- Database object cache.
- High level application cache.
As with other components, access to the cache is secured and the next question ask for a password which should be used for Redis.
Set OpenIAM password for Redis., default: passwd00
SMTP Credentials
E-mail notifications can be enabled for a broad range of operations in OpenIAM. Configuring a valid SMTP service is a pre-requisite to being able to send e-mail notifications. The next two questions ask the user to provide the SMTP credentials for the account which will be used to send e-mails from the application. These questions are optional at this time, and you have the option to configure these later if needed.
Set SMTP username. You can change it later., default: noneSet SMTP password. You can change it later., default: none
At this point the installer has enough information to complete the installation of: Elasticseach, Redis, and RabbitMQ.
Initialize Database Schema
| Question raised by the installer | Explanation |
|---|---|
| Use default value if this is new installation. If you are doing update, specify your current (before update) version here, like 4.1.11.0, default: 0.0.0.0 | If this install is an upgrade from an existing deployment, then the current version is important as it will determine which scripts need to be applied to upgrade the schema to the current version. If this is a new deployment, you can leave this blank |
| This is the name of the OpenIAM core database. If using MariaDB, this is most likely to be 'openiam', default: openiam | This question provides the option to choose the primary database schema. You should leave this blank and let it default to openiam. This value should only be changed if the scripts have been altered by the customer. |
| This is the name of the OpenIAM Activiti database. If using MariaDB, this is most likely 'activiti', default: activiti | This question provides the option to choose the database schema used by the workflow engine. You should leave this blank and let it default to activiti. This value should only be changed if the scripts have been altered by the customer. |
| Possible values: MySQL, Postgres, MSSQL, Oracle. Type of the database that you are going to use with OpenIAM. The RDBMS have to be already installed, default:mysql | Select the type of database that you will be using as the OpenIAM product repository. You can leave this blank if you will be using either MariaDB or MySQL. If you are using either PostgreSQL, Oracle or Microsoft SQL server, enter one the following values based on your database type: postgres, oracle, mssql. |
| Do you want to initialize OpenIAM Schema and Users? Select this if you are not created schema and users in RDBMS yet. Super user (root) password will be required [y/n] | If Y then installer will create schemas in database and corresponded RDBMS users as well. For Oracle/MSSQL it will generate an SQL script that must be performed manually. |
| Enter username for Super user (for mysql this is root), default: root | The installer needs a super user account or equivalent which has the privileges to create new schema, users, tables, etc. |
| Enter password for super user (sa or root, depend on the db type), default: | Enter the password for account provided in the last step. |
| This is the hostname of where the openiam core database is., default: localhost | Enter the host or DNS name of the server where the primary OpenIAM database will be deployed. |
| This is the port of where the openiam core database is. If using mariadb, this is most likely '3306', default: 3306 | Enter the port number used by the database server hosting the primary OpenIAM database. |
| This is the hostname of where the OpenIAM activiti database is., default: localhost | Enter the host or DNS name of the server where the workflow database will be deployed. |
| This is the port of where the openiam activiti database is. If using MariaDB, this is most likely '3306', default: 3306 | Enter the port number used by the database server hosting the workflow database. |
The OpenIAM RPM installer will continue with initialization and apply the SQL scripts which are required for successful startup. The OpenIAM services will automatically run the application stack after successful initialization and will show you the current stack status. Usually, startup takes near 6-10 minutes. You can view the status of the system as its coming up using the command line tools described below in OpenIAM components and Status.
Copying downloaded file from local machine to remote server
Use scp [OPTION] [user@]SRC_HOST:]file1 [user@]DEST_HOST:]file2
Example:
- C:\Users\Asus>scp openiam-4.2.1.10.noarch.x86_64.rpm root@10...*:/usr/local/openiam/
- The authenticity of host '10... (10...)' can't be established.
- ECDSA key fingerprint is SHA256:5pP7vxJnDzbQ+Xg1VANjSBYL7HboHyM4RqFKW4qHkPU.
- Are you sure you want to continue connecting (yes/no/[fingerprint])?`
- Warning: Permanently added '10...*' (ECDSA) to the list of known hosts.
- root@10...*'s password:
- openiam-4.2.1.10.noarch.x86_64.rpm 23% 133MB 1.4MB/s 05:12 ETA`
First time login
The final validation of our deployment is to be able to login to the OpenIAM web applications. To do this, you must first find the IP address of our VM.
Next open your browser (preferably Chrome or Firefox), and hit:
http://[ip address of your installation ]/webconsole
Use the following credentials for the first-time login:
Username: sysadminPassword: passwd00
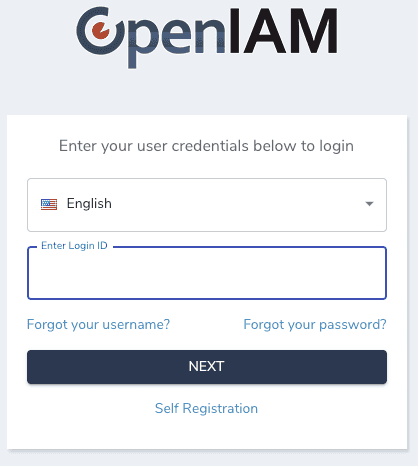
Enter the username on the field shown below and click Next
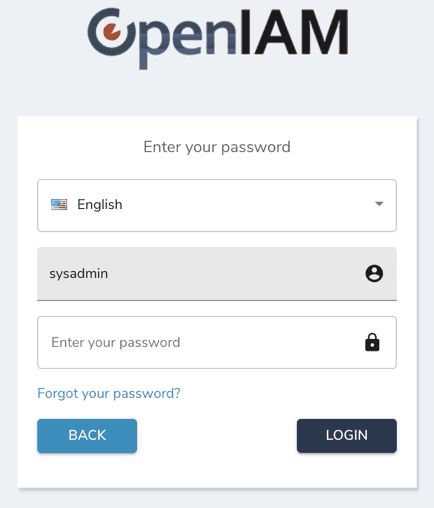
The authentication process is spread over two screens. You will be asked to enter the password on the screen below.
The next screen will force you to change the default password. As you enter your new password, you will see the password policy on the side. Your password must align with this policy. You will be able to change both the password and the policy later.
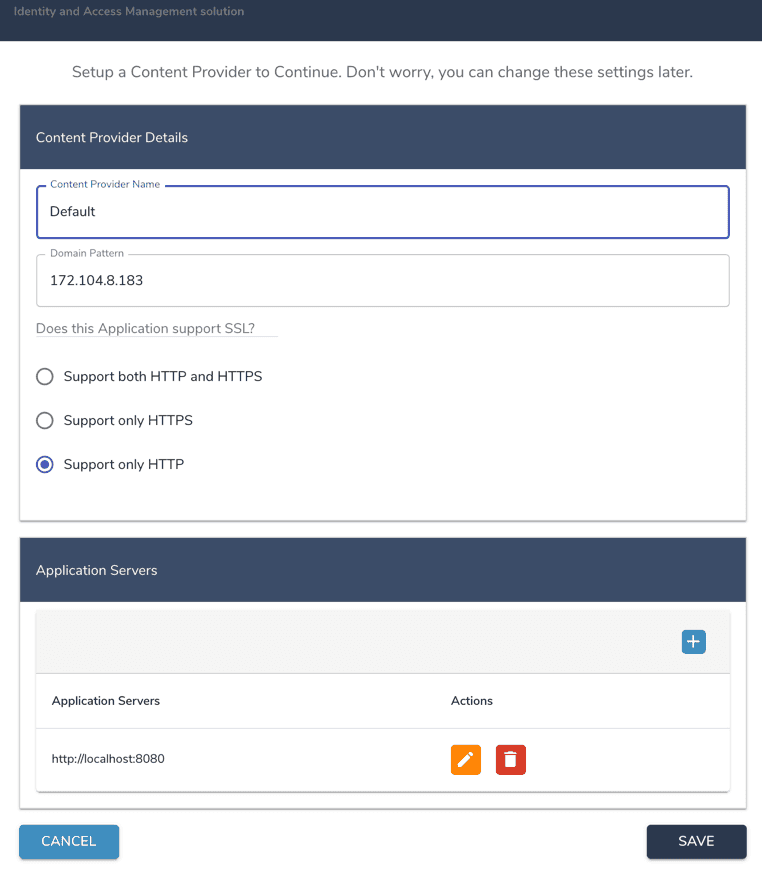
The next step is to define a content provider using the screen shown below. A Content provider is an alias which represents a domain. Associated with the content provider can be UI themes, authentication policies, etc. You can read more on Content Provider in this document. The table below describes the fields on this screen.
| Name | Description |
|---|---|
| Content Provider Name | You can think of a content provider as an “alias” which represents a domain. This is described in more detail in the OpenIAM documentation. For this setup, please enter a value such as: Default CP |
| Domain Pattern | This value is defaulted in. It should be the IP address or host DNS name of the instance where OpenIAM has been installed |
| Application supports SSL? | This configuration determines if the OpenIAM application will be accessed over HTTP or HTTPS. Unless you have already configured the certificate, select Support on HTTP. You will be able to update this configuration later. |
| Application servers | This is the location of the OpenIAM service layer which the UI and rProxy need to communicate with. In most cases, the default value will be correct since each of these components will be deployed on the same host. However, this configuration provides the flexibility to have the UI and service layer on separate hosts. |
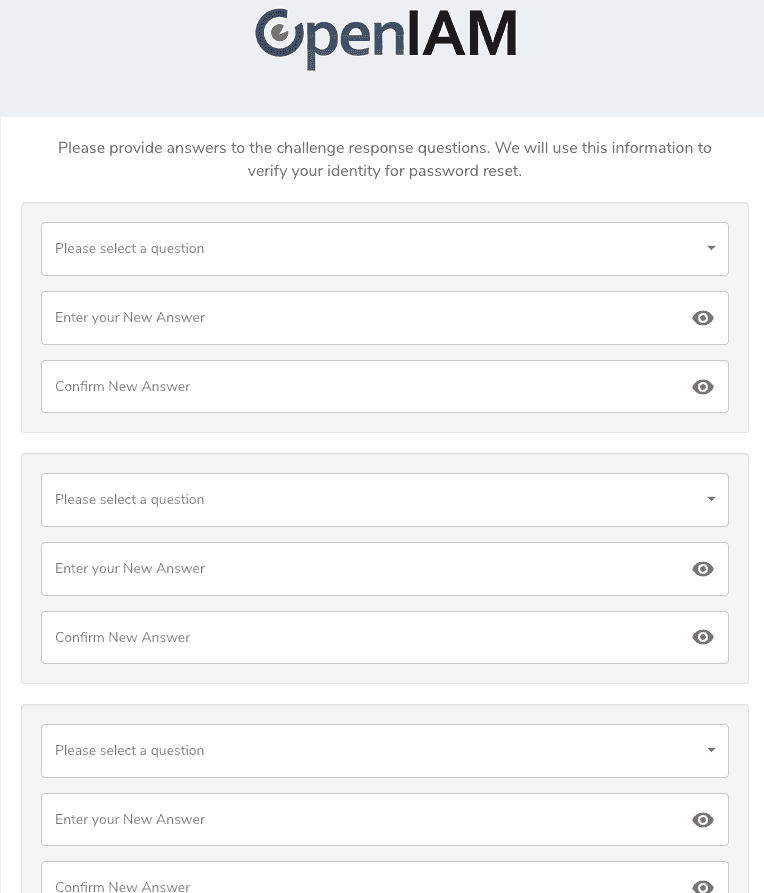
After setting the content provider, you will be taken to the challenge questions page. These questions will be used to reset your admin account in case you have locked yourself out. Please make a note of your answers.
After completing the above steps, you will be taken to the admin console landing page shown below. Allow the system about 5 min to refresh the internal cache and then you can proceed to configure your solution.
OpenIAM components and status
Using the OpenIAM Command line utility
OpenIAM provides a command line utility to help you view the status of all components as well as perform common operations such as view logs, start, stop,etc . The command is openiam-cli.
Just running the command by itself, as shown below, will display the list of all options.
openiam-cli
You will be asked about Internet access on this box, as shown below.
Type n and press Enter.
Output
Usage: /usr/bin/openiam-cli {start|stop|status|init|log|log <service_name>|list-connectors|list-source-adapters}
To check the status of the components or the confirm that the system is up, please use the following command:
openiam-cli status
To check current logs of any service you can use the following command. You can get the services using the following command: openiam-cli status command.
openiam-cli log <service_name>
For example, to check the logs of the openiam-esb module use the following command.
openiam-cli log openiam-esb
OpenIAM core services
| Name | Description | Default Memory (RAM) |
|---|---|---|
| openiam-esb | The service that provides Web Service API and to the bigger part of functionality | 2048m |
| workflow | The service that provides Business Workflow functionality | 768m |
| groovy-manager | The service that provides Groovy extension functionality | 256m |
| idm | The service that provides provisioning to target systems functionality | 512m |
| reconciliation | The service that provides reconciliation against target systems functionality | 512m |
| email-manager | The service that provides Sending and Receiving emails functionality | 256m |
| auth-manager | The service that provides End user Authorization functionality | 1024m |
| device-manager | The service that provides Device management functionality (IOS and Android) | 256m |
| business-rule-manager | The service that provides Business Rules functionality | 512m |
| openiam-ui | This is web server (tomcat) that provides Graphical interface | 2048m |


