Create OpenIAM oAuth provider in Python
The OpenIAM REST API in Python is a pretty simple process. Start by logging into the webconsole and heading over to the Authentication Providers and follow the steps below.
Go to webconsole > Access Control > Authentication Providers.
Select Create New Provider in the top left.
Under Select a Provider Type scroll down and select oAuth Client.
- Fill out the following mandatory fields.
| Field | Value |
|---|---|
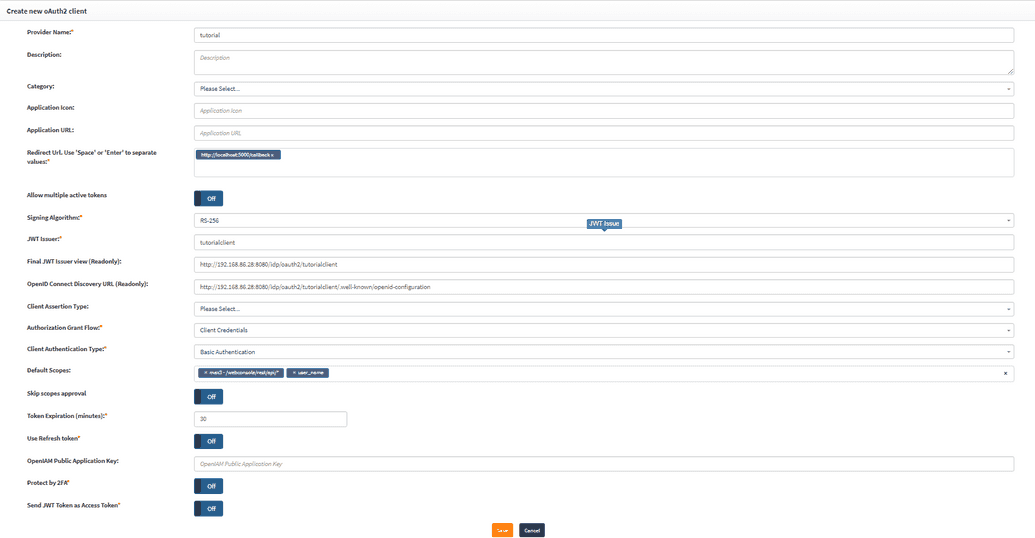
| Provider Name | Name it something like Python Client or as needed. |
| Redirect URL | Set this to http://localhost:5000/callback and be sure to press enter to confirm the value. |
| Signing Algorithm | Set this to RS-256 |
| JWT Issuer | Name it something like PythonClient or as needed. This will automatically fill out the fields Final JWT Issuer View and OpenID Connect Discovery URL. |
| Authorization Grant Flow | Set this to Client Credentials. |
| Client Authentication Type | Set this to Basic Authentication. |
| Default Scopes | Search for (your-content-provider-name) in /webconsole/rest/api/*. It may take a minute to scroll to find and select it. Additionally, search for user_name and select it. |
| Token Expiration (minutes) | Set this value to 30. |
| Use Refresh Token | Set to off. |
| Protect by 2FA | Set to off. |
| Send JWT Token as Access Token | Set to off. |
Once complete, your oAuth client creation page should look similar to one shown below.
- Click SAVE at the bottom. The page will automatically refresh and generate the Client ID and Client Secret.

