OTP over SMS or E-mail
Authentication using One-Time Passwords (OTP) provides an extra level of security during the authentication process. OpenIAM supports:
- OTP over SMS / E-mail.
- TOTP using the OpenIAM authenticator.
OpenIAM also provides the flexibility of defining which URLs need a higher level of security and which ones don't. This allows you to determine if you want, for example, to enable OTP-based authentication for an entire application like the web console or for a specific operation or application that has a higher level of sensitivity.
Configuring an authentication provider
The first step is to update the authentication provider using the following steps.
- Go to web console > Access Control > Authentication providers.
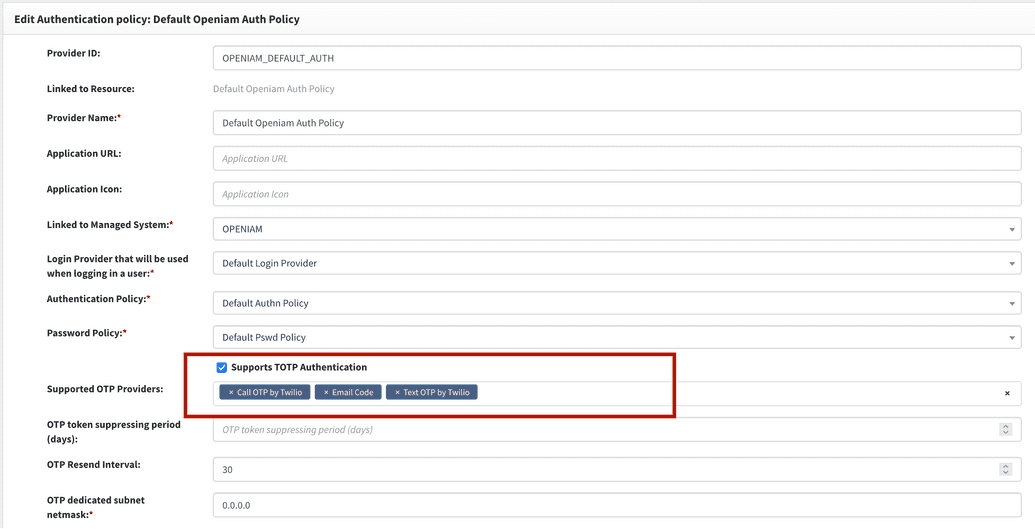
- Select the provider by searching in the Authentication Provider Search box. If you are using the default authentication provider, then select Default OpenIAM Auth Policy. You will see a screen like the one below.
From the screen above, enable the OTP delivery mechanisms that you want to support. The options are:
- Supports SMS One-Time Password - Delivers the OTP over SMS.
- Supports Email One-Time Password - Delivers the OTP over e-mail.
Ensure that you have configured your SMTP Gateway and SMS Gateway.
Configuring a URL pattern
After configuring the authentication provider, selecting TOTP authentication, and choosing SMS or Email, the next step is to select URLs that will be protected with OTP. To select a URL, follow the steps below.
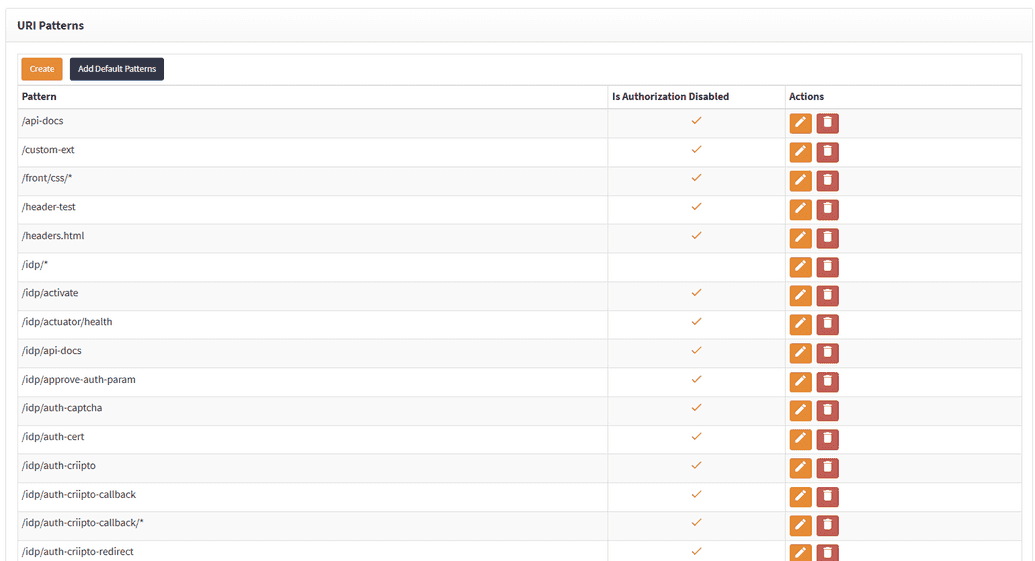
- Find the required Content provider, click Edit, and scroll down to the URL patterns section, as shown below. Click Edit.
- Click the
+sign and add the TOTP authentication rule.
- Click Save. The rule is added to Support authentication levels.
- Select the URL that needs to be protected. For example, if you need to protect the entire SelfService portal URL:
- Find
/selfservice/*in URL patterns and click Edit. - Scroll down to the Support authentication levels section.
- Click Save on the Content provider page to finish the configuration. Now, whenever somebody tries to access the SelfService portal, they will be asked to log in using OTP.
The SelfService portal is now protected by the TOTP authentication rule. If you want to protect another URL, repeat the steps for the URL you want to protect. Go to the required Content provider > URL patterns > select URL > add authentication rule.
Inserting into pointed places
- Remove the Authentication Rule if list is not empty.
If you need only one type of authentication, you can select a new authentication rule from the default values.
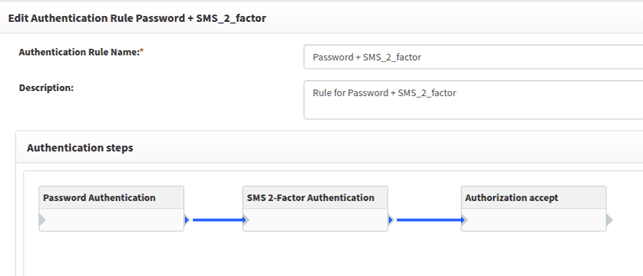
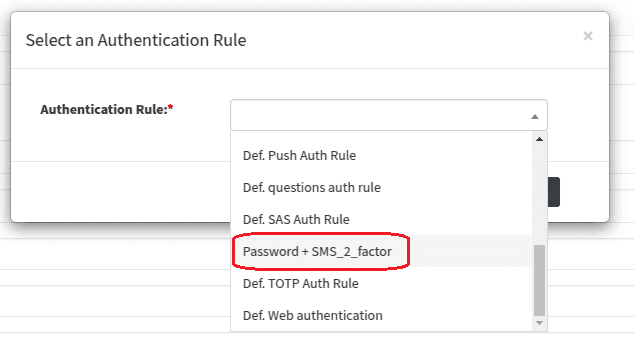
- If you need to use two or more authentication steps, you will need to create a new authentication rule with the required steps. For example:
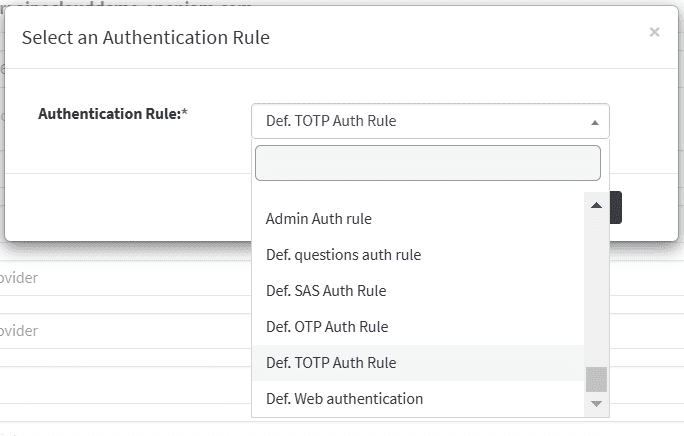
Select a new authentication rule, as shown in the screenshot below.
Click Save. The rule will be added to Support authentication levels.
For more instructions about authentication rules, please consult this document.
Configuring step-up authentication for federation targets
In case you want to protect a specific URL you can add an authentication rule to it in the Content provider, as described above. However, for the applications that users can federate to - SAML, oAuth, OIDC - the steps are somewhat different. In case you need to add an extra authentication level to a specific application, follow the steps below.
- Log in to webconsole and go to Access Control > Content providers.
- Find the Content provider needed and click Edit.
- Create a new URI pattern like
/idp/sso/launch/the_application_resource_idand add authentication level you need.
Every application from My Application page in SelfService has a URL in the following format
https://custom_domain/idp/sso/launch/the_application_resource_id. Hence, the the_application_resource_id can be found in the Authentication providers UI.
- Log in to webconsole and go to Access Control > Authentication providers.
- Find the application you need to protect an URL to and chose Linked to Resource (click on the resource name).
- The value you need is stored in the Resource ID field.
Now the application URL is protected.
