Configuring approval workflows
This guide explains how to create approval workflows (also known as Approver Associations) for roles, groups, and resources in OpenIAM.
Defining an Approval workflow
OpenIAM allows you to define approval workflows at two levels:
- Application Level (Managed System or Manual Managed System).
- Entitlement Level (Roles, Groups, or Resources).
For applications with a large number of entitlements, defining the approval flow at the application level is recommended. However, you can override this at the entitlement level if necessary.
To define approvers, follow the steps below.
- Locate the Application or Entitlement
For Applications
- Go to WebConsole > Access Control > Resource.
- Filter by Managed System or Manual Managed System in the Type column.
- Find your application by searching in the Name column.
- Click the Actions button to view the application details.
For Entitlements
Enable Entitlement-Level Approvals.
- Go to WebConsole > Administration > System Configuration.
- Navigate to the Workflow tab.
- Enable the Use approver association or role/group instead of resource checkbox.
Find the Entitlement.
- Determine the entitlement type (Role, Resource, or Group).
- Go to WebConsole > Access Control > [Entitlement Type].
- Filter by Managed System name in the Managed System column.
- (Optional) Further filter by Metadata Type.
- Find your entitlement by searching in the Name column.
- Click the Actions button to view entitlement details.
Define the Approval flow
- Click on Approval Associations from the sidebar.
- Click the
+button to add an approver.
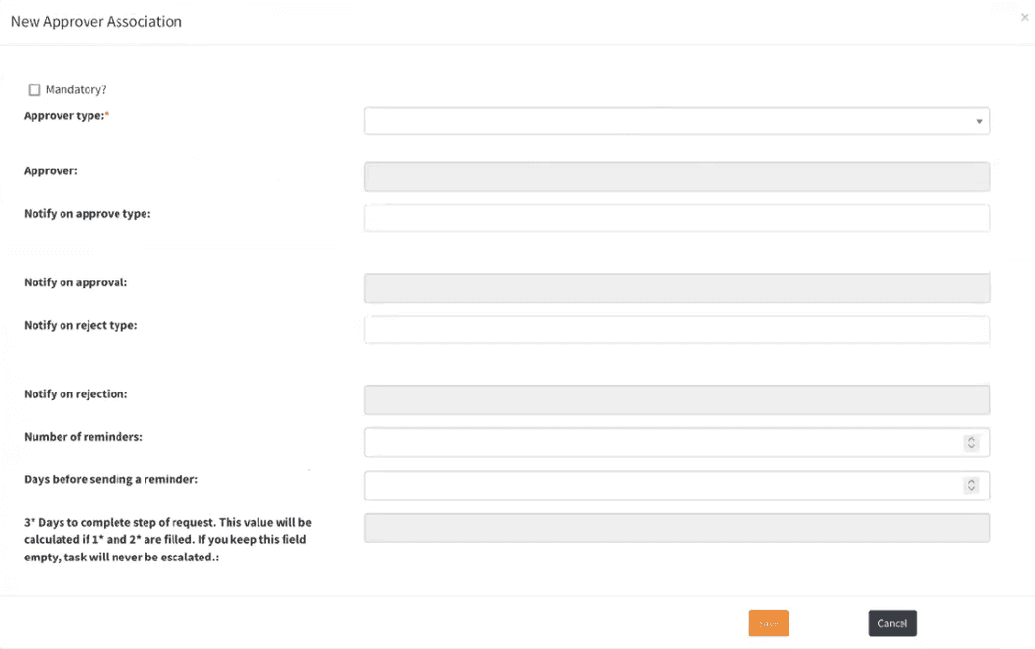
- Configure the Approval flow Fill in the following fields:
- Approver: Select the approver type and name.
- Notify on Approval: Choose who will be notified if this step is approved.
- Notify on Reject: Choose who will be notified if this step is rejected.
- Request Service Level Agreement (SLA) Parameters:
- Number of Reminders: How many reminders to send.
- Days Before Sending Reminder: When to send the first reminder.
- Total Time to Complete (Calculated Value).
Approval flow field descriptions
| Field | Description |
|---|---|
| Is Mandatory | If enabled, the step must be completed. If no approver is set, the request is sent to a default approver. |
| Approver Type | Defines who will approve or reject access. (See Approver Types section below.) |
| Approver | Auto-filled based on the selected approver type. |
| Notify on Approve Type | Specifies who receives an additional notification when this step is approved. |
| Notify on Approval | Auto-filled based on the previous field. |
| Notify on Reject Type | Specifies who receives an additional notification when this step is rejected. |
| Notify on Rejection | Auto-filled based on the previous field. |
| Number of Reminders | How many reminders are sent to the approver. |
| Days Before Sending Reminder | When to send the first reminder. |
| Days to Escalation | The total time allowed before escalation. |
Adding additional approval steps
To add another step:
- Save the first approver.
- Click the
+button again. - Repeat the configuration process.
Approver Types
| Approver Type | Description |
|---|---|
| Supervisor | The direct manager of the user making the request. Note: If the manager initiates the request, this step is skipped. |
| User | A specific individual assigned as the approver. |
| Group | A group of users who can approve (anyone in the group can claim and approve the request). |
| Role | Any user with a specific role can approve. |
| Owner | The owner assigned to the Managed System or Manual Managed System. |
| Admin | The administrator assigned to the Managed System or Manual Managed System. |
Escalations
If a request is not approved or rejected within the defined timeframe, it can either:
- Be automatically rejected by the system.
- Be escalated to a higher-level approver.
To configure escalations:
- Open the Approver Association screen.
- Click the blue escalation button.
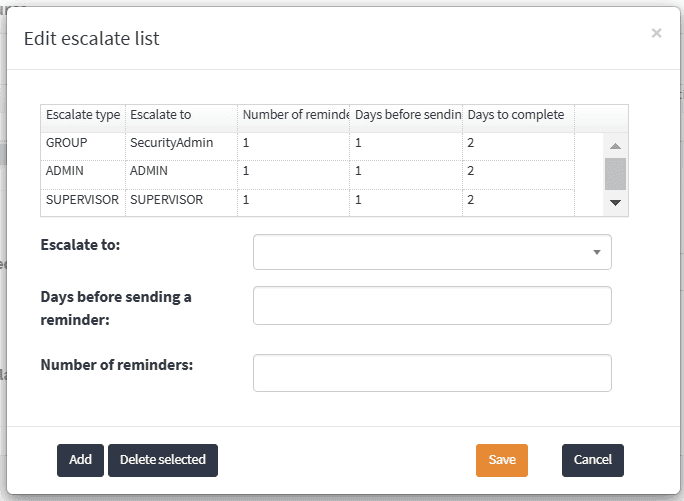
- In the Escalation List window:
- Select the user or group to escalate to.
- Click Add.
- Configure reminder frequency and days before escalation.
If the initial approver does not take action, the request is escalated based on these settings. If it remains unapproved past the expiration date, it is automatically rejected.
Enabling escalation processing
Escalations are managed by a batch task. To enable it:
- Go to WebConsole > Administration > Batch Tasks.
- Find Escalation of Expired Requests.
- Click Edit and enable the Is Enabled flag.
Notifications
Approvers can receive notifications about pending requests. However, for notifications to be sent, the corresponding batch task must be enabled.
Enabling approval notifications
- Go to WebConsole > Administration > Batch Tasks.
- Find Notification Reminders for Approvers.
- Click Edit and enable the Is Enabled flag.
This batch task handles reminder notifications. Standard email notifications are sent by default.
Email notifications
Standard email templates are used to notify users about request statuses.
| Template Name | Description |
|---|---|
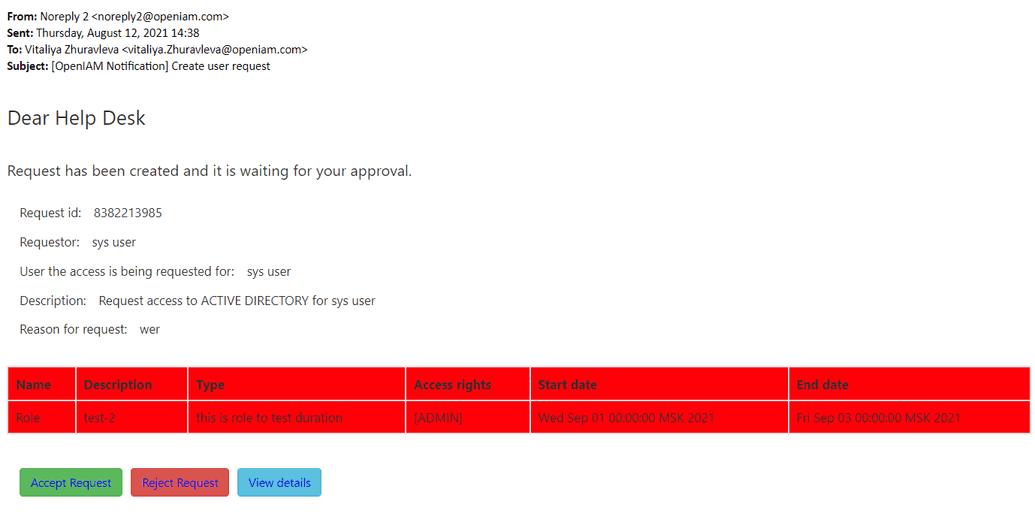
CREATE_USER_REQUEST | Notifies the approver of a pending request. |
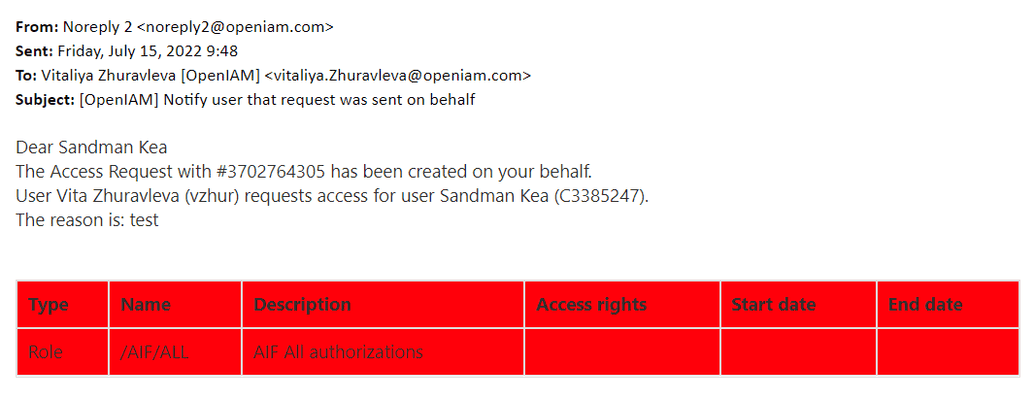
ACCESS_REQUESTED_ON_BEHALF | Notifies the user that access has been requested on their behalf. |
CREATE_USER_REQUEST_REJECTED | Notifies the user that their request was rejected. |
CREATE_USER_REQUEST_ACCEPTED | Notifies the user that their request was approved. |
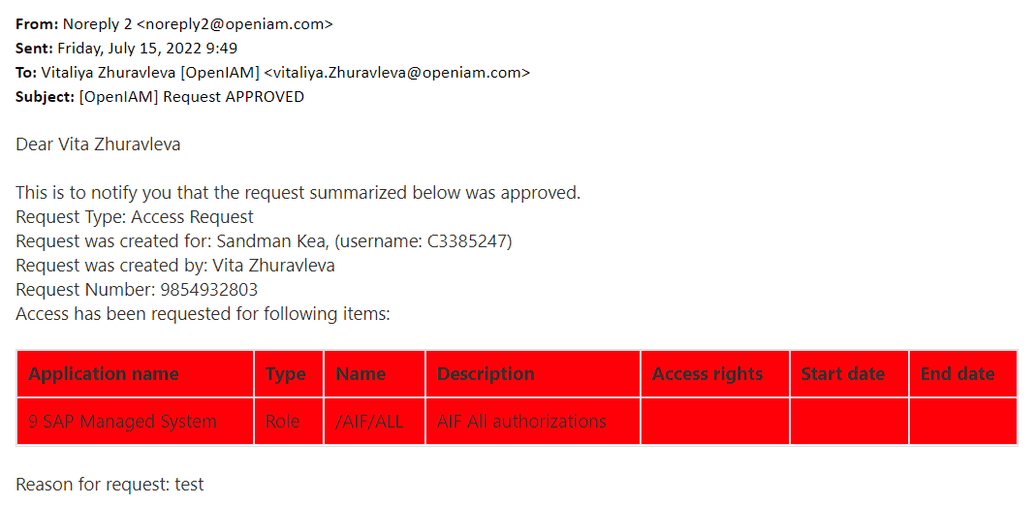
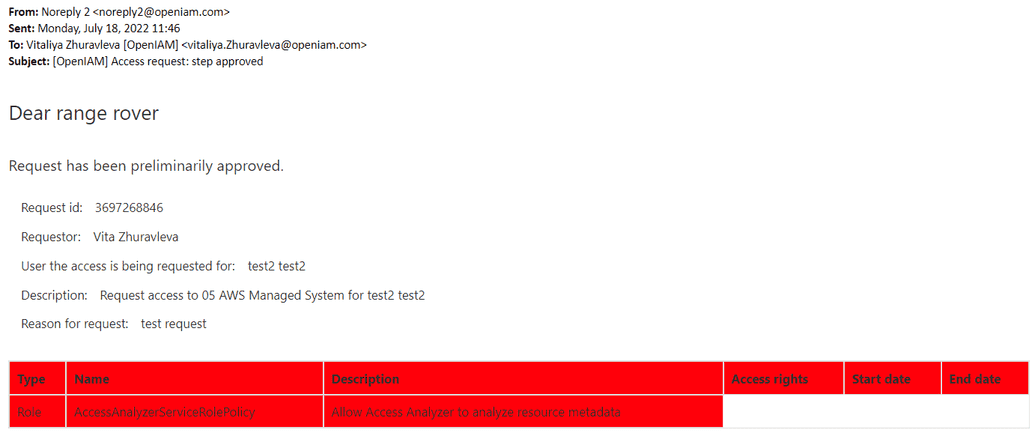
CREATE_USER_REQUEST_STEP_APPROVED | Notifies the user that a preliminary approval step was completed. |

