End-user access roles
In this example, we will define a role that grants users access to the following menu options in the SelfService portal.
- My Approvals (SelfService > Request approval > My Approvals).
- Following options under Manage user.
- Superiors and Subordinates
- Edit User
- Identities
The implement the above, we will follow the high-level steps described below:
- Create a role.
- Assign the appropriate menus to the role.
- Assign the role to one or more users.
Assigning menus to a role
Since steps 1 and 3 have been defined elsewhere, this section will focus on assigning menus to a role to achieve the objectives above.
Update the Is Public flag
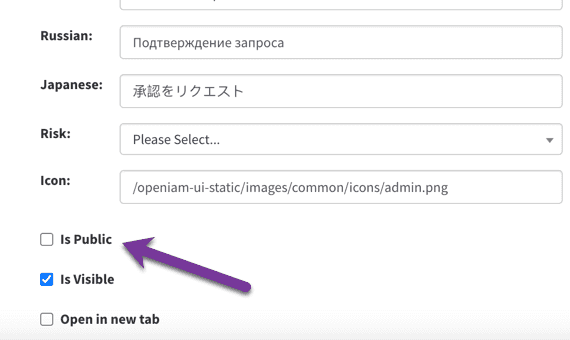
By default, each of the top-level menus in SelfService, has the Is Public flag set to true. This means that everyone who has access to the SelfService portal has access to all the menus. Since our goal is to allow only a few of the menus to be accessible, update the Is Public flag in each top-level menu to false. Follow the steps below to update the flag.
- In the webconsole, go to Access Control > Menus.
- Filter on
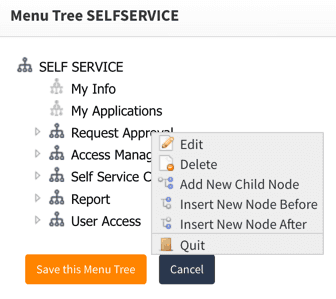
SELFSERVICEand click on the actions button for SelfService. - From the Menu tree shown below, right click on the menu that you want to update.

- Select Edit from the dropdown menu.
- From the edit menu screen, uncheck the
Is Publicflag.
- Click on save in the dialog box followed by clicking on Save this Menu Tree.
For reference, SELF-SERVICE contains the following top-level menus:
- My Info (removing this option will remove the SelfService portal landing page).
- My Applications.
- Request Approval.
- Access Management.
- Self service center.
- Report.
- User Access.
Associate menus to roles
To add menus to your role
- Find the role by going to Access Control > Menus.
- Filter on the Role name.
- Click the Actions button to view the role details.
- Navigate to the role that you want to update.
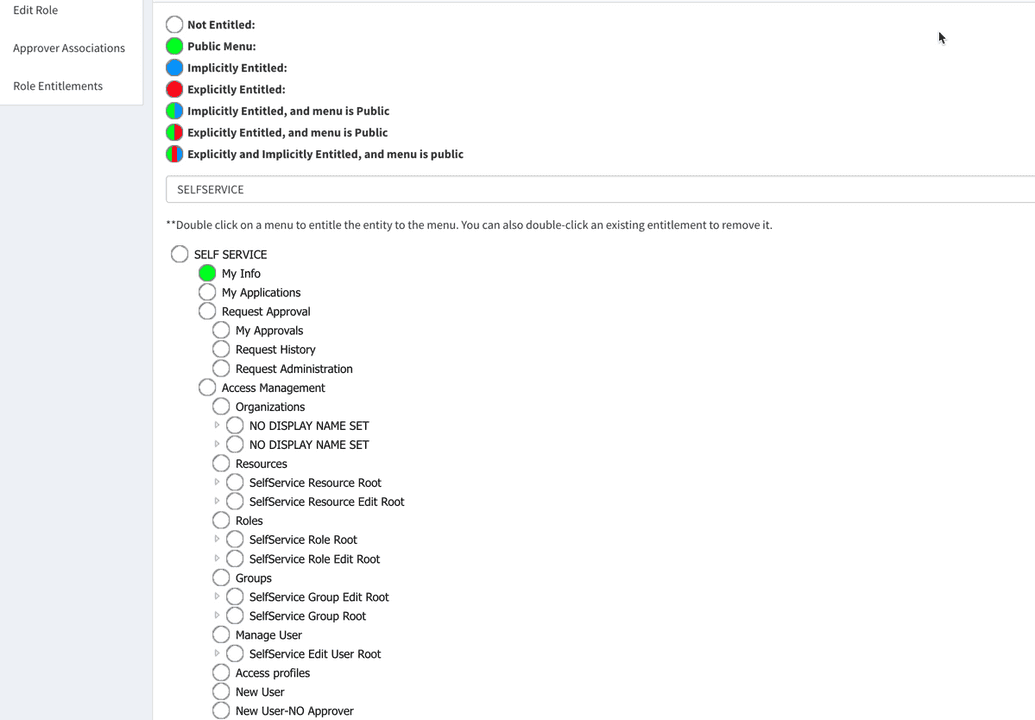
- Click on Menus from the left side menu.
- Select the
SELFSERVICEmenu tree.
Assigning My Approvals menu to a role
From our objectives above, the first step is to enable the My Approvals menu option under Request Approval. To do so, follow the steps shown below.
- Double-click on My Approvals.
- Click Save.
