AWS connector
AWS is a Java connector. It is deployed using common deployment steps, described in this document for the particular deployment scenario.
AWS has two ways of managing users and their accounts - Identity and Access Management tool and Identity Store. IAM Identity Center allows you to manage workforce user access across multiple AWS accounts and cloud applications. In contrast, an IAM user is tied to a single AWS account and can only access the account where it was created.
Using IAM Identity Center, you can set an identity source and assign permissions for multiple accounts to the same user. However, for IAM users, access to multiple accounts requires explicit permissions in each account. For example, an IAM user in Account A can only access Account B if both permissions in Account A are granted and Account B explicitly allows it. Hence, IAM Identity Center simplifies user and access management across multiple AWS accounts, unlike IAM users, which are restricted to the account in which they are created.
OpenIAM supports both ways of managing users in AWS.
Establishing a connection
The common steps on establishing the connection are given in the document by the link. The AWS-specific details of establishing the connection are described below.
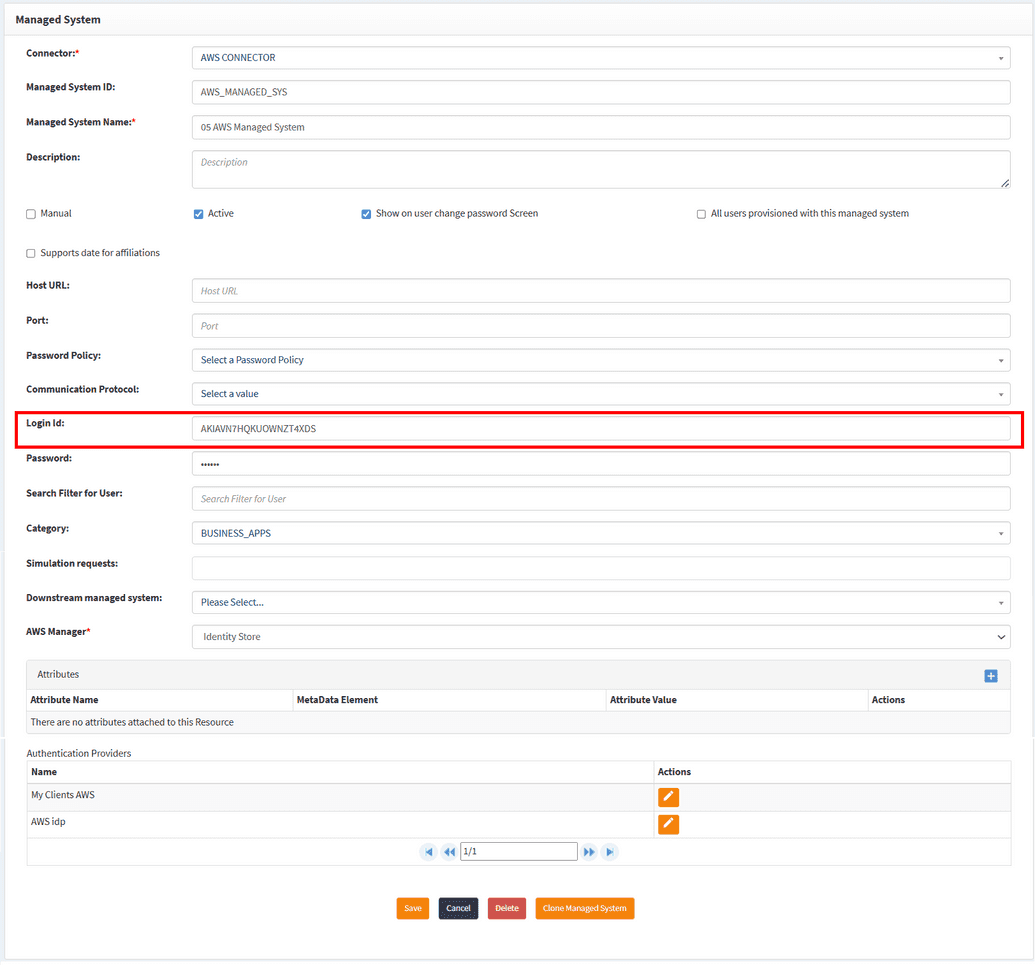
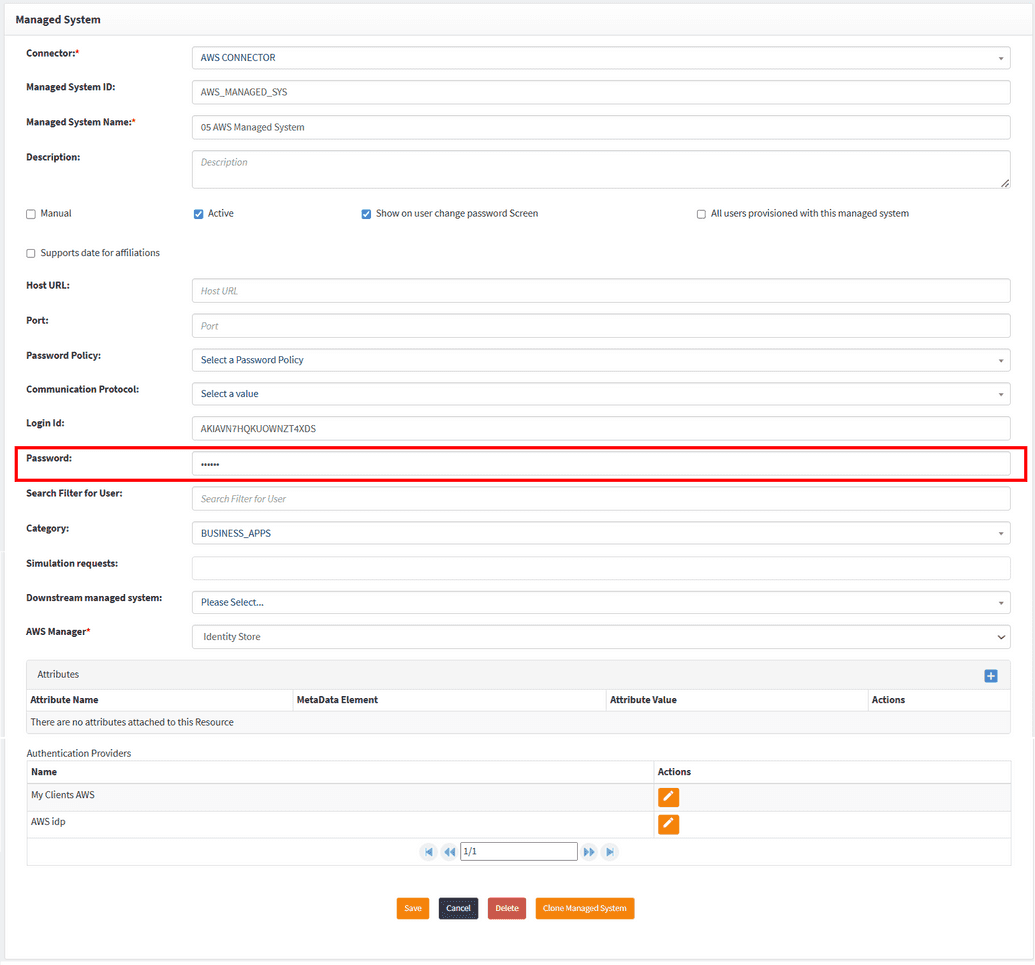
To establish a connection with the AWS system you will need to fill the Login ID and Password fields. For AWS these are token and secret token that can be found on My Security Credentials page in AWS as described below.
- The first step is creating a service account that will be used for connection. One can use a root account for connection either, however, if this is unwanted or inapplicable for your business purposes, you can create a service account with an appropriate permission policy. To create a service account, follow the steps below.
Go to Identity and Access Management homepage or Identity Store homepage and log in.
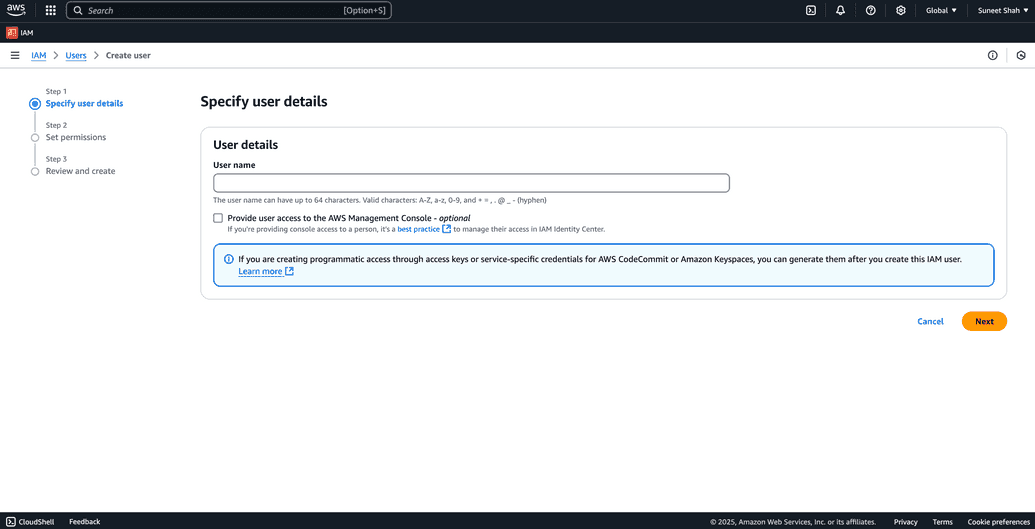
Go to Users in the and click on Create user. You will be prompted to user creating screen.
Fill in user details in the first screen and click Next. This user will be used as a service account for connection.
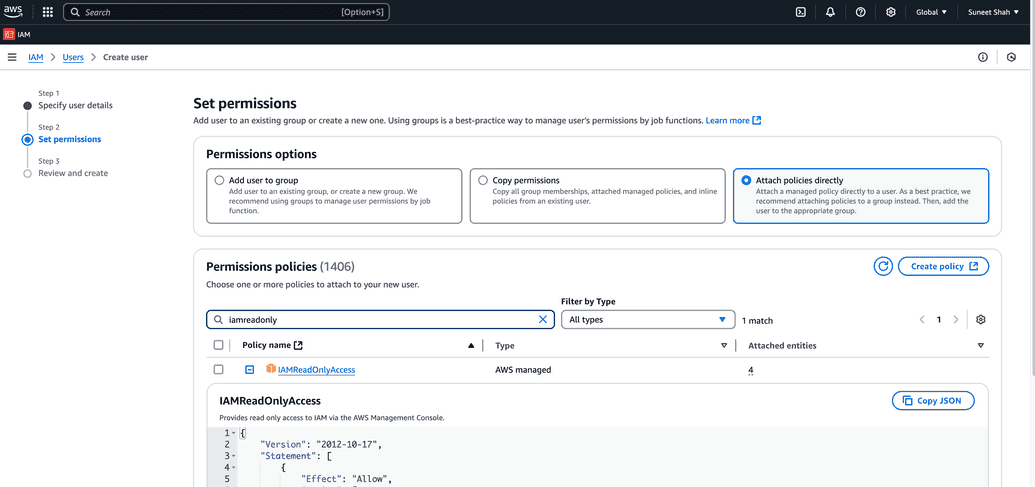
Set permissions for this user from the three options. The image below shows the case when permissions are added in manual mode, however, you may have service account that you can copy permission from, or a group specifically created for this purpose. For instance, in case you want your service account to perform only read operations, meaning account will only synchronize users, then you can add
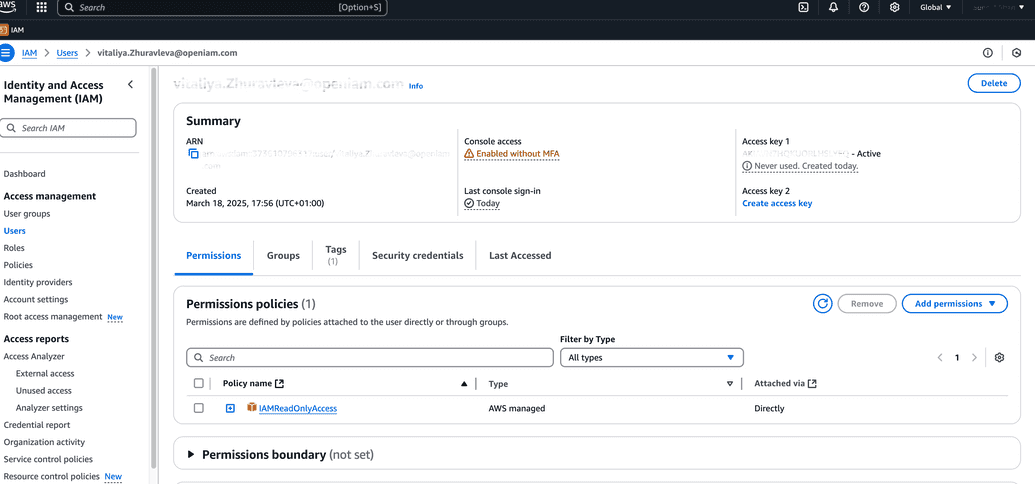
IAMReadOnlyAccess.Click Next, review the user data and create the user. Now you have a service account, access key of which will be used in OpenIAM's Managed system.
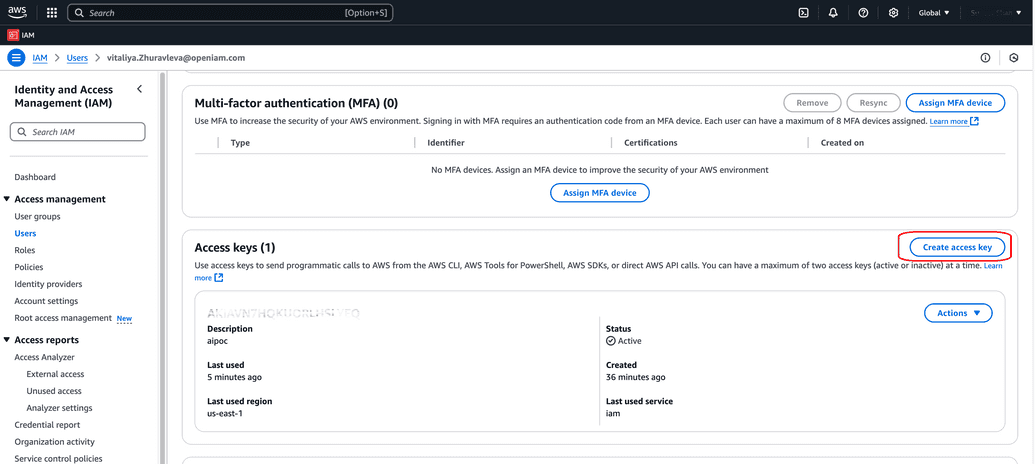
Under the root user, create an access key for the service user you have just created. There is no need of grating permission to create an Access key to this user since as a supersecurity administrator, root user can create those for other users.
The Access key ID is the login ID. Copy it into respective field in OpenIAM Managed system configuration window.
When the Access key was generated by WAS, it also generated a secret for it that the user was to save on their computer. This secret needs to be copied into a Password field in OpenIAM Managed system configuration window.
Here, you can use either one. Access key for both systems, or you can choose to use different ones.

Policy map
For AWS systems, the default policy map supports the userName, password, groups and userPath attributes.
Synchronization
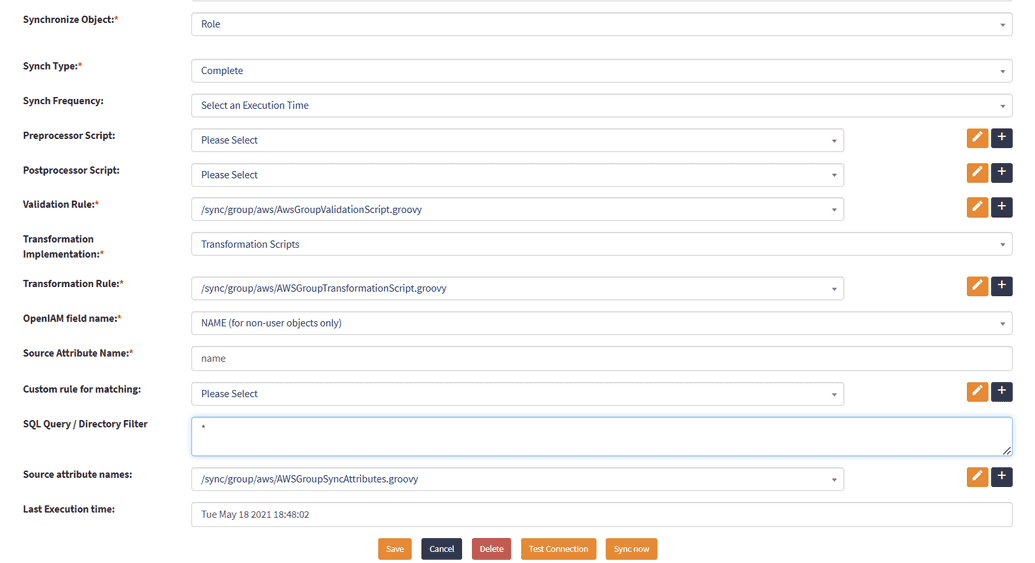
OpenIAM offers two out-of-the-box synchronizations configurations for AWS connector. They are AWS User Sync and AWS Group Sync and can be used "as is" or amended to suit your business purposes.
For example the default synchronization object in OpenIAM is selected as Roles. Hence, when synched, OpenIAM will search for Roles in AWS system. Here, there are no filters for Role objects, you can insert the * into the search query field and the roles will be synchronized.
In case you want to synchronize User groups object in AWS, then change the synchronization object to Groups. For AWS groups, OpenIAM supports search-only operations. It doesn't support creating or deleting groups. The search is performed in both IAM and Identity center in AWS and then you can save them in OpenIAM.
For synchronizing Policies object, in its turn, select Role as synchronization object and make sure the search query contains the word policy. Note that limitation for number for policies to be synchronized is a 1000. Additionally, the attributes that can be synchronized from the policy objects are name, arn, path and description.
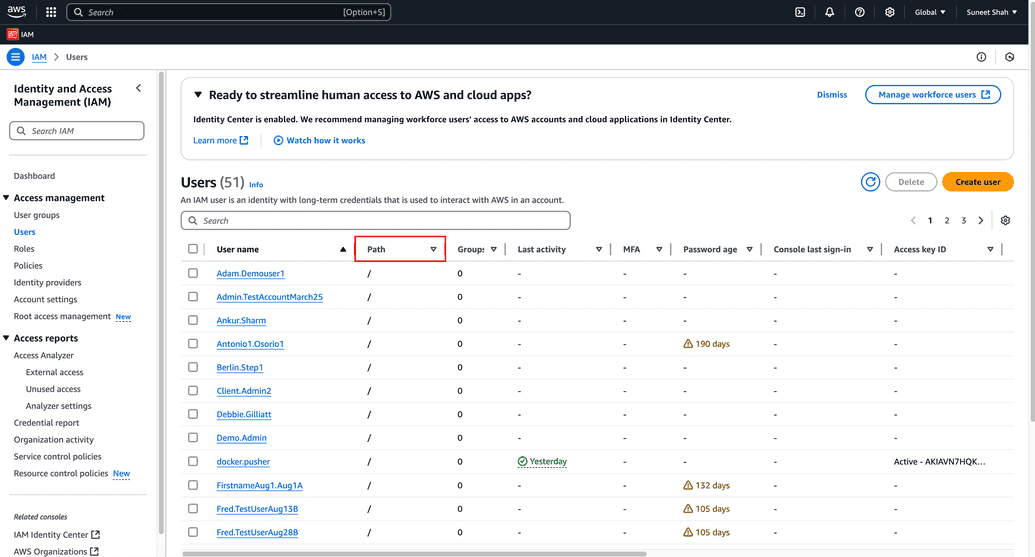
AWS User Sync synchronization configuration works with searching for users. In both IAM and Identity Center, OpenIAM supports deleting users, resetting password, saving and updating users, and synchronizing (search). To search for the user properly, make sure that the user path is inserted correctly into synchronization configuration in OpenIAM. For IAM in AWS, the user path is shown in Path column in User menu. In Identity Center, the search is performed for all users without any filters.
