Self registration
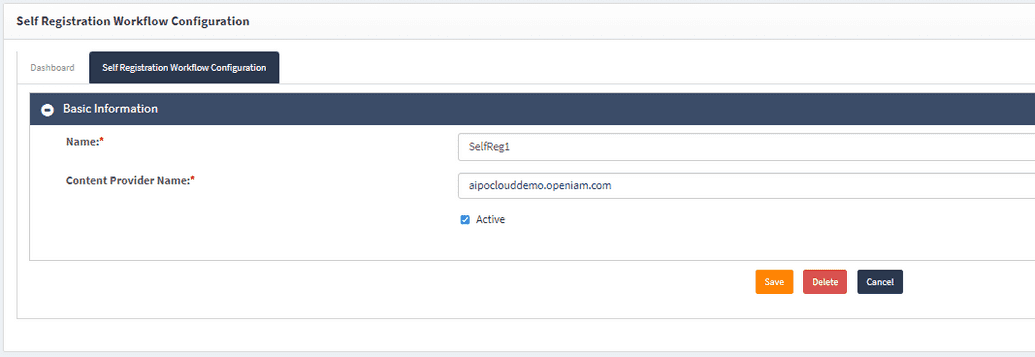
OpenIAM provides functionality from the webconsole to customize workflows for self registration forms. These workflow configurations can be linked to various content providers to provide custom registration pages for specific user populations such as employees, contractors and customers.
The sections below describe how to create and modify these configurations respectively.
Create new self registration configuration
Select Administration > Self Registration Configuration.
Select Create from the left-hand menu. Enter the Name of the workflow configuration, and select the Content Provider the configuration will be linked to. Select Active to make the self registration form visible.
- Select Save. The workflow configuration page will expand to allow customization of the first step of the workflow. The table below provides a description of these fields.
| Field | Description |
|---|---|
| Self Registration Workflow Steps | By default, the system creates the first step for the workflow automatically. |
| Add New Self Registration Workflow Step | Selecting this button creates a new workflow step that can be added to any workflow configuration. Enter the Name and Description, and select a Page Template from the drop-down list. To create a new page template during the customization of this step, select Create New Page Template. Select Add. |
| Name | The name of the workflow configuration. |
| Description | The description of the workflow configuration. |
| Page Template Search | A page template is created automatically for this step of the workflow. You may alternatively choose a page template from the drop-down list. Please note these templates can also be accessed by selecting Administration > Page Templates. |
| Custom Validation Groovy Script | From the drop-down list, choose a Groovy script for validation of user input during this workflow step. |
| Custom Javascript | Custom Javascript files provide additional elements to page templates such as field descriptions. Enter the path to the Javascript file. |
| Selected Template Fields | From the drop-down list, choose the fields to be displayed during this workflow step. The table below this field will show a list of the added template fields. Modify the added fields by selecting the pencil icon from the Actions column. |
What's next? refers to the action to be executed by the workflow upon completion of this step. Selecting Check condition and apply actions based on it will evaluate the user input against pre-defined conditions and execute actions based on a positive or negative result. Selecting Apply action will execute the same action regardless of the values entered by the user.
| Option | Description |
|---|---|
| Check condition and apply actions based on it |
|
| Apply action |
|
- Select Save. Select the tab labeled Dashboard to view a visual representation of the self registration workflow.
Note: in the Selected Template Fields field, one of the options is Supervisor. It is not a drop-down list, but a text field that requires the user to enter the email address of his/her sponsor. OpenIAM allows for validation of the user through a Groovy script named SponsorValidator.groovy. The script checks whether the specified supervisor can be a sponsor account for the new user and is executed after the user selects Submit. This provides additional security, and the script can be customized to have logic as required. An example of the result is shown below.
In case validation for this field is not needed, use the default Groovy script that does not include validation conditions found at /selfservice/selfregistration/SponsorValidator.groovy.
Modify existing self registration configurations
- Select Administration > Self Registration Configuration.
- Enter the Name of the self registration workflow configuration and/or select the Content Provider Name to filter the results. To modify a workflow configuration, select the corresponding pencil icon from the Actions column.

