Import Roles
This section describes how you can develop your own transformation script to import roles. While there are several OTB example, there will be times when its necessary to create your own.
The steps below assume that you have already completed the Synchronization configuration described in the Administrators guide.
While the example below is based on a CVS, the concepts will work with any connector as well. You will need to adjust the incoming source attribute name.
Assume that we are working with the following CSV file:
NAME, DESCRIPTION, CUSTOM_ATTRIBUTE_1, APPROVER_1, ROLE_OWNER, ROLE_ADMIN,PARENT_ROLEDEVELOPER,Developer role granting access to common tools, ATTR-1-VALUE1, SUPERVISOR,donald.duck,elmer.fudd,NULLSR_JAVA_DEVELOPER, Senior Java Developer role,ATTR-1-VALUE2,michael.smith ,donald.duck,elmer.fudd,DEVELOPER
While this file appears to be trivial, creating a Groovy script to import this file will demonstrate how to:
- Map primary attributes to the Role object
- Add custom attributes
- Add approvers
- Assign role owners and admin
- Create hierarchical relationship
Each of above topics will be covered in order they are shown above.
Create new groovy script
The first step in developing a transformation script is to create the body of the script. You can do this by going to Webconsole -> Administration -> Groovy Manager. From the Groovy manager, select the New button has shown below.

Next create the body of the script as show in example below (you may paste the example below to help get started). There are a few things to now when doing this:
- Class name below and the Groovy script name must be the same; Change the name to suite your needs. It should be something meaningful to aid in maintainability.
- Class must extend
AbstractRoleTransformScriptas shown below - Class must override
execute()andinit()shown below.
The execute() and init() will be called by the synchronization framework when synchronization starts. The execute() method is where all the work will need to happen.
import org.openiam.base.AttributeOperationEnumimport org.openiam.idm.srvc.continfo.dto.Addressimport org.openiam.idm.srvc.continfo.dto.EmailAddressimport org.openiam.idm.srvc.continfo.dto.Phoneimport org.openiam.idm.srvc.org.dto.Organizationimport org.openiam.idm.srvc.role.dto.Roleimport org.openiam.idm.srvc.role.dto.RoleStatusimport org.openiam.idm.srvc.role.dto.RoleAttributeimport org.openiam.sync.service.TransformScriptimport org.openiam.idm.srvc.synch.dto.LineObjectimport org.openiam.idm.srvc.user.dto.Userimport org.openiam.idm.srvc.user.dto.UserAttributeimport org.openiam.idm.srvc.user.dto.UserStatusEnumimport org.openiam.idm.srvc.user.dto.UserToRoleMembershipXrefimport org.openiam.provision.dto.ProvisionUserimport org.openiam.provision.type.Attributeimport org.openiam.idm.srvc.membership.dto.AbstractMembershipXrefimport org.openiam.sync.service.impl.service.AbstractRoleTransformScriptimport org.openiam.common.beans.mq.RoleRabbitMQServiceclass MyCSVRoleTransformationScript extends AbstractRoleTransformScript {/* OTB password policy and role type. customize for your needs. */static final String DEFAULT_PASSWORD_POLICY_ID = "4000";static final String PROVISION_ROLE_METADATA_TYPE_ID = "PROVISION_ROLE";@Overrideint execute(LineObject rowObj, Role role) {println "** - Role Transformation script called."try {populateObject(rowObj, role)}catch(Exception ex) {ex.printStackTrace();println "** - Transformation script error."return -1;}println "** - Transformation script completed."return TransformScript.NO_DELETE}private void populateObject(LineObject rowObj, Role role) {}@Overridevoid init() {}}
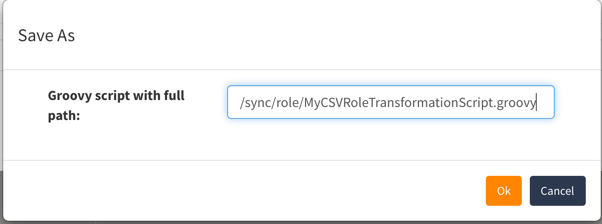
Save the script. OpenIAM will ask you for a path. Unless you defined a directory structure for your scripts, consider using /sync/role/.
OpenIAM will compile your script. Only if its free of compilation errors, will the file save successfully. Otherwise, the compilation error will be shown.
Map primary fields
The next step is to develop the populateObject() method that was created in the previous step as a placeholder. We can start by mapping the primary fields such as NAME and DESCRIPTION from the CSV file.
Add the following code fragment to the populateObject() method as shown below.
/* isNewUser is inherited from AbstractTransformScript and determines if this is a new object. */if (isNewUser) {role.id = null;role.policyId=DEFAULT_PASSWORD_POLICY_ID;role.mdTypeId=PROVISION_ROLE_METADATA_TYPE_ID;role.status=RoleStatus.ACTIVE.name();}def columnMap = rowObj.columnMaprole.name = columnMap.get("NAME")?.valuerole.description = columnMap.get("DESCRIPTION")?.value
Add custom attribute
The next step in developing our script it to add custom attributes. All entitlement objects in OpenIAM are designed to support custom attributes from both the UI, API(including groovy scripts). The synchronization framework will take care of passing fields from the CSV file to the synchronization script. Follow the steps below to process the custom attributes in the script.
Add the method shown below to your script, after the populateObject() method.
private void addAttribute(Role r, String attrName, String attrValue) {if (r.roleAttributes?.find({ attrName.equalsIgnoreCase(it.name) })) {RoleAttribute ra = r.roleAttributes?.find({ attrName.equalsIgnoreCase(it.name) })ra.addValue(attrValue)} else {RoleAttribute ra = new RoleAttribute()ra.setRoleId(r.getId())ra.setName(attrName)ra.addValue(attrValue)if (!r.roleAttributes) {r.roleAttributes = new HashSet<RoleAttribute>()}r.roleAttributes.add(ra)}}
Next, call this method from your populateObject(). Include the custom attribute column name from your CSV file as shown below.
Attribute attrVal = columnMap.get("CUSTOM_ATTRIBUTE_1")if (attrVal) {this.addAttribute(role, "CUSTOM_ATTRIBUTE_1", attrVal.value)}