Configuring Certificate Based Authentication
This section provides instructions on how to configure Certificate Based Authentication in OpenIAM in simple steps.
- Create Certificate Authority (CA) to create and sign Certificates, that will be used in authentication This can be done using Linux command prompt and commands as follows:
openssl genrsa -out ca.key 2048openssl req -new -x509 -days 3650 -key ca.key -out ca.crtecho -n "00" > file.srl
Enter CA password (not less than 4 symbols) and CA info. For example:
Country Name (2 letter code) [AU]:USState or Province Name (full name) [Some-State]:NYLocality Name (eg, city) []:NewYorkOrganization Name (e.g., company) [Internet Widgits Pty Ltd]:OpenIAMOrganizational Unit Name (e.g., section) []:developmentCommon Name (e.g. server FQDN or YOUR name) []:*.openiamdemo.comEmail Address []:admin@openiamdemo.com
ca.key is a private key and should be stored in safe place. It will be used to sign client's certificates. ca.crt is a certificate that should be installed in Apache and in client browser. file.srl is a file that store current serial that should be increased every time new client certificate is signed.
- Create client certificate
2.1 Create sign request (CSR):
openssl genrsa -out user1.key 2048openssl req -new -key user1.key -out user1.csr
You will be prompted for key password and Certificate info. For example:
Country Name (2-digit code) [AU]:USState or Province Name (full name) [Some-State]:NYLocality Name (e.g. city) []:NewYorkOrganization Name (e.g. company) [Internet Widgits Pty Ltd]:OpenIAMOrganizational Unit Name (e.g. section) []:developmentCommon Name (e.g. server FQDN or YOUR name) []:user1Email Address []:user1@openiamdemo.com
2.2 Sign CSR using CA.
openssl x509 -req -days 365 -in user1.csr -CA ca.crt -CAkey ca.key -CAserial file.srl -out user1.crt
2.3 Using PEM certificate in curl or from applications
To use PEM certificate in curl or from applications, you need to create PEM certificate that will contain both certificate and key. To use it without user interaction, you also need to clear PEM password in a key.
To remove PEM passphrase from key, if it exists, and to combine user1.crt with key without passphrase, use the following.
openssl rsa -in user1.key -out user1.no_pass.keycat user1.crt > user1.pemcat user1.no_pass.key >> user1.pem
Now it is possible to usr user1.pem in curl requests (in --cert parameter):
curl -k —cert user1.pem https://lnx1.openiamdemo.com/webconsole/
- Convert client certificate to pksc12 format that can be used for import into browser. This only needed if you want to use client certificate from browser.
openssl pkcs12 -export -clcerts -in user1.crt -inkey user1.key -out user1.p12
You will be prompted for Export Password:
Enter Export Password:Verifying - Enter Export Password:
Generate and use your new Export Password here. You will need it to add your .p12 certificate into browser.
The user1.p12 and ca.crt files need to be copied to client's computer and installed in browser. User also will need Export Password to add user1.p12 into browser.
- Configure Apache This step is only needed if you want to use client certificate from browser.
https should be already configured on Apache. To configure using client certificates in it, follow the next steps.
4.1 Configure CA bundle on linux box with apache installed
Do not overwrite /etc/pki/tls/certs/ca-bundle.crt!
Create backup and use >> to append data instead of overwrite.
openssl x509 -in ca.crt -text >> /etc/pki/tls/certs/ca-bundle.crt
4.2 Add or check that this line is already added in Apache ssl configs:
SSLCACertificateFile /etc/pki/tls/certs/ca-bundle.crt
4.3 Add this configs in virtual host config. It'll inform client's browser to send client certificate in requests:
SSLVerifyClient optional
Note that Apache should be configured to use https to be able to send client's certificate to server. Otherwise, http will not work.
4.4 Restart Apache
service httpd restart
- Configure Authentication Provider
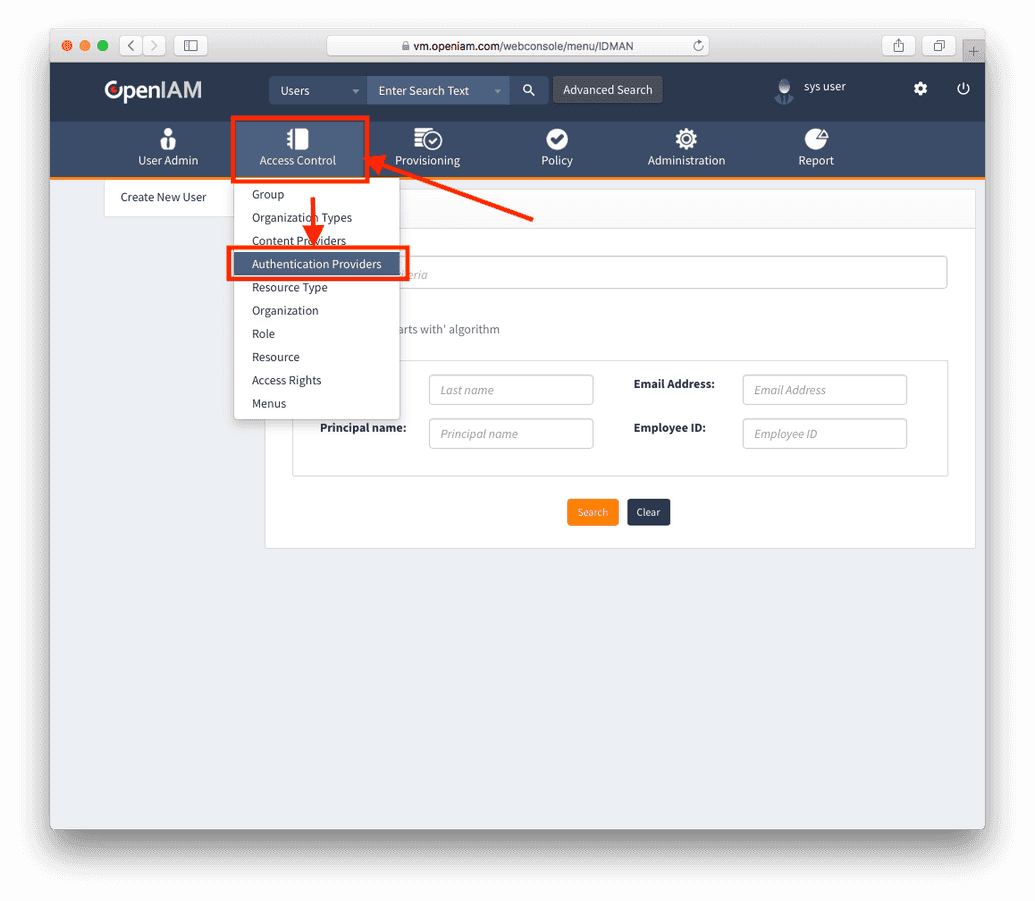
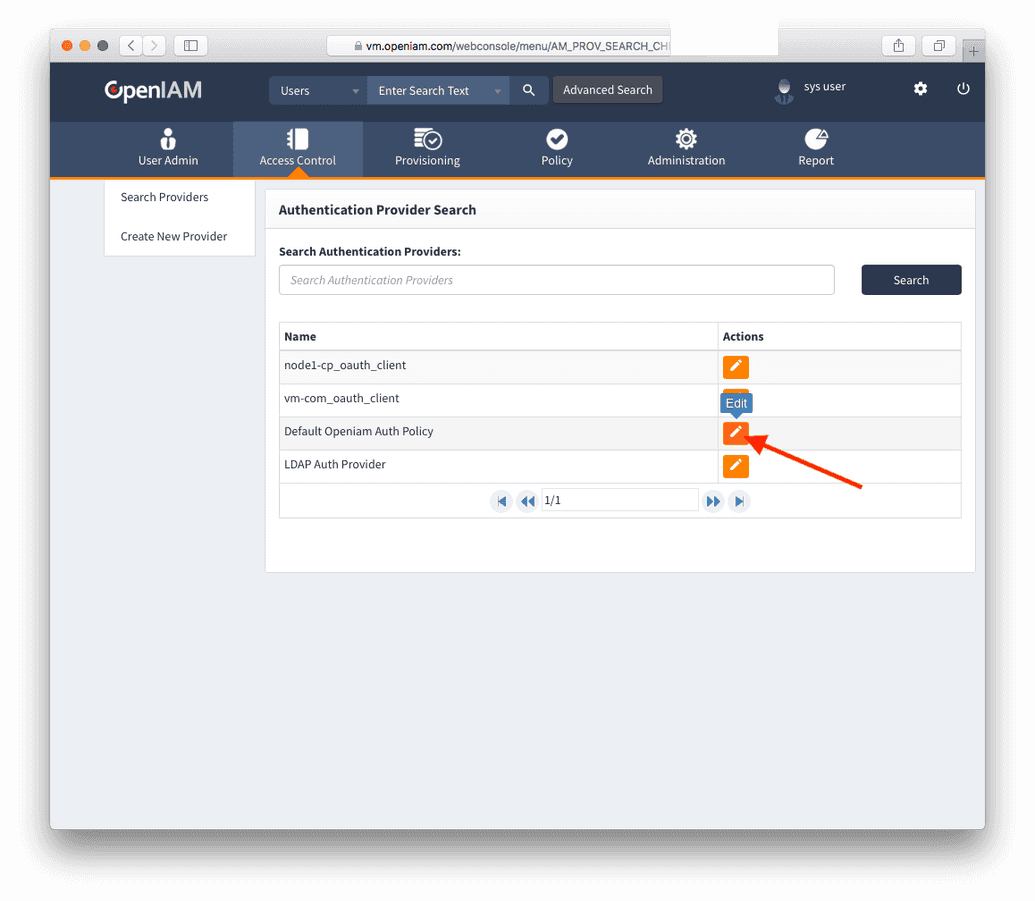
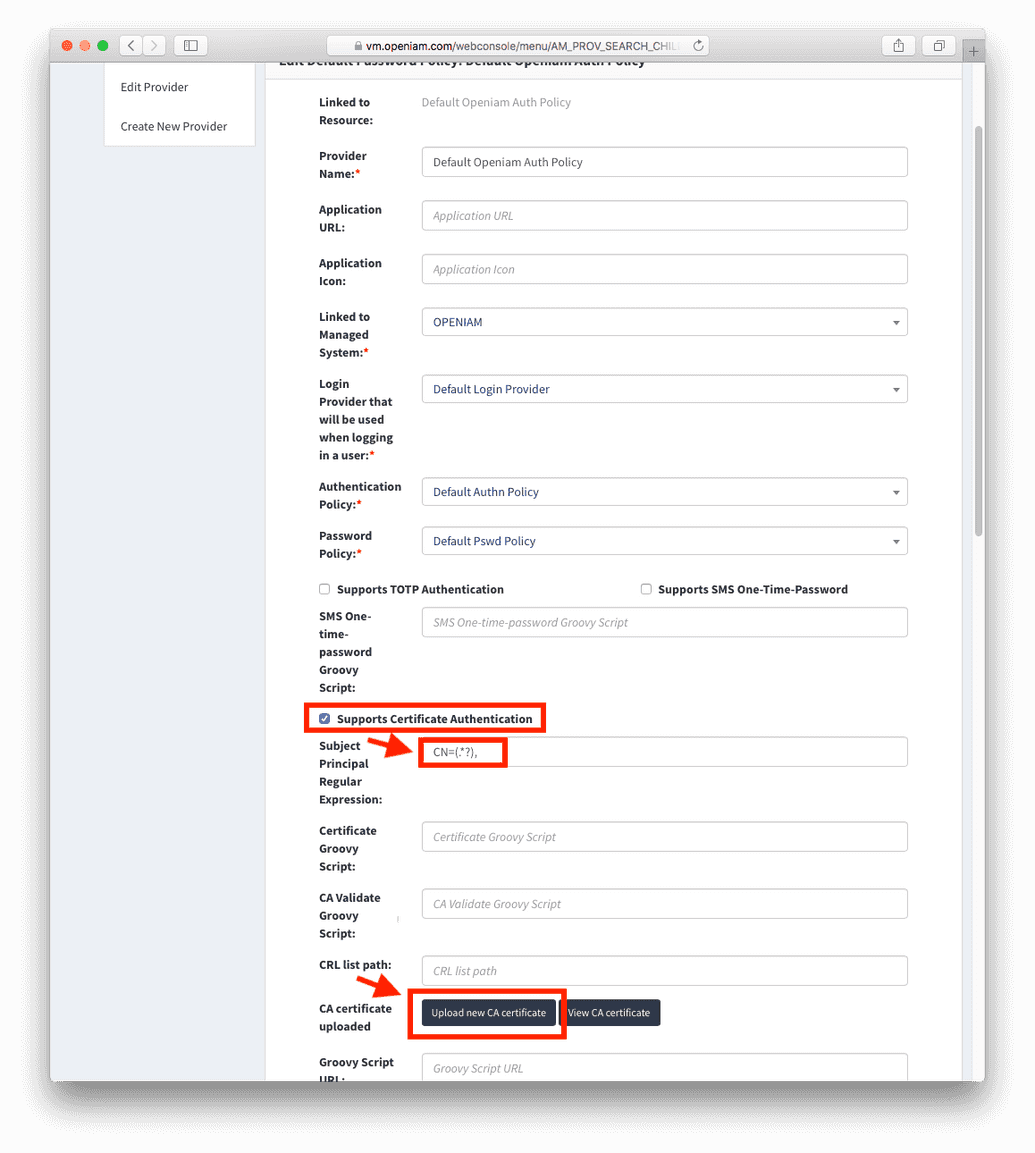
Navigate to the the current Authentication Provider, and enable Certificate Based Authentication, as shown in figures below.
Now, there exist two options:
- Add a Regular Expression to the Certificate. This will assume that the matching group in the Regex is the principal. The Regular Expression in the example is:
CN=(.*?); or - Define a Custom Groovy Script, which will have custom logic to parse the Certificate to get the principal.
5.1 Optional step: Configure CA Validation script
The ExampleDefaultCACertCheck.groovy is:
import org.openiam.am.cert.groovy.DefaultCACertCheck;import org.openiam.exception.BasicDataServiceException;import org.openiam.idm.srvc.auth.dto.Login;import org.apache.commons.lang.StringUtils;import org.openiam.base.ws.ResponseCode;import java.io.File; import java.nio.file.Files;import javax.security.cert.X509Certificate;class ExampleCACertCheck extends DefaultCACertCheck {public ExampleCACertCheck() { super(); }public Boolean resolve() throws BasicDataServiceException {try {clientCert.checkValidity();} catch (Exception ex) {throw new BasicDataServiceException(ResponseCode.CERT_CLIENT_INVALID, ex.getMessage());}if (caCert != null) {try {caCert.checkValidity();} catch (Exception ex) {throw new BasicDataServiceException(ResponseCode.CERT_CA_INVALID, ex.getMessage());}try {clientCert.verify(caCert.getPublicKey())} catch (Exception ex) {throw new BasicDataServiceException(ResponseCode.CERT_INVALID_VERIFY_WITH_CA, ex.getMessage()); }} else {throw new BasicDataServiceException(ResponseCode.CERT_CA_INVALID, ex.getMessage()); } return true; }}
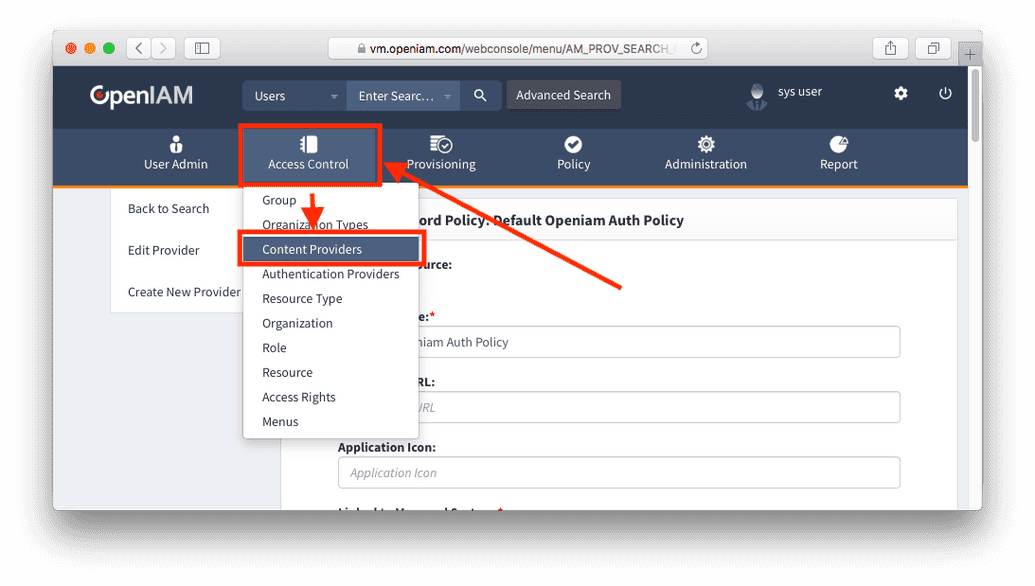
- Configure Content Provider
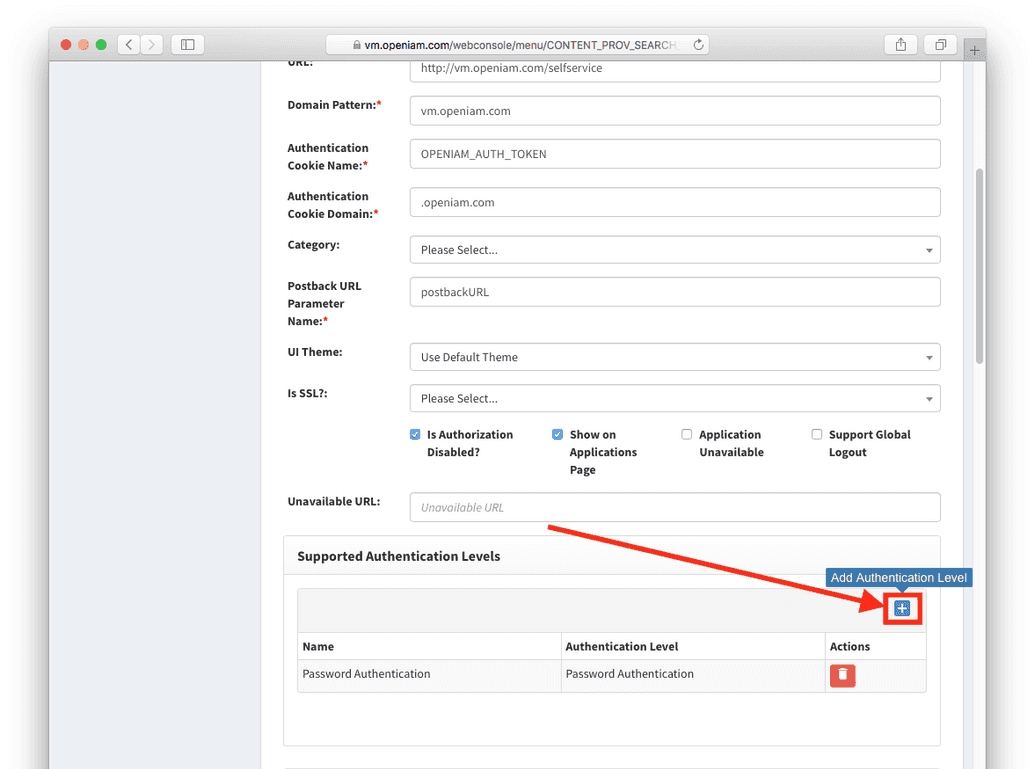
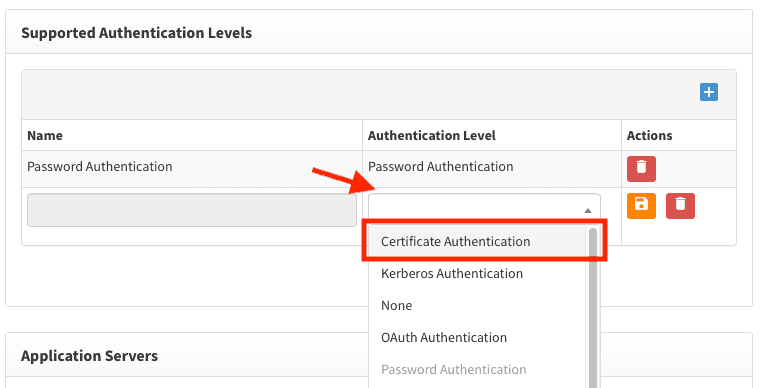
You can do so in the Content Provider Screen. Navigate to Authentication Levels and add 'Certificate Authentication' as shown below.
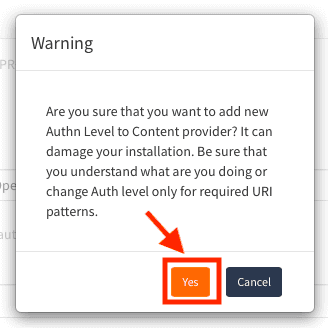
If you see warning pop up about modifying default settings, as shown below, click 'Yes':
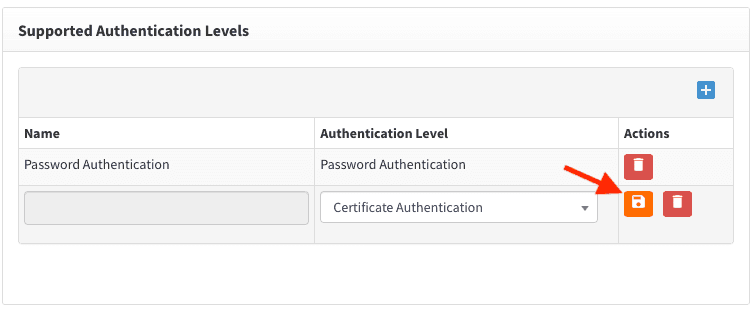
Add 'Certificate Authentication' using steps, described below:
Enabling Certificate Based Authentication for a Specific URI pattern can be done in the URI Pattern screen.
- Configure client's browser
User will need to copy user1.p12 and ca.crt files on local computer and install them in browser: browser will check user1.p12 using ca.crt before send it in request. This is why you need to install both.
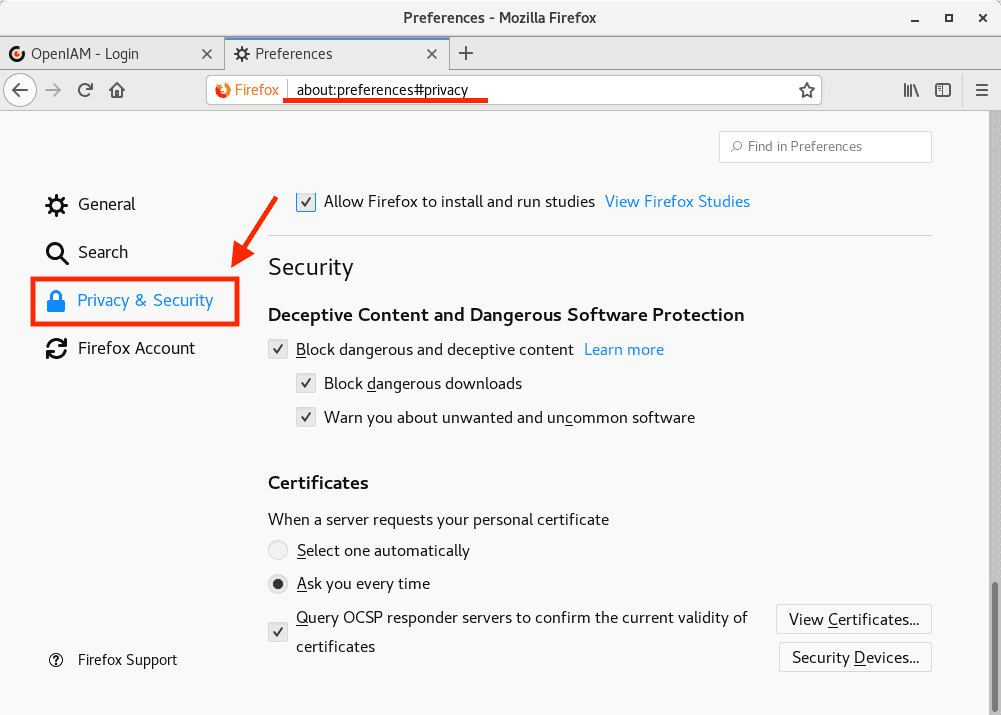
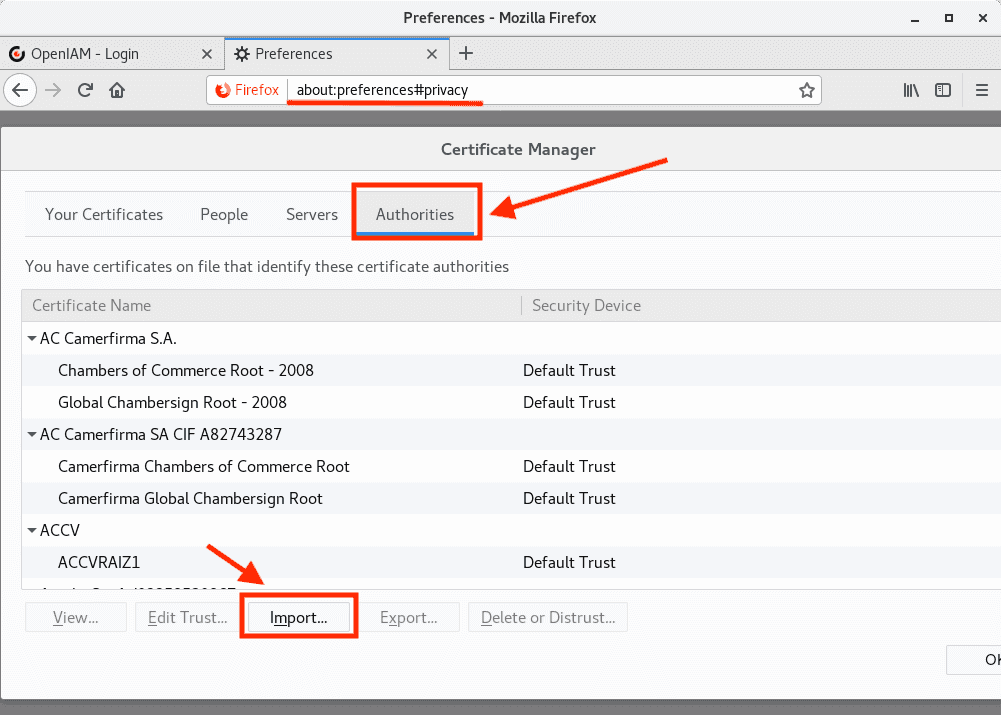
7.1 Installing ca.crt into browser
Go to certificates config:
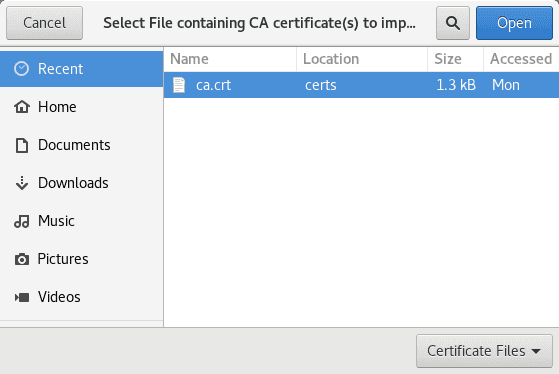
and import ca.crt in Authorities, as follows.
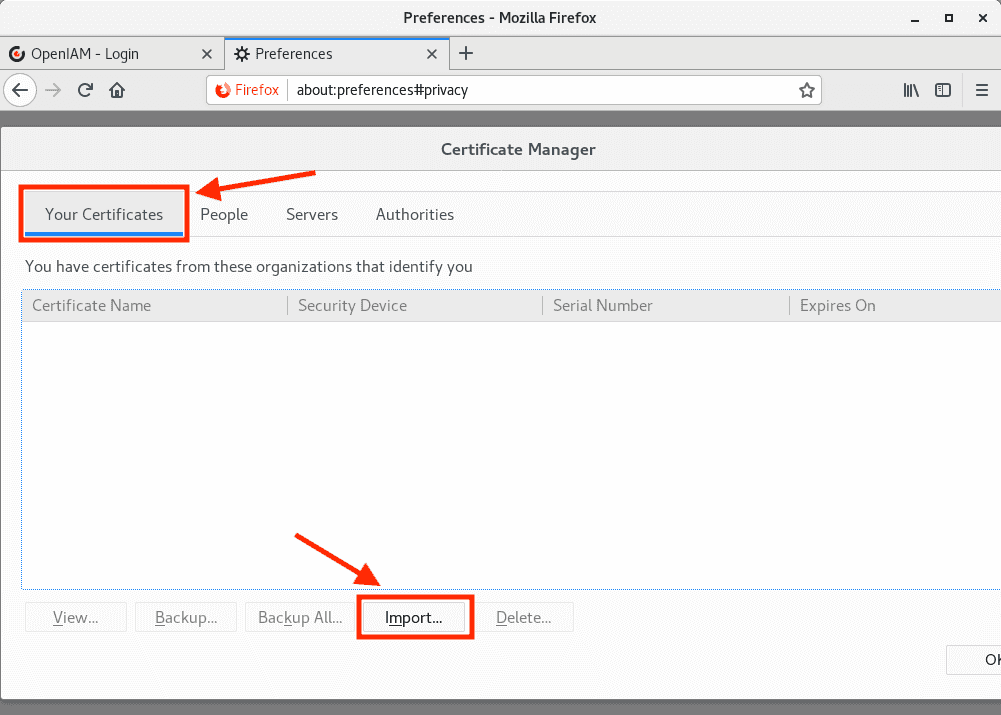
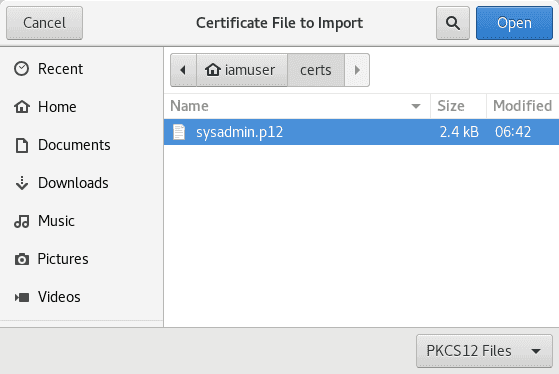
7.2 Install user1.p12 into 'Your Certificates'
You will also need Export Password that you used when creating a .p12 file.
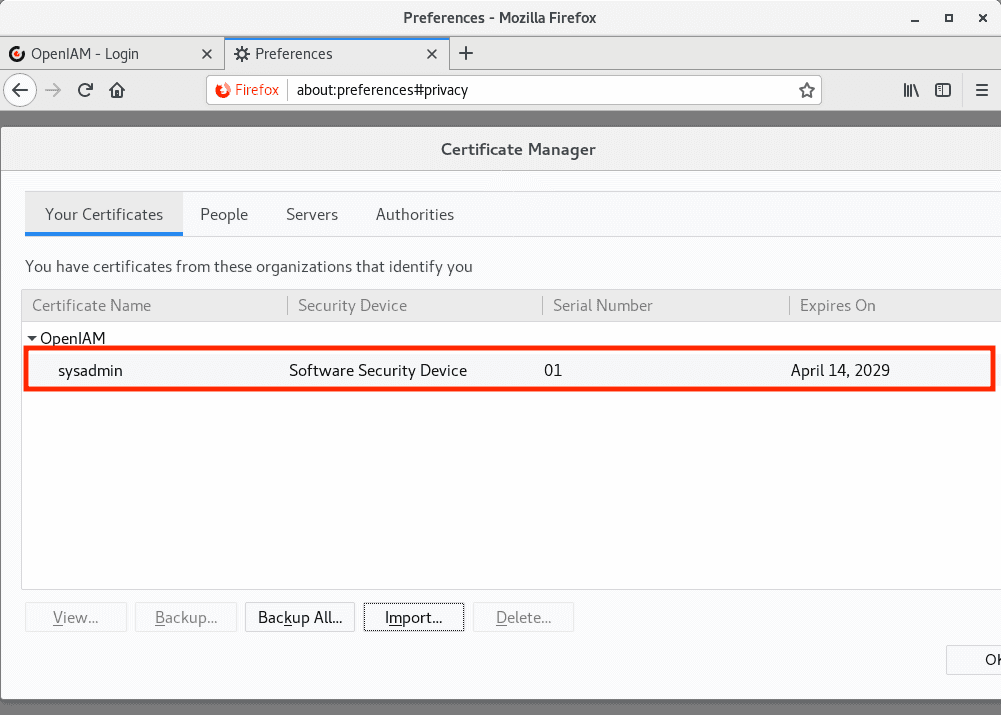
After, check that user certificate was added, as follows.
7.3 Finishing steps
Now restart browser and then hit an url with configured 'Certificate Authentication' and then client certificate will be send to server.
Click 'OK' and you will see this dialog to send your certificate to server.
