Create Postman Collection
Once the Authentication provider has been configured on the OpenIAM, we can define a new collection in Postman using the steps below.
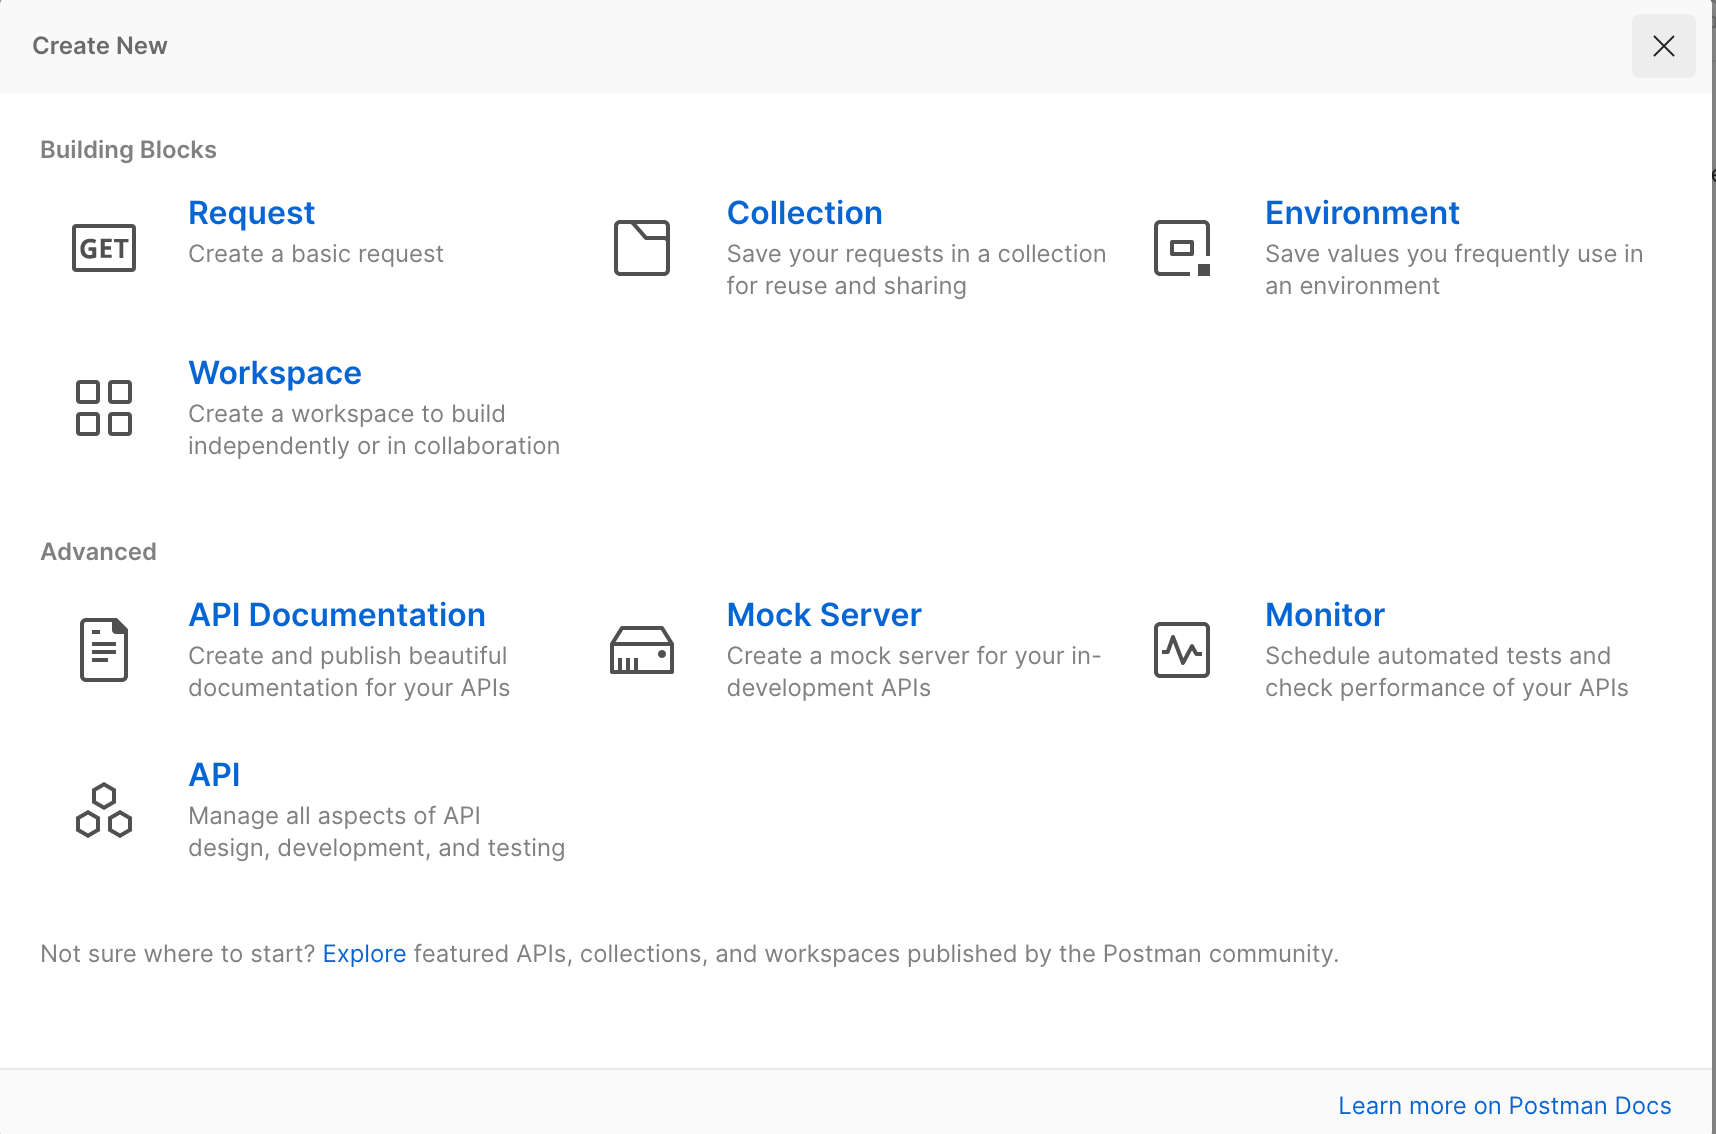
- In Postman, select New > Collection from the screen shown below.
- Go to the
Variablestab and create an entry for theclientidandclientsecretas shown in the example below. Both of the values can be found on in your OpenIAM Authentication provider configuration.

Save the configuration.
- Go to the
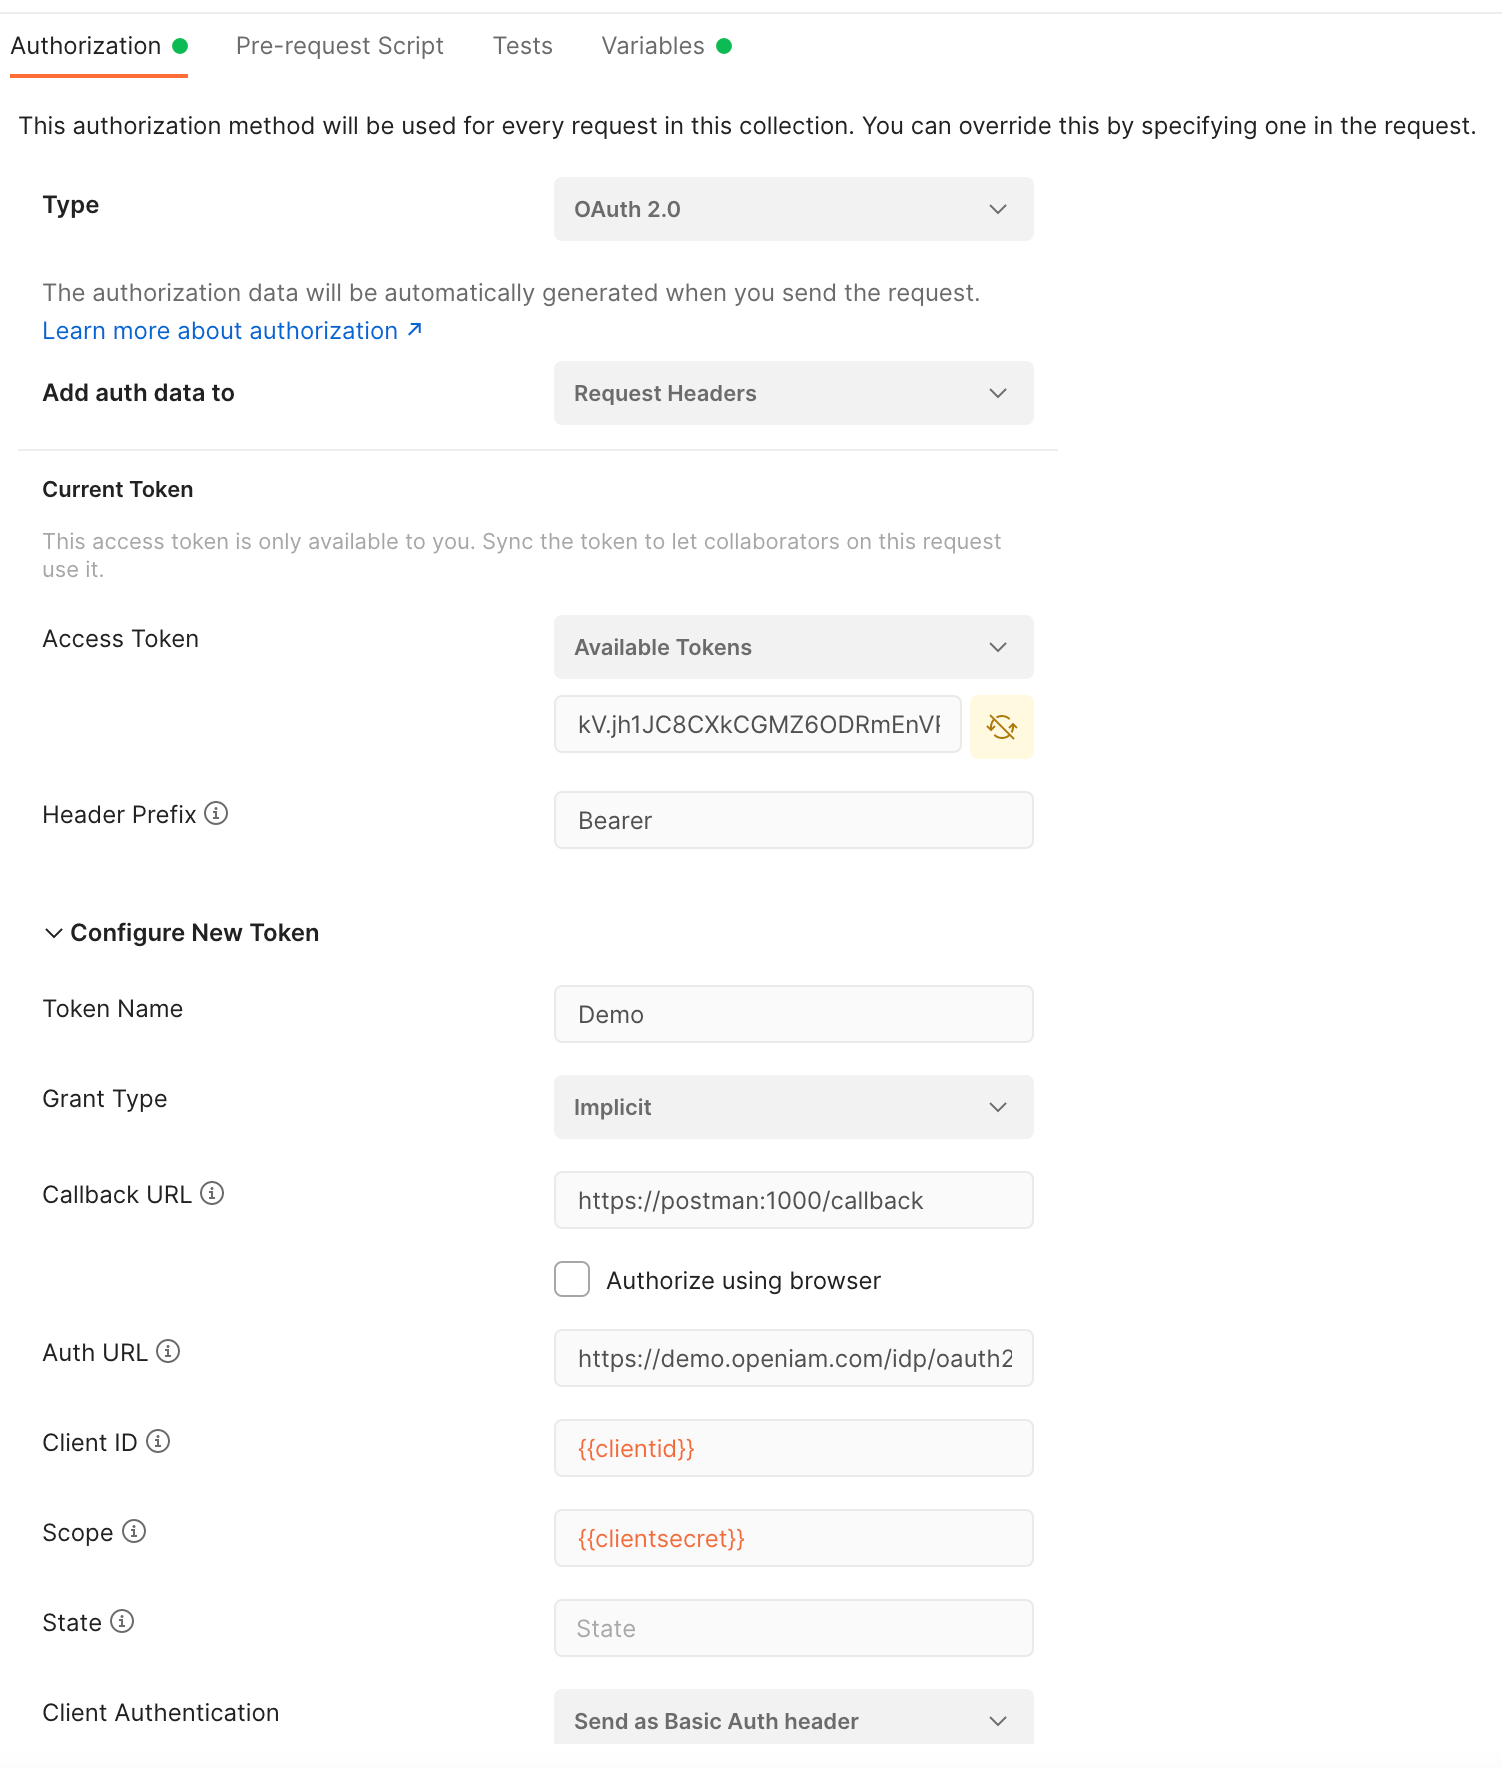
Authorizationtab and configure the values listed below.
| Field Name | Description |
|---|---|
| Type | Select oAuth 2.0 from the dropdown. |
| Add auth data | This determines how auth data should be passed. You can choose between Request Headers and Request URL. Select Request headers |
| Token name | Token name can be any name that you want to assign to your access token. |
| Grant type | Describes how the auth client (postman) will interact with the oauth server (openiam server). This value MUST be the same as the Grant type that you select during the OpenIAM Authentication provider configuration which was Implicit |
| Callback URL | Callback URL should be set to: https://postman:1000/callback |
| Authorize using browser | This checkbox should be left unchecked |
| Auth URL | The Auth URL is the endpoint URL which is used to get the authorization code. This value should be set to: https://[openiam server host]idp/oauth2/authorize. |
| Client ID | Enter the following string {{clientid}}. This tells Postman to use the ClientId variable that you defined earlier. |
| Scope | Enter the follwowing string: {{clientsecret}}. This tells Postman to use the Client Secret variable that you defined earlier. |
| Client Authentication | Select Send as basic headers. |
Once you have defined the above parameters, save your configuration.
Then click on Get new access token. This will start the authentication process and postman will show the OpenIAM login screen. After successful authentication, you are ready to make API calls on your OpenIAM instance.