Configure approval workflows
This section is aimed at describing how to create approval workflows (aka Approver associations) on either Roles, Groups or Resources.
Defining an approval flow
OpenIAM allows you to define the approval flow at either the application level (Managed System or Manual Managed System) or at the application entitlement (Group, Role, Resource) level. When working with application which have hundreds or thousands of entitlements, it may be better to define at the approval flow at at the application level and then override that flow at the entitlement level if needed. This approach is often more maintainable than defining approvers at the entitlement level only.
To define approvers follow the steps below.
- Find the application or entitlement that you want to define approval flow for
- Applications
- Go to Webconsole -> Access control -> Resource
- Filter by either
Managed SystemorManual Managed systemin the Type column - Find the name of your application by searching in the Name column
- Click on the button in the Actions column to see the application details
- Entitlement
- First enable entitlement level approval by going to:
- Webconsole -> Adminstration -> System configuration
- Go to the
Workflowtab - Enable the checkbox labeled
Use approver association or role/group instead of resource.
- Determine the type entitlement that you need to find - Role, Resource, or Group
- Go to Webconsole -> Access control -> [your entitlement type]
- Filter by the managed system name in the Managed System column
- If your application has several types of entitlements, you can further filter by the "Metadata type" in the Type in column
- Find the name of your entitlement by searching in the Name column
- Click on the button in the Actions column to see the entitlement details
- First enable entitlement level approval by going to:
- Applications
- Define the approval flow
- Click on the
Approval Associationsmenu from the side bar - Click on the
+on the screen below. It will open up a row where you can define the approver.
- Click on the

- Complete the fields in the approval flow as described below
- Approver - Select the type of approver followed by the name of the approver. The table below describes each of the approval options.
- Notify on Approval - Select who should be notified after this step has been approved.
- Notify on Reject - Select who should be notified if this step is not approved.
- Request service level agreement parameters
- 1* - Number of reminders which should be sent to the approver to complete their task in a timely manner.
- 2* - Number of days which should elapse before sending out a reminder
- 3* - Calculated value from 1 and 2 which indicates the maximum amount of time allowed to complete this step.
- Save this row (must be done independently of the save operation on the page)
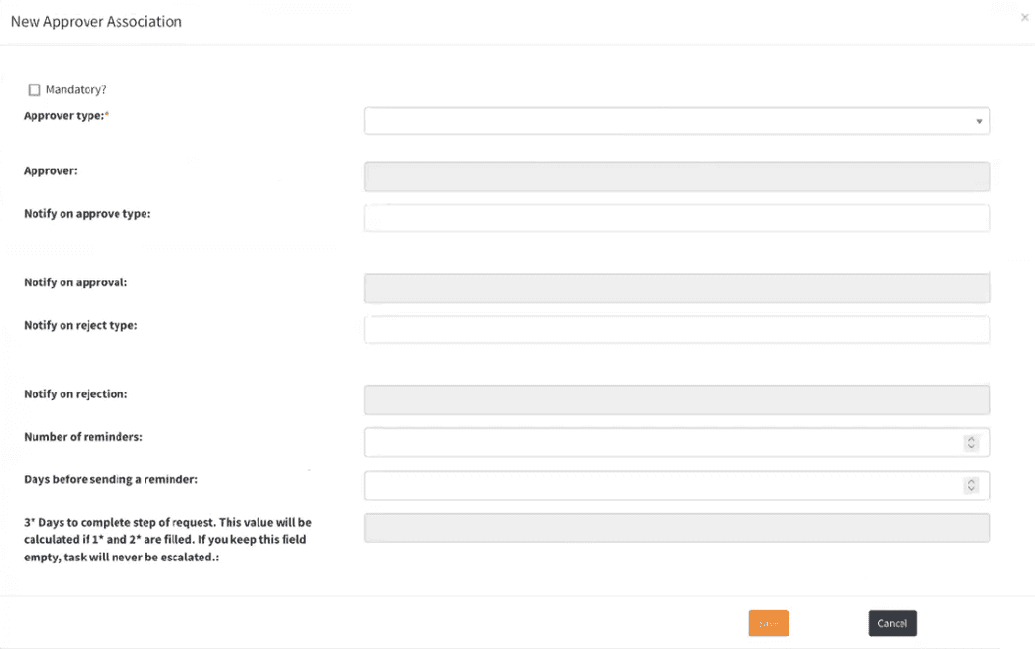
The approval flow screen is shown below.
The field description are described in the table below.
| Field | Description |
|---|---|
| Is Mandatory | Flag is used to make the step mandatory for approving. In case Is Mandatory flag is on, but there was not approver type set, the request is sent to a default approver. Usually this flag is on by default. |
| Approver type | The person who will approve or reject the access to an application. The description of this field options is given further in the document. |
| Approver | The field is filled automatically upon selecting the approver type. |
| Notify on approve type | Stands for an additional notification for a user or a group of users upon finishing this approval step. Important: this stands for preliminary approval on this particular step. The types of people being notified, in fact, corrwsponds to the Supervisor type field. As an addition, TARGET_USER here is the one, for whom the request was created. User can select several options from the dropdown. |
| Notify on approval | The field is filled automatically upon selecting the Notify on approve type field nd the subsequent fields. |
| Notify on reject type | Stands for other users/groups of users, whom one can send a rejection notification, besides users being notified by default (the requestor and the user the request is formed for). User can select several options from the dropdown. |
| Notify on rejection | The field is filled automatically upon selecting the Notify on reject type field and the subsequent fields. |
| Number of reminders (1*) | Number of reminder's to send to the approver to encourage them to complete the request. |
| Days before sending a reminder (2*) | Number of days which must elapse before reminder notice is sent. |
| 3* | Days to escalation. This value is calculated based on the values in 1 and 2. |
To add additional approval steps, simply save the first approver and repeate the steps above starting from clicking + button, as shown in the image above.
Approver Types
| Type of Approver | Description |
|---|---|
| Supervisor | The manager of the person for whom this request has been created. Note, if the manager has submitted the request, then approval for the manager will be skipped as its assumed that the manager wanted to grant this access when creating the request. |
| User | Select the user that should be the approver. |
| Group | Group of people who should be the approver. Anyone in the group can claim and approve. |
| Role | Role that should be the approver. Any role member can approve. |
| Owner | Owner that is defined on the managed system or manual managed system as the resource owner. |
| Admin | Admin that is defined on the managed system or manual managed system as the resource admin. |
Escalations
For every request that was not approved or rejected in a specified number of days (days to complete the request field from the image below), there exist two options: it can be rejected by the systems automatically or, if the Days to escallation field is not left empty, it can be escalated (aka levelled up) to the user, being higher in hierarchy than the initial approver.
User can choose the person/people the request will be escalated, by clicking a blue button on Approver Association screen, as shown below.
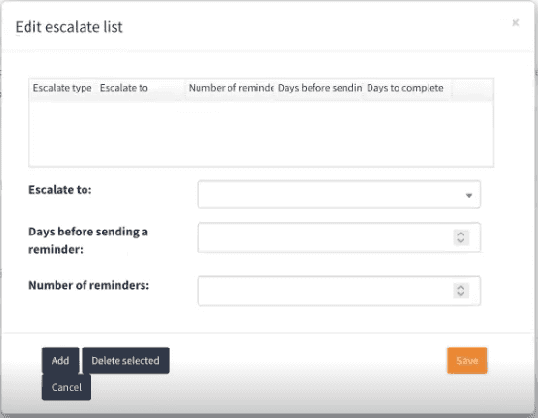
Upon clicking the mentioned button, the following window pops up.
Here, a user can create unlimited number of escallation steps by choosing a user/group of users in the Escalate to field and adding them by clicking Add button.
Days before sending a reminder and Number of reminders fields stand for when and how many reminders will be sent to the escalated approver.
Here, in case the initial approver didn't address the request, it will move forward throught steps, indicated in this window, in specified number of days. Afterwards, provided the request has an expiration date, it will be rejected by the system as expired.
It is important to mention, that escallation is regulated by a default batch task. For the requests to be escalated, it is vital that the corresponding batch task is enabled since this exact batch task moves the request upwards along the escalation hierarchy. Additionally, this exact batch task is responsible for rejecting the unaddressed requests at the set expiration date.
To do so, go to Administration -> Batch Tasks. The batch task of interest is Escalation of expired requests. Click Edit and set the flag Is enabled in the screen opened.
Notifications
In the section above, we identified that when there is a request pending for an approver, a user can opt for notifying the approver about it. However, some additional step must be taken for these notifications were possible to send.
Sending notification about pending requests is regulated by a default batch task. Hence, for a user to be able to set those notification for sending, the corresponding batch tasks have to be enabled. Otherwise, the notifications will not be sent.
To enable the mentioned batch task, go to Administration -> Batch Tasks. The batch task of interest is Notification reminders for approvers. Click Edit and set the flag Is enabled in the screen opened.
This batch task is responsible for reminder notifications only. The standard request notifications, such as mentioned in E-mail notification section below, are send by default.
E-mail notifications
For notifying the user upon the status of a request, there exist standard mail templates. They can be found at Administration -> Mail Templates. The following templates are used to notify about requests:
| Template Name | Description |
|---|---|
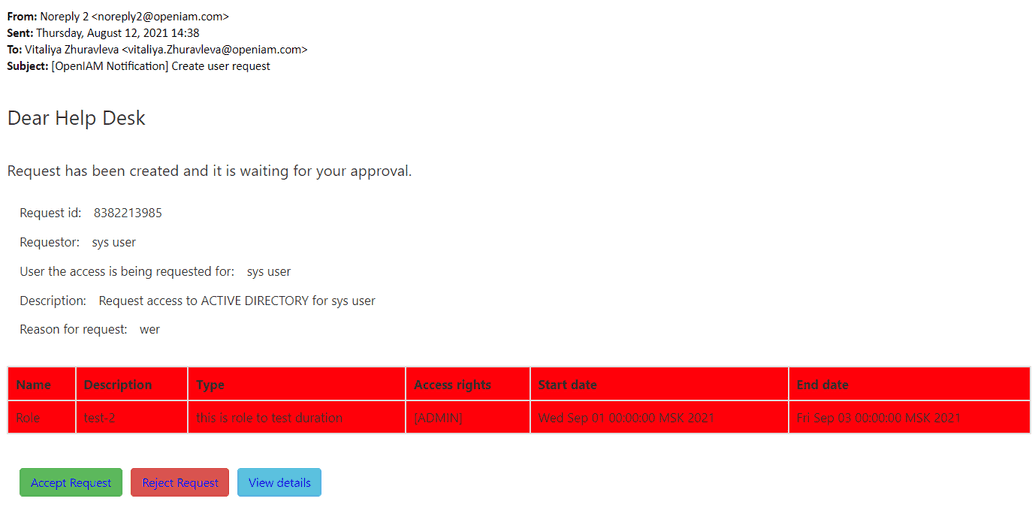
| CREATE_USER_REQUEST | Used to notify an approvr that they have a pending request. |
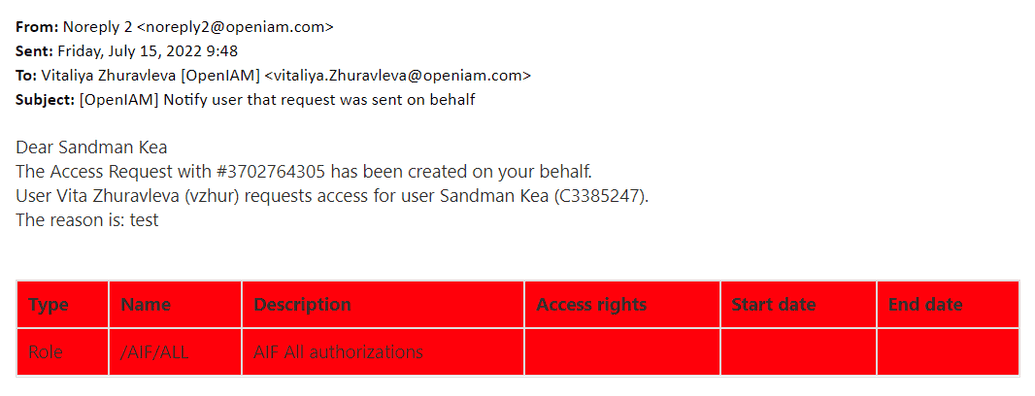
| ACCESS_REQUESTED_ON_BEHALF | Used to notify the user, for whom the access request was created. |
| CREATE_USER_REQUEST_REJECTED | Used to notify the user that their pending request was rejected. |
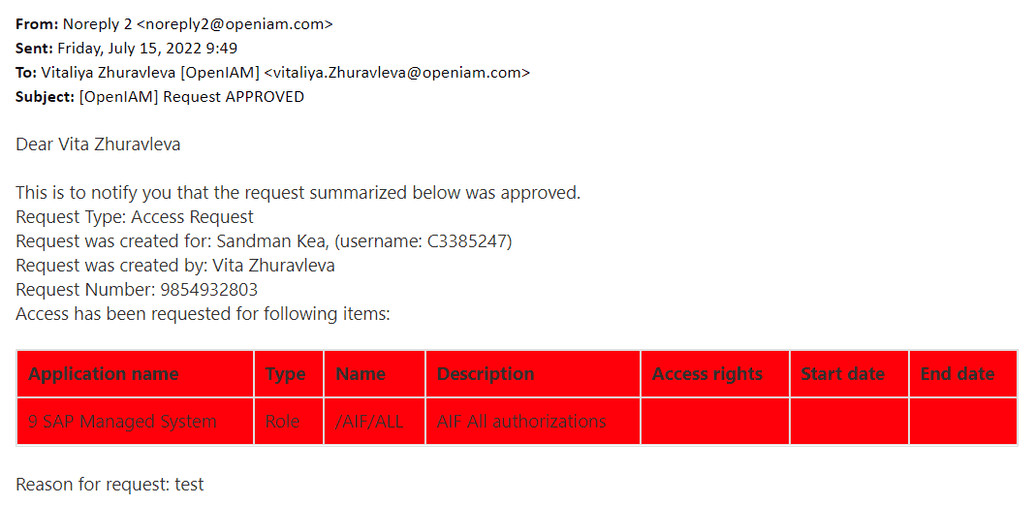
| CREATE_USER_REQUEST_ACCEPTED | Used to notify the user that their pending request was approved. |
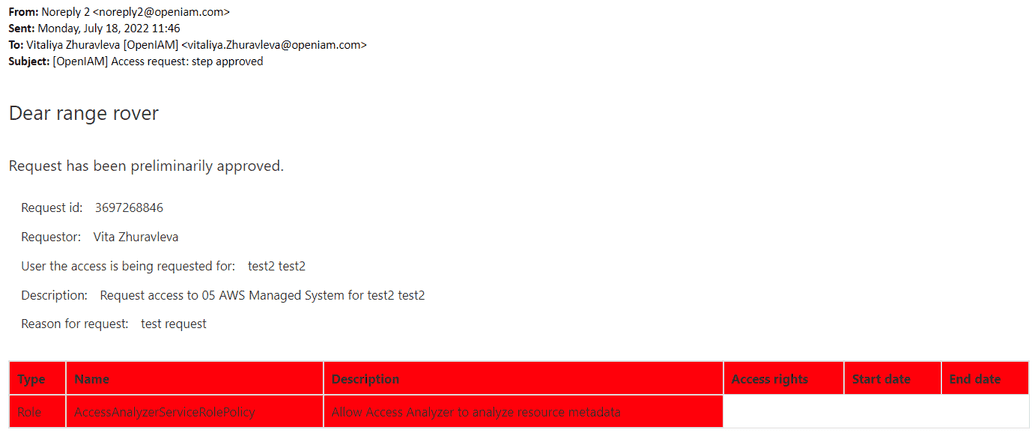
| CREATE_USER_REQUEST_STEP_APPROVED | Used to notify the user of preliminary approval of their request. |
The e-mails sent with these templates are shown below.
