Menus
Menus are a type of Resource which are used by the OpenIAM UI to gain access to specific functions. As with all resources, Menus can be used in conjunction with Roles and Groups to control the functionality provided to set of people.
Menus are a tree-like structure and there several menus the user can have access to. The top-used menu is IDM (aka Webconsole), the other of interest to a user is SelfService menu. To be able to see and use the menu branch, a user needs to be entitled to do so. Users get an access to a particular branch/-es via Roles and Groups they were addedd to. See Create Role for more details on how to add user to a Role/Group.
User can also have access to a menu in case it was made public (meaning available to all users not depending on their entitlements).
Viewing and Navigating the Menu structure
To see the menu structure, go to Webconsole -> Access Control -> Menus. Here you can search for a required menu structure - IDM (this is root menu for all Webconsole menu items), SelfService etc. Find the required menu and click Edit to see the menu tree.
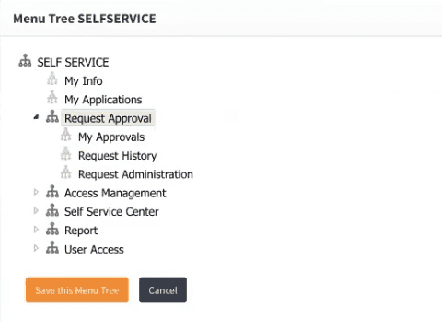
Here, you can see the required menu structure. The example of SelfService menu is shown below.
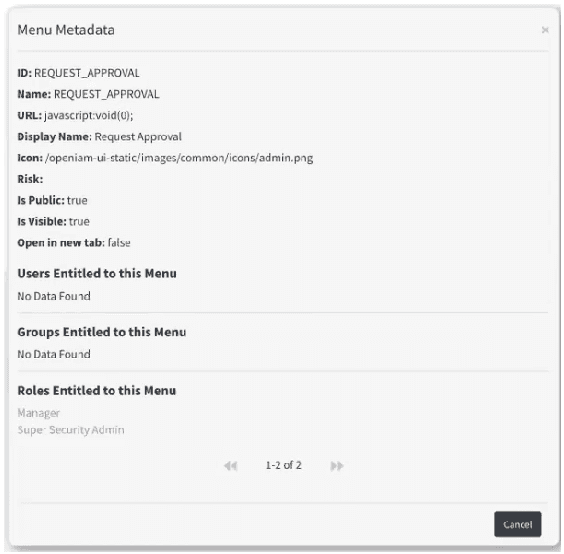
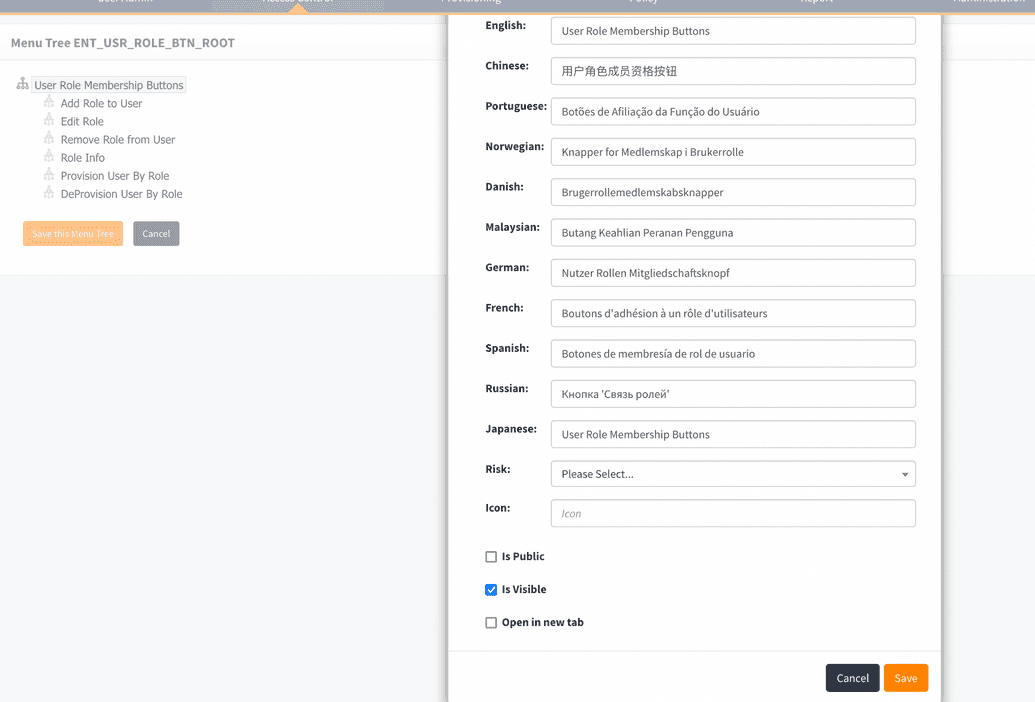
By clicking a branch of menu, you can open the MetaData window, shown below.
Here, you can see that user can be entitled to this menu via Role, via Group or a User can be directly entitled to this menu, being rather exceptional case.
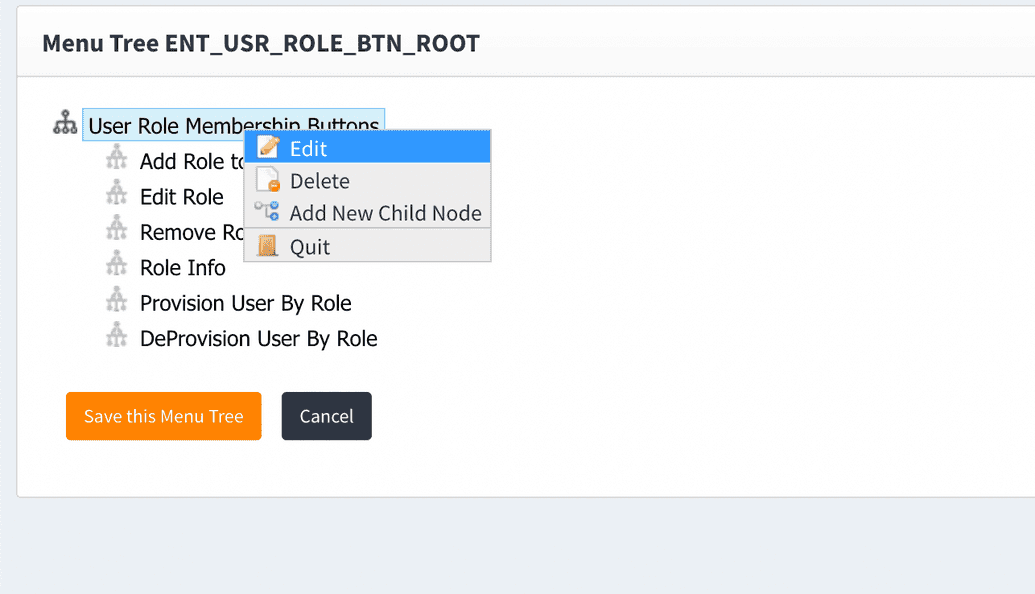
If you would like to edit menu (change label or translation, modify menu properties) please use right click drop down menu.
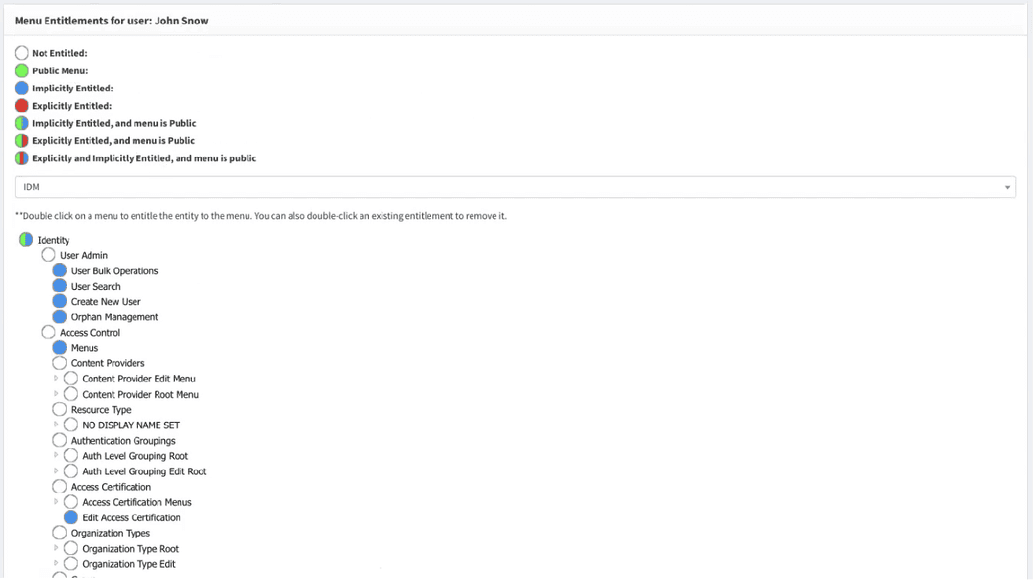
Another option to see the menu tree is via a particular user.
Find a user required and click Menus in the left-hand list. Here, by selecting menu name of interest in the search box, one can see which menus the user is entitled to. Color-coding is aimed at helping to understand user entitlement to this menu. The respective template is shown below.
Same can be done to see entitlements of a specific Role after finding it in the system. Find the required role and click Menus on the left. Find the respective menu in the search box. After opening it you will see the menu tree. Here, by doubleclicking the respective branch one can give an explicit access to this menu branch for this Role members, if needed.
Entitling menus to roles (or groups)
Go to Access control -> role (or group) -> select one -> Menus.
On this page you will find a tree of Menus, select head node of menu tree to see full picture of accesses.
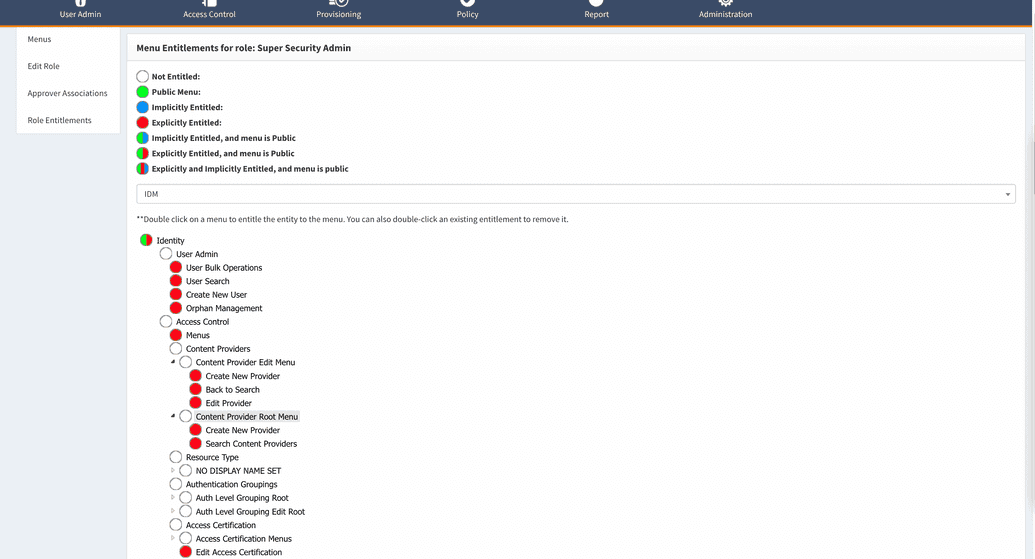 Use double click on node to entitle it to role (or group) and when you finish click save at the bottom.
Special step for Webconsole menus access
Access to menus of Webconsole requires special authorization step, because actions performed in Webconsole and even data shown on Webconsole pages are security sensitive.
To allow members of role (or group) to have access in Webconsole you should link role (or group) with resource of two URI patterns: /webconsole/rest/api/ and /webconsole/
How to do it:
- Webconsole -> Access Control -> Content providers -> choose that content provider where you'd like to provide access to role (or group members).
- in the list of URI patterns find /webconsole/rest/api/* and click pencil icon
- on the top of page find Linked to Resource and click on provided link You will be redirected to page of resource.
- go to page Entitlements and add target role (or group) as a member of the resource
- repeat same steps for URI pattern /webconsole/*
Take in account that authorization service uses cache, and it can take from 5 to 15 min to refresh case, in other word role (or group) will start providing access to Webconsole in mentioned time.
