Create OpenIAM Provider
The OpenIAM API is secured using oAuth and in order to be able to interact with the API, you will need a ClientID and ClientSecet. To obtain these values, you will first need to create a new Authentication provider in OpenIAM.
Create Authentication Provider
To create a new Authentication provider:
- Login to the Webconsole and go to Access Control > Authentication Provider
- Go to
Create New Provider - Select
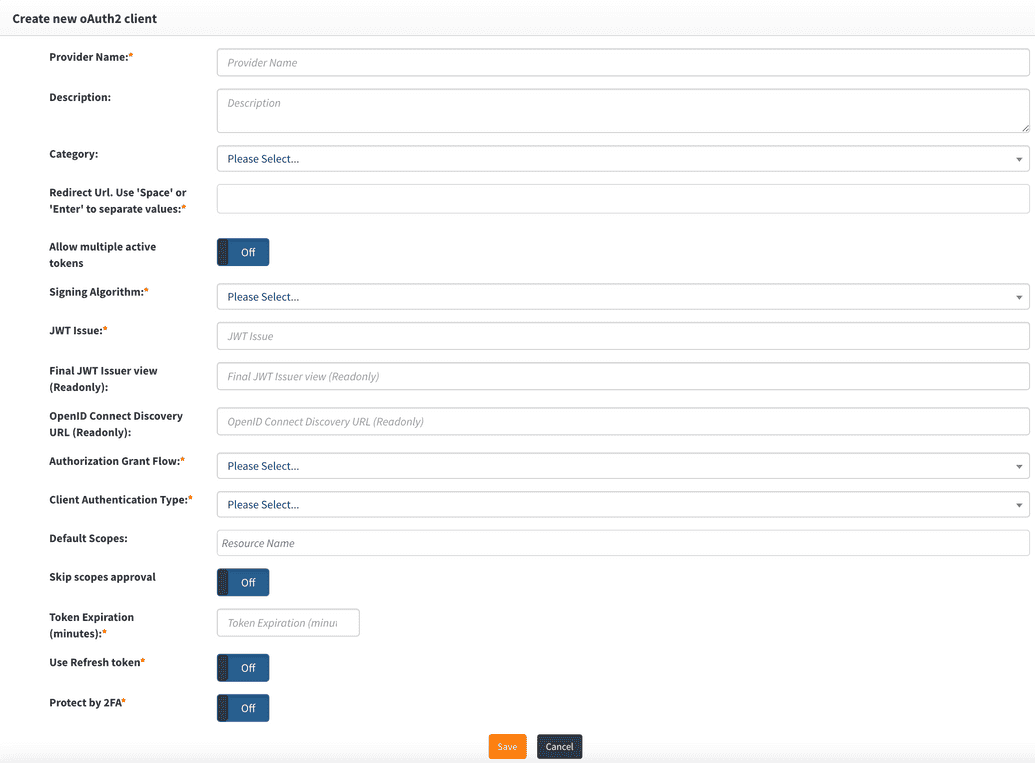
oAuth Clientfrom the "Select a Provider Type" drop down as shown below
Configure oAuth Client Provider
| Field Name | Description |
|---|---|
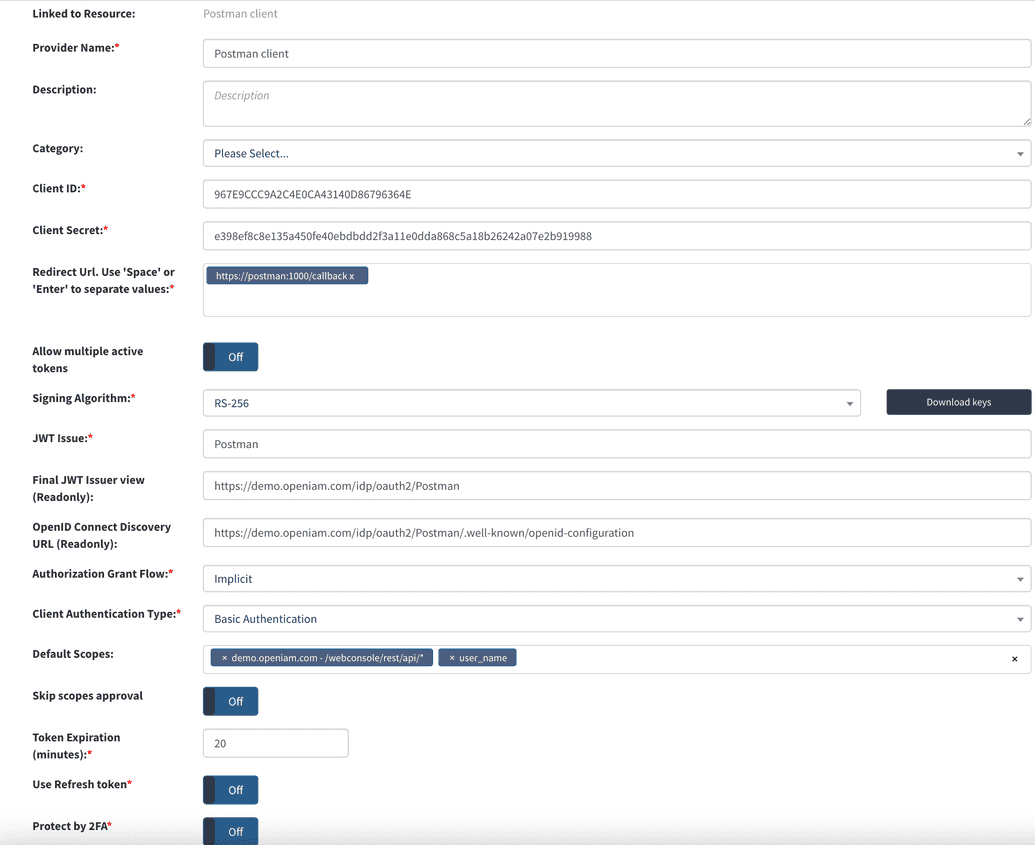
| Provider name | This can be any descriptive name to identify this configuration such as Postman client |
| Redirect URL | Redirect URLs are a critical part of the OAuth flow. After a user successfully authorizes an application, the authorization server will redirect the user back to the application with either an authorization code or access token in the URL. Since the redirect URL can contain sensitive information, it is critical that the service doesn’t redirect the user to an arbitrary location. For integration with Postman, the redirect URL should be: https://postman:1000/callback |
| Allow multiple Active Tokens | Set this value to Off , which is the default. |
| Signing Algorithm | Select the algorithm used to sign tokens issued for your application or API |
| JWT Issuer | This is the JWT Issuer. It identifies the client that will be issued the JWT token. In this case, we can put any descriptive value like Postman client |
| Final JWT Issuer view | This value will be automatically generated upon completing the "JWT Issue" value. |
| OpenID Connect Discovery URL | This value will be automatically generated upon completing the "JWT Issue" value. You can configure your OIDC application using the information found at the URL. |
| Authorization Grant Flow | The grant flow drop down requires the selection of a Grant type. The grant describes how the client application to acquire an access token which can be used to authenticate a request to an API endpoint. Note: the grant type that you select here, must align with the grant flow that you define in Post. Select Implicit from the drop down. |
| Client Authentication Type | Select Basic Authentication. |
| Default Scopes | Scopes in OAuth 2.0 provide a way to limit the amount of access that is granted to an access token. For setting up Postman, enter the following: CONTENT_PROVIDER_NAME - /webconsole/rest/api/* and user_name |
| Skip scope approval | Set this to Off |
| Token expiration | Access token expires after the specified minutes of being idle. You can set this value to 30 minutes. |
| Use refresh token | Refresh tokens carry the information necessary to get a new access token. Whenever an access token is required to access a specific resource, a client may use a refresh token to get a new access token issued by the authentication server. For our Postman client this value should be set to Off. |
| Protect by 2FA | Set this value to Off unless you are want to use 2FA during the authentication process. |
The example represents a value Authentication provider configuration for use with Postman.
Upon saving the configuration, the system will generate the clientid and clientsecret which will be used by your oAuth Client, Postman.


