External/Multiselect authentication
External or multiselect authentication offers an added layer of protection by allowing users to choose from multiple authentication methods, improving both security and user experience. This document will walk you through the step-by-step process of configuring external/multiselect authentication.
Create new authentication level grouping (external authentication type)
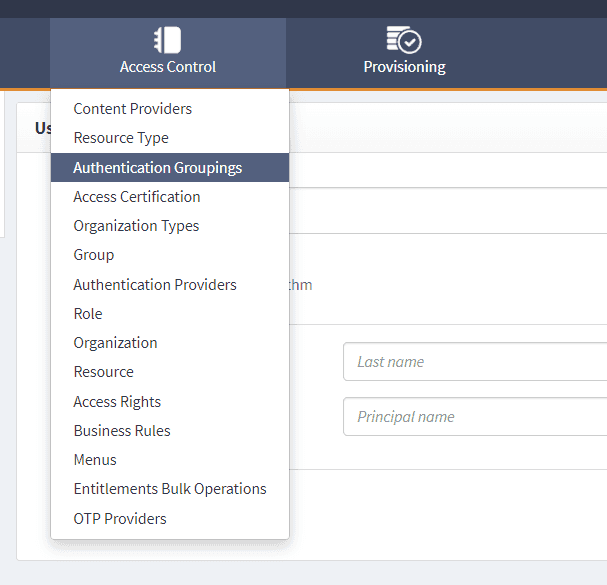
- Go to webconsole > Access control > Authentication groupings > Create new grouping.
- Select a new name to authentication level grouping with External authentication.
Additionally, you can select an authentication provider. It will provide the logo for the authentication grouping. Icon image property from authentication provider will be used to provide the icon for authentication level grouping.
- Once the auth level grouping is created add the attribute for authentication level grouping by
clicking on the
+icon.
Provide the name for attribute with Redirect type as type and a URL as value for the attribute. This URL will be used as the redirect link upon selecting the newly created authentication grouping.
Additionally, a groovy script can be provided instead of string value. This groovy script implementation is to handle specific use-case. Example groovy script can be found at /AM/TestAbstractRedirectURLGroovyProcessor.groovy.
Add authentication level grouping to authentication rule
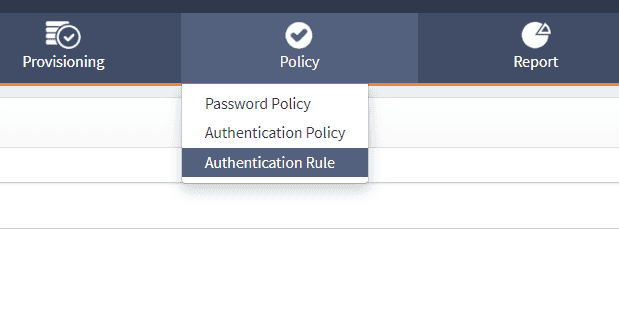
- Go to webconsole > Policy > Authentication rule > Create/edit authentication rule.
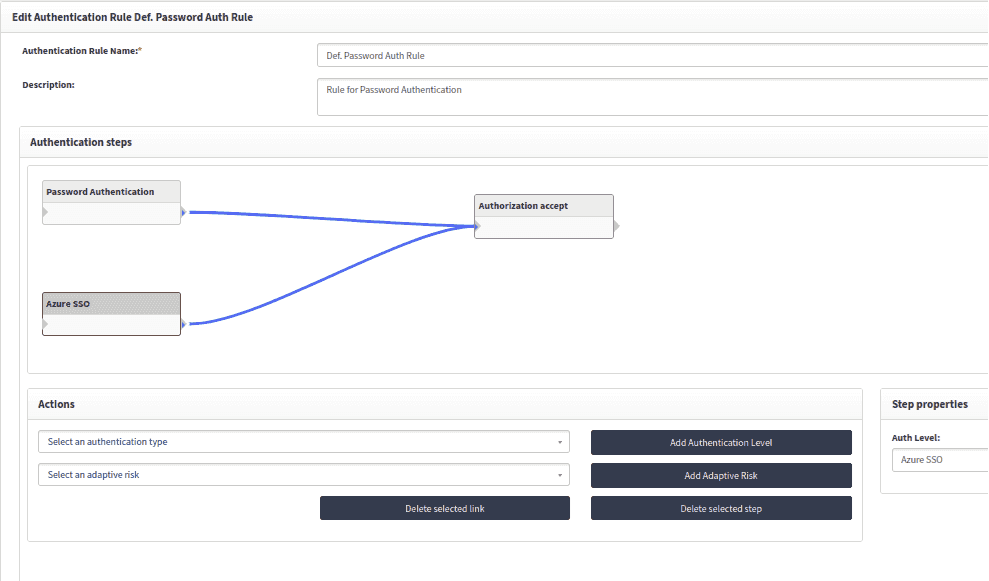
- While creating or editing the authentication rule add the newly created auth level grouping as authentication level.
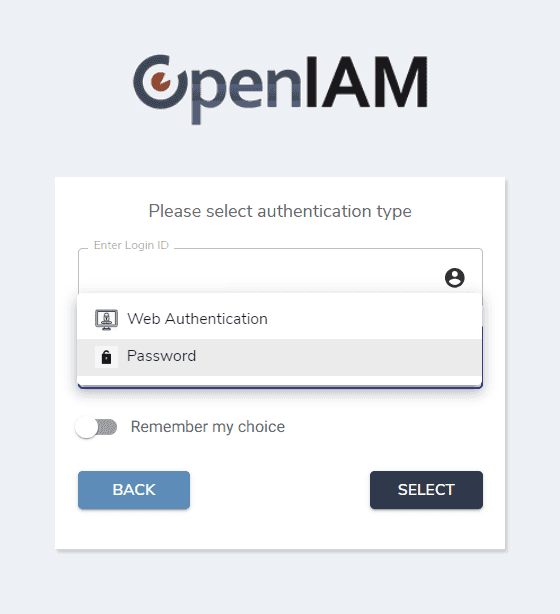
Once the authentication level is applied to the authentication rule, the user needs to select the desired authentication type out of available authentication options on the login screen. Users can select the Remember my choice option to auto select the option for next logins.


